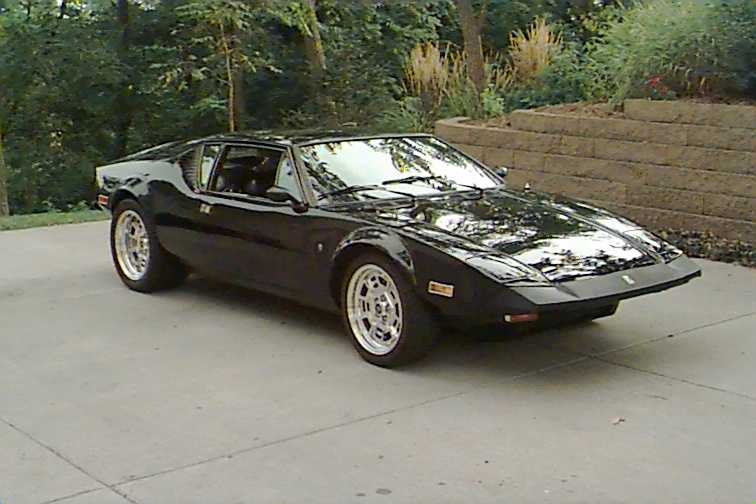
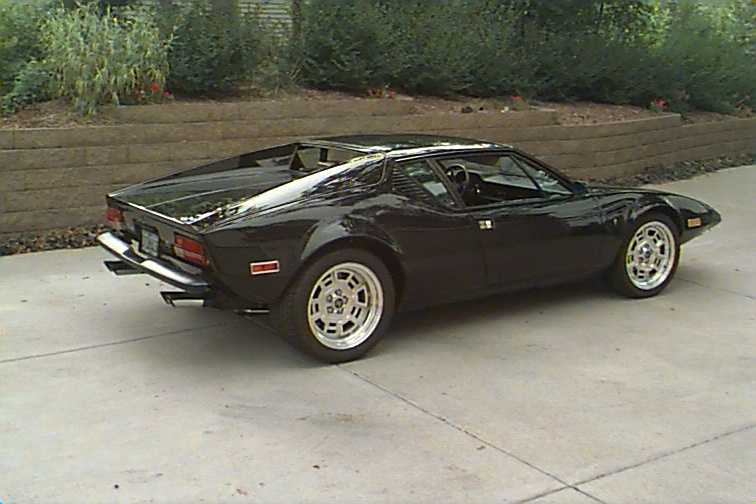
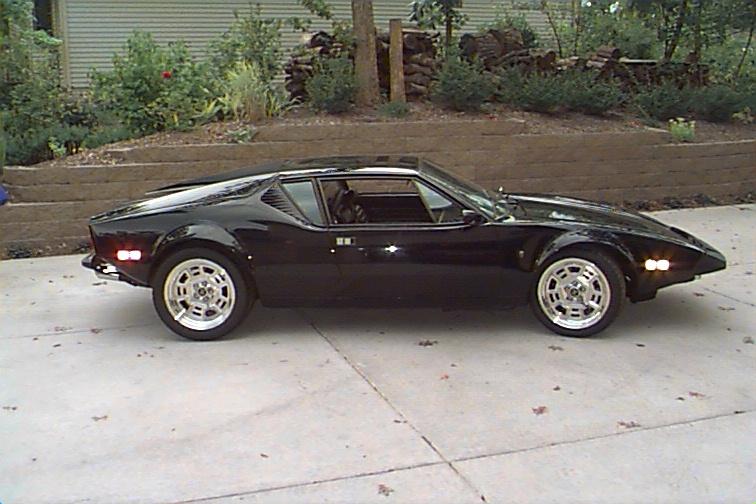
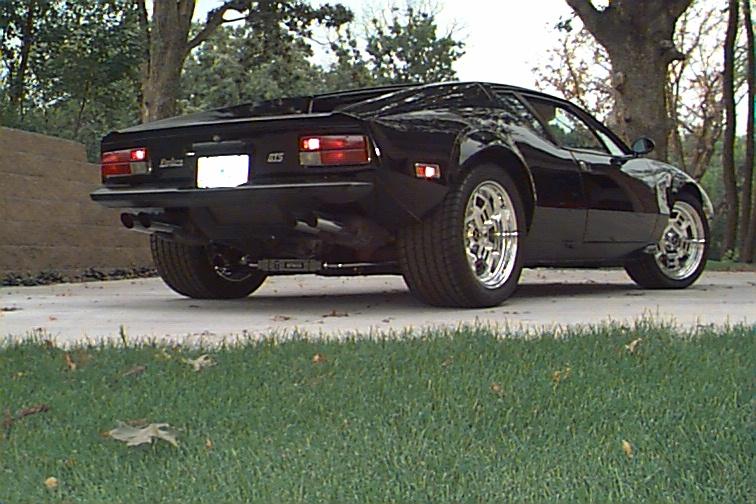
I bought my Pantera about two years ago. Since I travel a bit for work, I’d had the opportunity to look at several cars in various locations in the country. I had just committed to drive a couple hours to look at two Panteras in Southern Wisconsin, when, the Saturday morning before I left, the car I eventually purchased showed up in the classified section of my local newspaper. A Pantera for sale in the collector car section of the paper is a rare event in Iowa. So I took the paper with me and called the guy from the road. As it turned out, the car was directly on my way home and only an hour from where I lived. The two cars I saw in Wisconsin were OK but a little rougher than I was looking for so I thought I’d take a look at the car in the classified section on my way home. It turned out to be a 74 GTS registering 15k miles. It had ten-inch Campys, worn out P7s, GTS exhaust, an Edelbrock dual plane intake, a 650 Holley, and a solid black paint job. After driving it, I flipped my brother the keys to my car, bought the GTS, and drove it home. It was a pretty solid car.
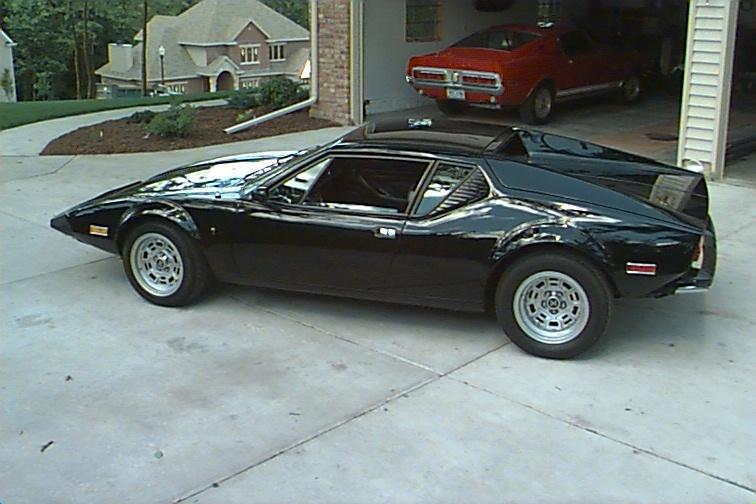
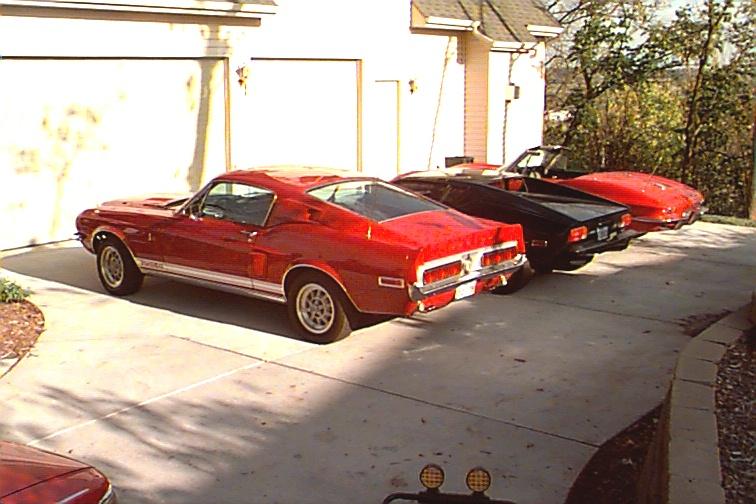
For a short while, it was nearly nirvana, hoarding three sweet cars. Then I was awaken from my dream by a woman (and two kids, fido, and a mortgage), who was demanding one of my garage stalls for her SUV. I was groggy. Who was this woman and why were these children calling me daddy? I made a feeble effort to hold out, remarking, "If parking outside was the worst hardship she ever had to endure, she was doing all right". Needless to say, she was less than impressed with my point of view. Resistance was futile. So, in a magnanimous gesture of goodwill, and in the never-ending pursuit of full-blown domestication and marital bliss, the Shelby departed. Gonna miss that 428CJ, but the new owner has agreed to weekend visitations. Alas, she had her (my) precious garage stall, but I had a plan for some of the proceeds of the sale. Read on.

The GTS was a nice car but hadn’t yet realized its full potential. After a little more education from the Pantera internet community, I concluded that the low compression Cleveland was causing me to miss out on a lot of what the car had to offer. So I decided copious increases in torque and horsepower were in order. My priorities for the project went something like this: If ya wanna’ go fast, you’d better be able to keep it stuck to the road and brake harder than you can accelerate (words to live by-keeps you out of the ditches). You also don’t want to break in course of doing so (that staying alive/ditch thing again). Let’s face it, working on cars is fun but driving them is more fun.
At this time I have to pause to give the folks at Pantera Performance a little plug. They have been great people to work with. Thanks Dennis, Rai, and crew. So here come the suspension, brake, and drive-train upgrades.
If you’re like me, I always start my projects with the best intentions and before I know it, they’ve grown into major productions. I also need to caution anyone prone to obsessive/compulsive behavior to stop reading less you lapse into an episode of your own.
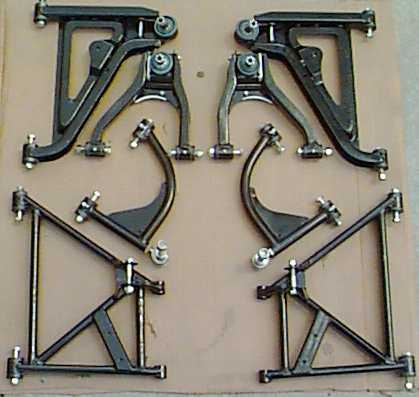
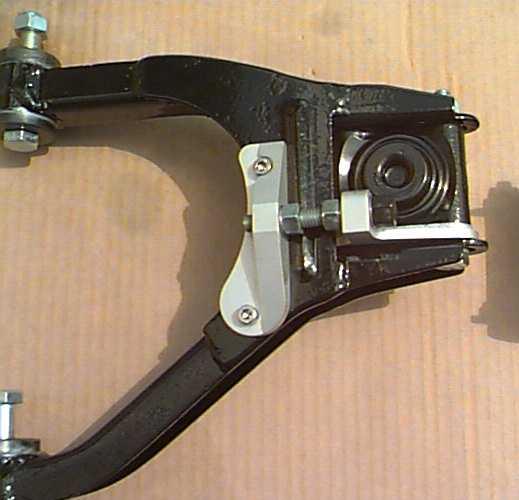
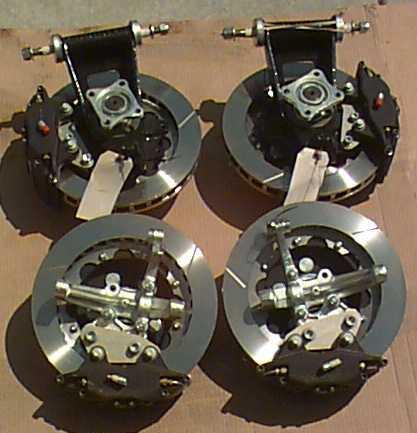
For brakes, Wilwood Super Lights with the biggest vented rotors I could get. When I discovered the poor availability of speed rated wide rubber for 15" Wheels, 17" billet Campys adorned with Michelin MXX3s became part of my project (and the rotors got bigger). Digging a little deeper, I learned of bump steer and camber lock kits. The car was fairly clean but if you have the uprights pulled off, you have to go ahead and rebuild the control arms, don’t-ya? So the control arms get PPC’s treatment, welding, powder coating, greaseable urethane bushings, and a little plating here and there on the steering arms. I would have enjoyed doing this myself, but the driving season in Iowa is too short and recreational time is precious. Plus, the PPC crew do nice work.

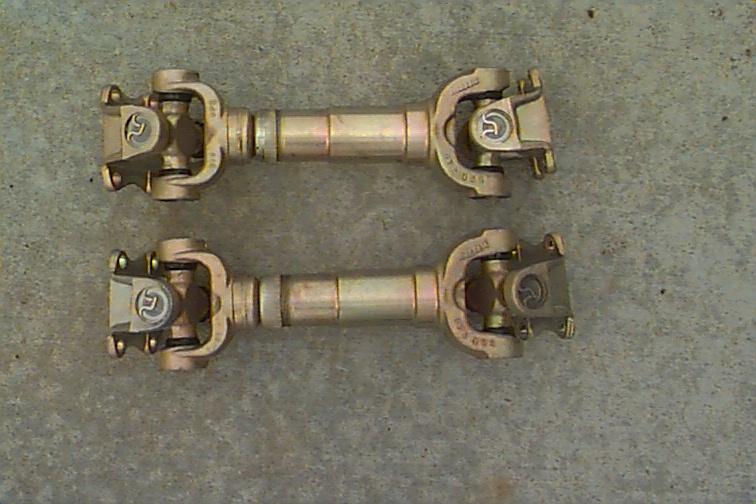
Using the same rationale for restoring and upgrading the suspension, if you’re planning engine upgrades, and you have this really wide, soft rubber, you need to harden up the drive train while you have the suspension off. Right? So forged rear axles, tapered roller conversion, Spicer half shafts, and greaseable lower support shafts for the rear uprights are suitable remedies.
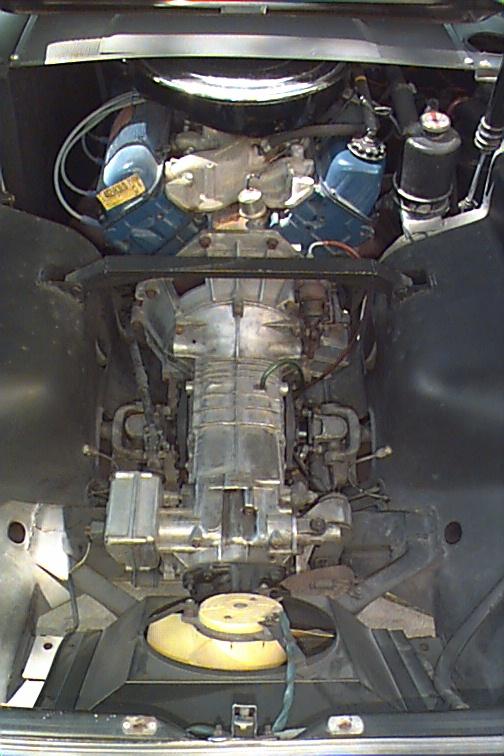
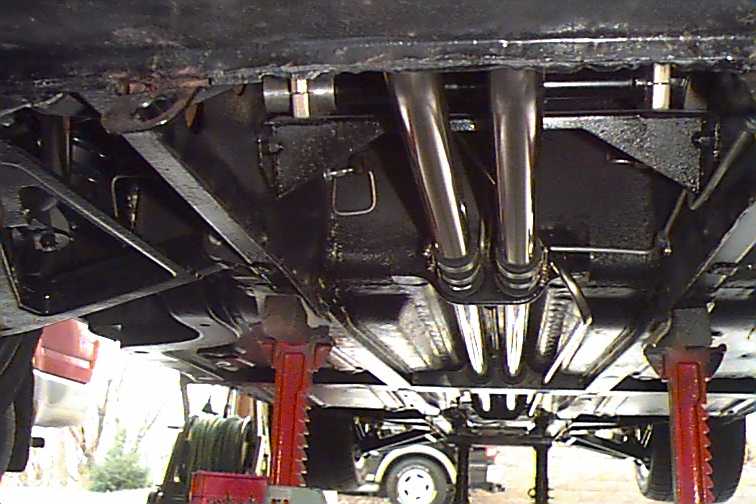
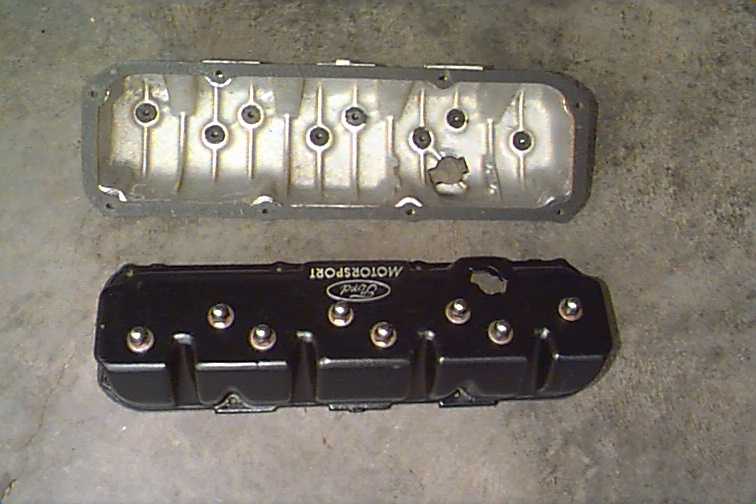
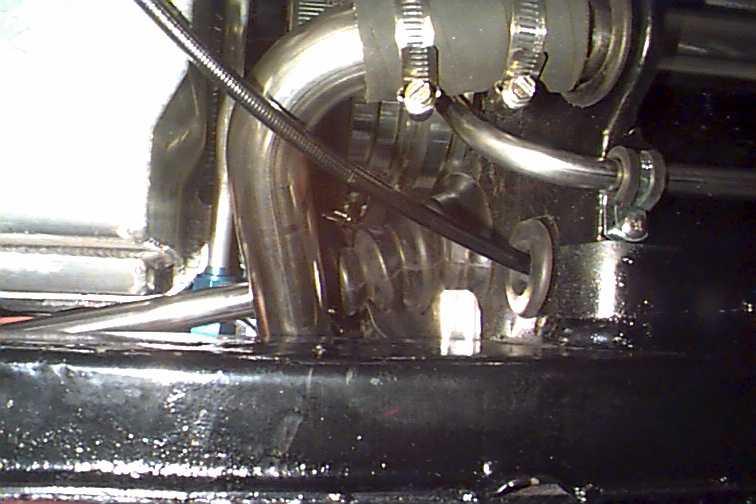
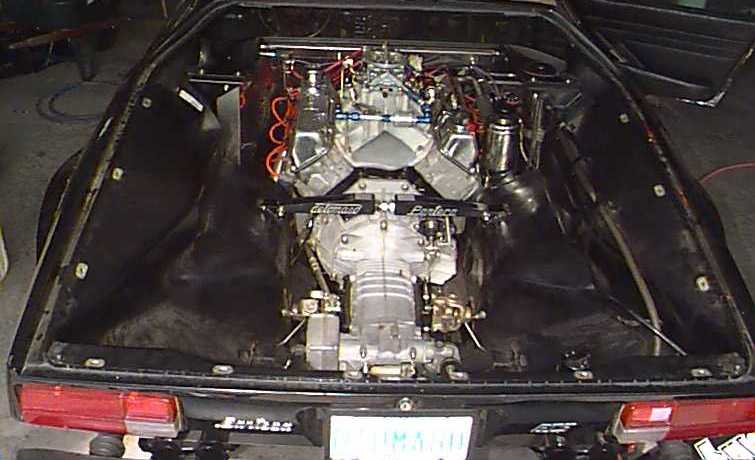
Likewise, if you have this nice wide, low profile rubber, you need to keep the rubber on the pavement a high percentage of the time to really appreciate it. So introduce aluminum bodied adjustable Konis with 550 lb/in springs on back and 450 lb/in up front, 1" sway bars, and may as well add some of those pretty billet caps around those new urethane sway bar bushings and one of those pretty wheelhouse bars. How’d those DeTomaso valve covers get in there? By the way, had to paint the wheel wells while they were empty.
![]()
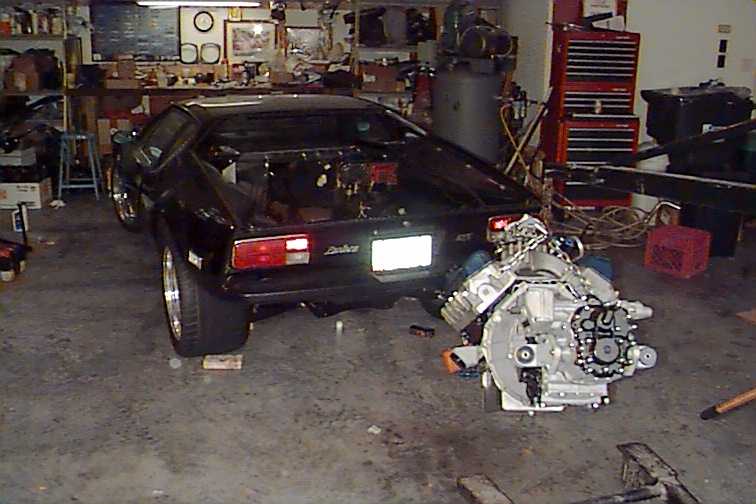
So I’m done right? Nope. But I am out of money. So it’s put the car back together while there’s still some driving season left, even though that wimpy smog engine is still lodged in the engine compartment. I’ve gotta tell ya, that wide, low profile rubber, wheels, and suspension upgrades made a huge difference in handling, braking, and overall ability to feel the road.
So the end of my first whole driving season with the car is over now, I’ve made some progress with the car, the snow is flying in Iowa, and the bank account has recovered (well sort of). Now it’s time to do something about that engine. I’m thinking Fontana block, Yates heads, billet crank, and PPC’s independent runner fuel injection. However, my wife is thinking I need therapy, counseling, and perhaps medication. Oh well, they sure were nice thoughts, but what’s plan B? In the nick of time, an incredible stroke of luck occurs. A once in a lifetime deal (no kidding) on a set of A3 heads finds me. Titanium intakes, stainless steel exhaust, 145 lbs of seat pressure with springs good to stratospheric altitudes.…there is a God in heaven.
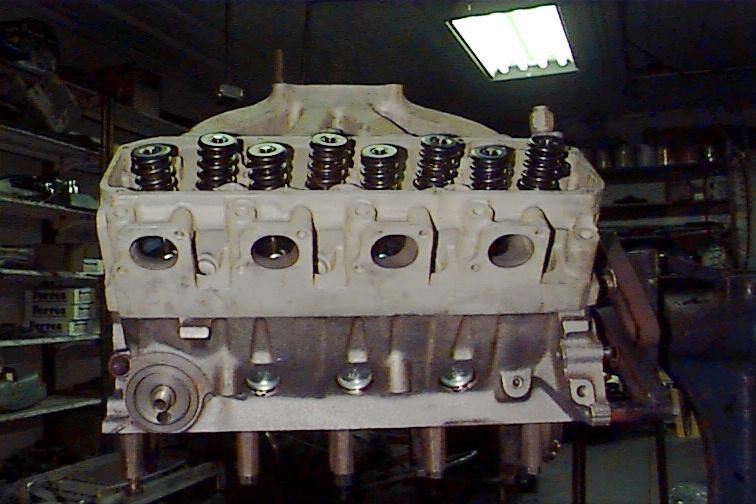
Uh-oh. How do I come up with a short-block worthy of that top end? If the power isn’t coming from high RPMs and fuel injection, I figure, ya-gotta go stroker. Ah-hah! Let’s go .030" over on a Windsor block, stroke a 400 crank to 4.100", add some eagle h-beam rods, forged flat tops, and for crying out loud, girdle that two bolt main.
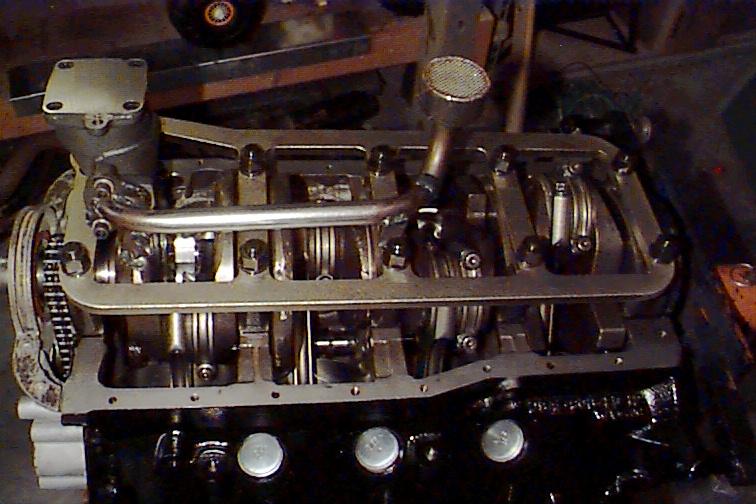
Keeping in my mind that I don’t want to build a grenade, I try to use a little restraint on the cam, go hydraulic roller, roller rockers, a C351 Ford Motorsports intake (a rare item), an HP series 750 Holley e-bay special, and God help me, a ten-quart aluminum pan from PPC.
There. I feel better now. However, it’s March and the new engine still isn’t in the car. Why? Because I’m so anal I have to detail the engine compartment while the engine is out.
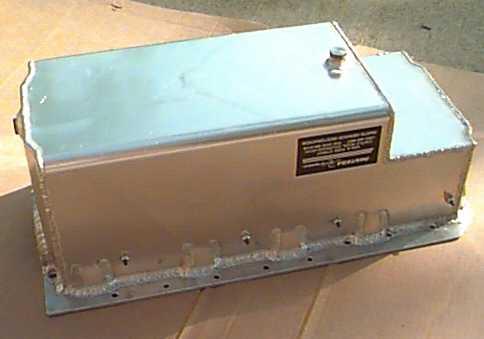
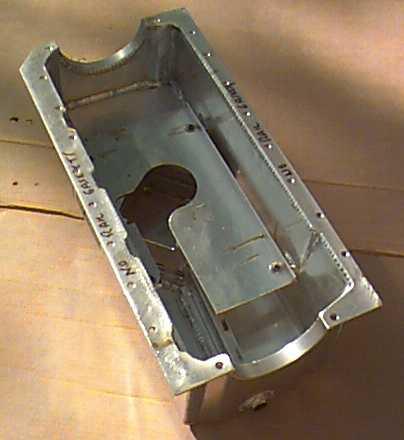
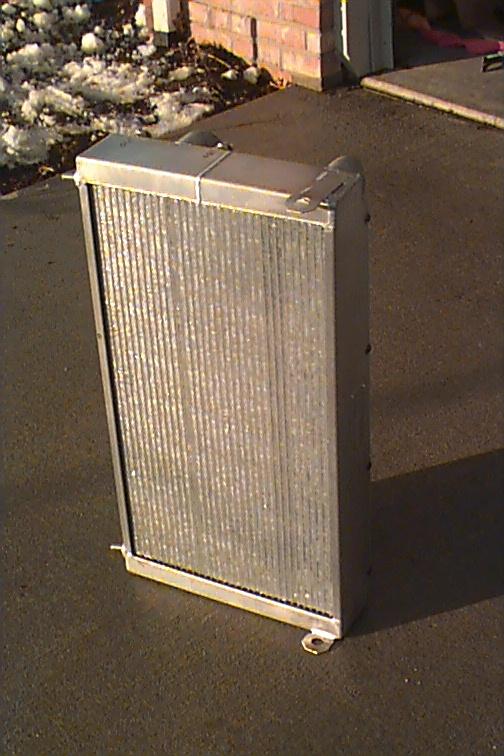
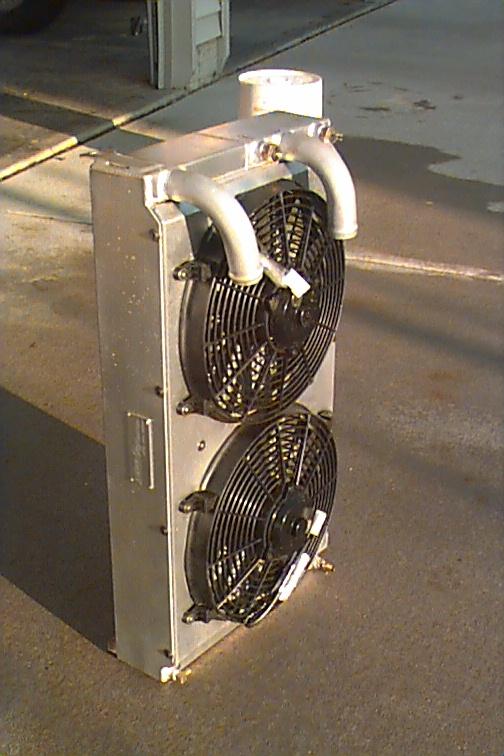
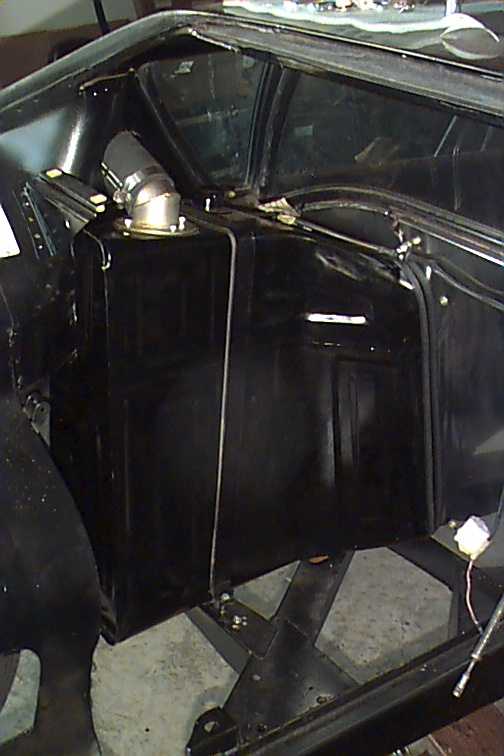
So out comes the gas tank (a clean tank is a happy tank), replace the old jute on the firewall, make my own stainless steel coolant tubes, run stainless brake lines, and after all this, you can’t take any chances with being able to cool those 418 cubic inches, ... can you? Uh-uh, yep, you got it, aluminum lay down radiator, and while I was under the car I figured I’d yank the steering rack and rebuild it.
Well, this is pretty much where I’m at with project far. Did I mention that I got a brand new set of AC hoses and Sanden rotary compressor in a grab bag of parts I bought last year from an acquaintance? May as well put them in too. My car has what I presume is the factory undercoating. It is very lightly applied and thankfully there is none applied in the engine bay at all. I made the mistake of making a few strokes with a putty knife on the underside of the car. Uh-oh, paint the underside of the car?
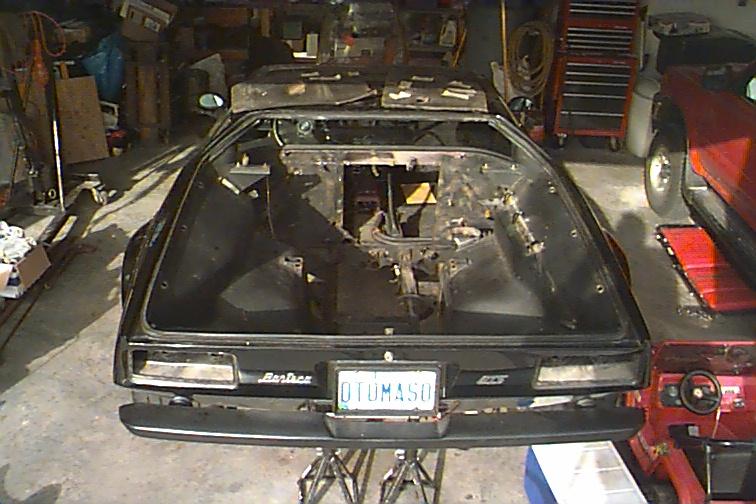
My neighbors stop by, stare at the empty engine compartment, and compliment my progress. Support is always appreciated, but I’m thinking to myself, anyone can take a car apart. Stop back when it’s back together.
November 4, 2001
Well, the Pantera is progressing. A few hours at a time, things are taking shape but the driving season is slowly slipping away. Alas, having been through most everything that can be rebuilt or restored, I think I’m closing in on it.
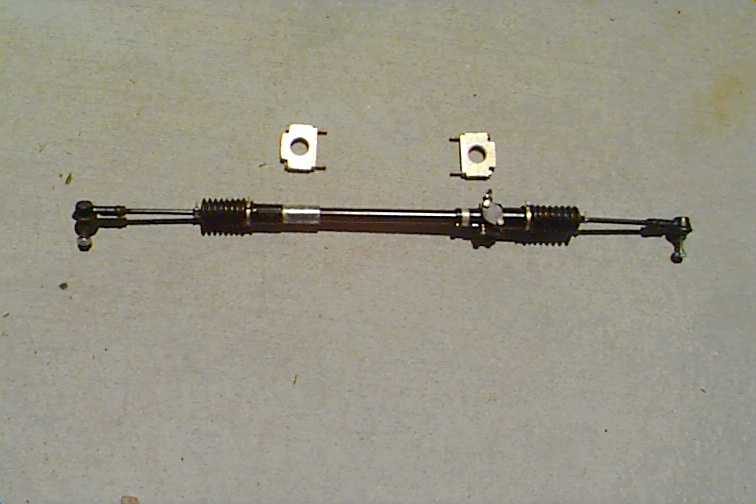
I did the ubiquitous steering rack rebuild. Everyone knows this routine, and it’s well documented elsewhere at this site, but here’s my result.
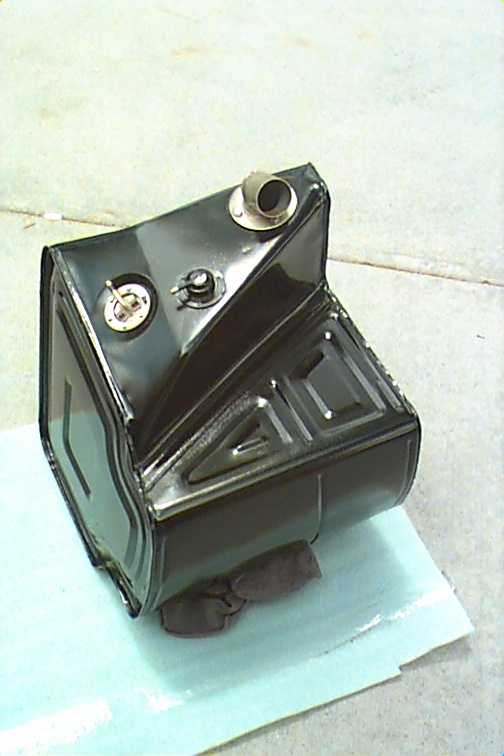
I finished up the gas tank job. I was encouraged by several vendors to seal the inside of the tank while I had it out. However, when I looked inside the tank it was perfect- not a spec of rust, so I just couldn’t bring myself to do it. Onward! Sand blast the exterior, some good primer, enamel, a little plating on the neck, new hardware, and install.
When we left off last, I was contemplating scraping off the undercoat, and painting the underside and engine compartment. Well I did. It was the least enjoyable part of the project so far though the result is rather satisfying. There was a hint of rust under the goop and some pitting, but it was very minor. I treated what little there was, sanded a little, sealed, and shot it. I also filled the spot welds in the engine bay while I was at it. Prior to all of this I installed a removable cross member so the oil pan can be removed without pulling the engine. I also removed the parking brake bracket and installed one piece coolant tubes.
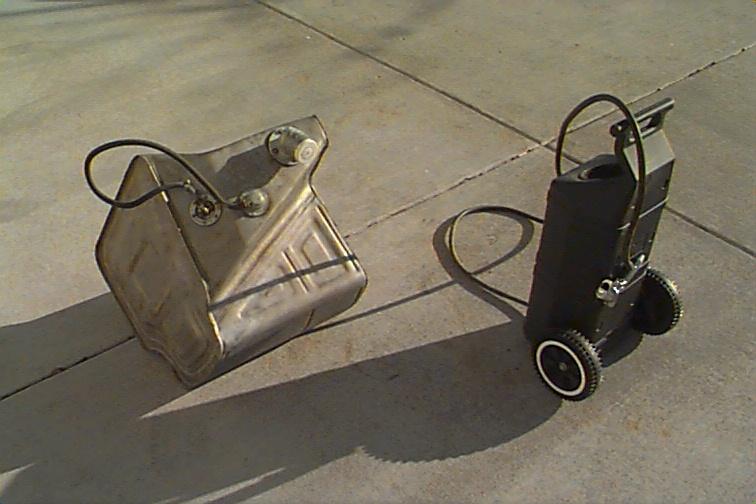
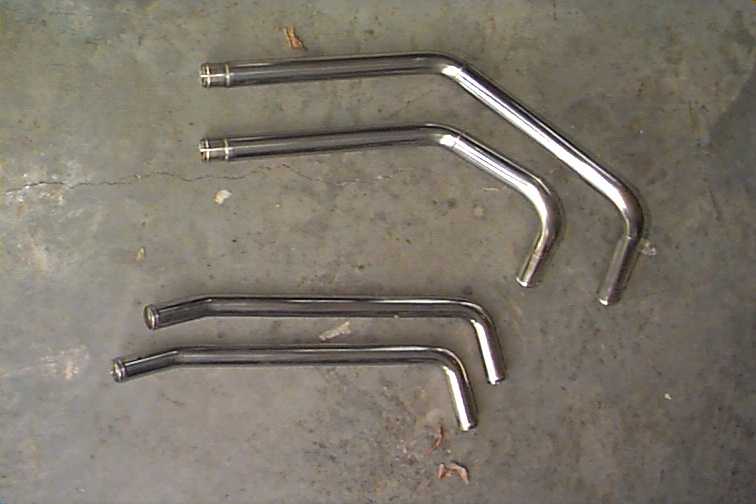
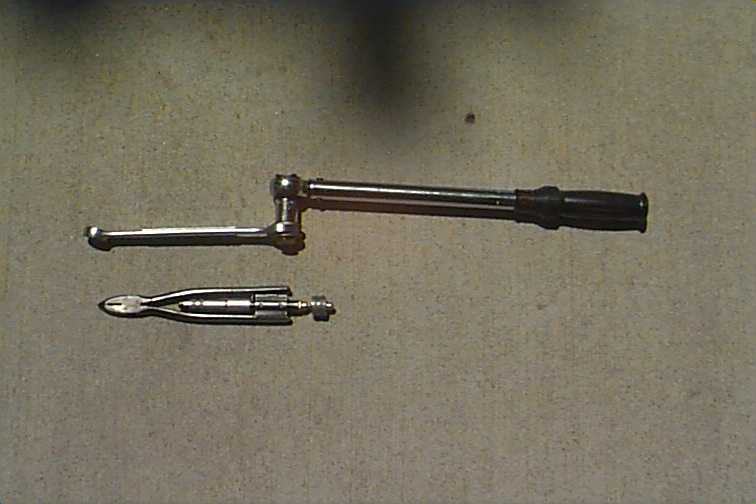
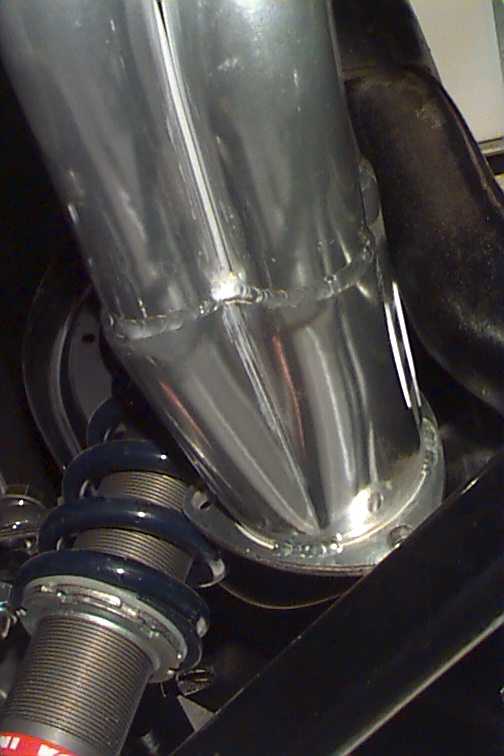
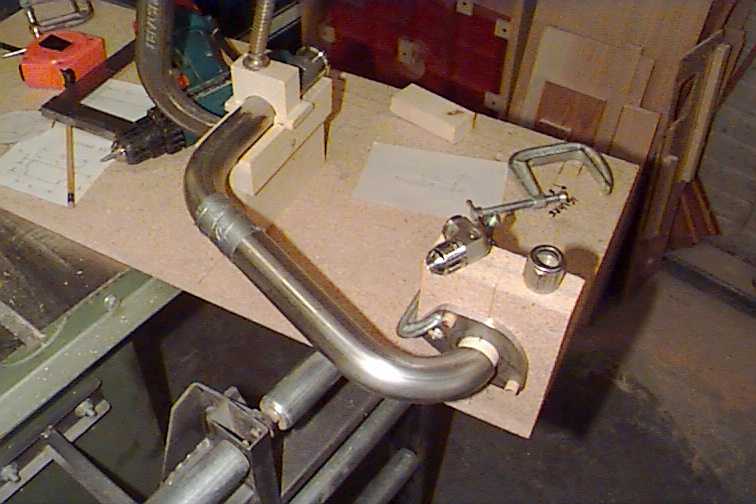
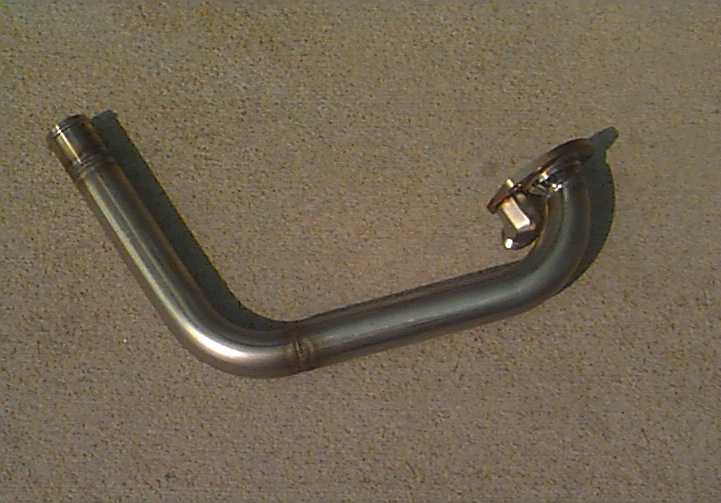
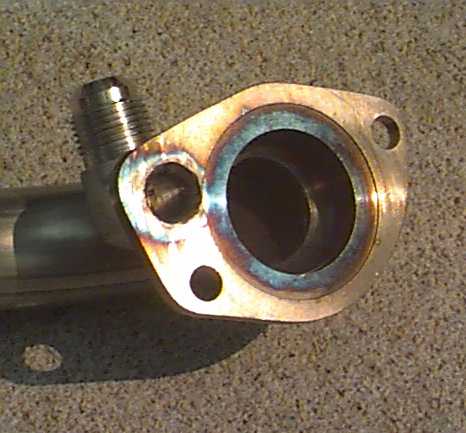
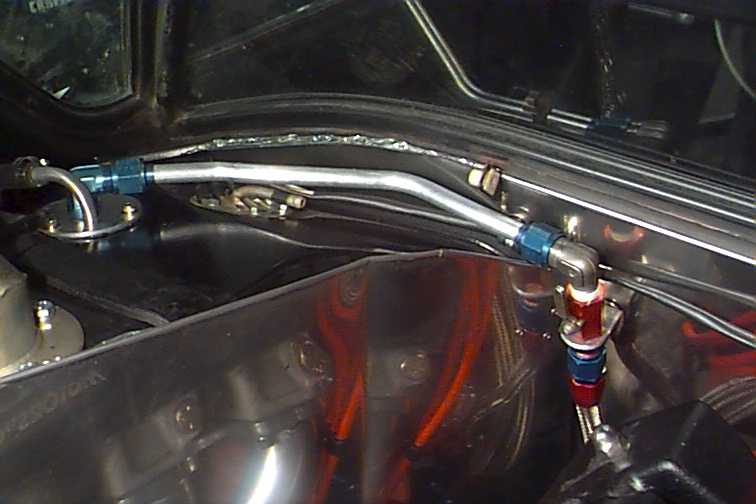
The PPC radiator has nice mandrel bent elbows welded onto it, but they are in different locations than stock and are also 1½" in diameter instead of 13/8" like the rest of the plumbing. To keep things cleanly routed and connected with short straight sections of hose, I fabbed up some custom front coolant tubes. There shown next to the stock tubes in the picture below. I bought some 1½" mandrel bent tubes available from several custom header shops online. I found some roll formed nipples in 1½" and 13/8", made crude wooden weld fixtures, and called in some favors from an acquaintance to do some tigging (not my strong suit). I could have stretched some 13/8" hose onto the 1 ½" radiator elbows but it looked so tight I figured it was asking to blow a hose. I routed the coolant tubes a little differently than the stock routing and am also going to make a support bracket so the weight of the assemblies isn’t just hanging on the radiator elbows. I think it’s a pretty sanitary set up.
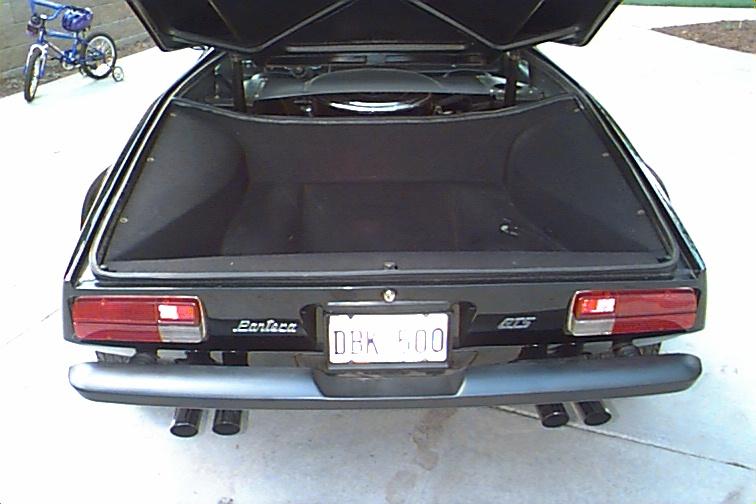
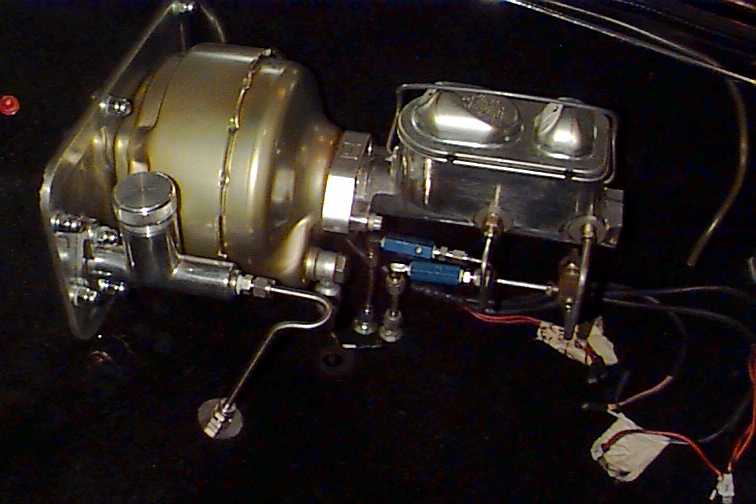
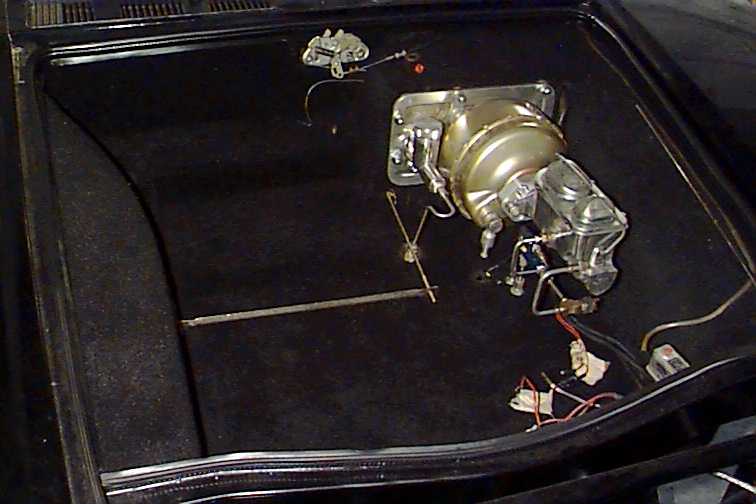
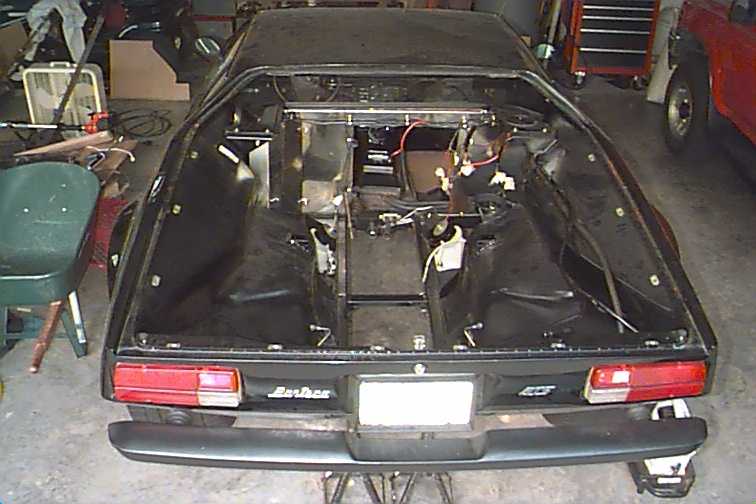
I decided to clean up the trunk and detail it a little. I’ve never cared much for the stock routing of brake lines through the trunk area nor thought a whole lot of the stock proportioning and shuttle valve set up. With the addition of the new master cylinder and residual valves, it looked to me like it would be cleaner to immediately bulkhead through the trunk and route the lines underneath where it was out of sight and protected. Since I had everything apart, I got caught up in one of my episodes and ended up stripping the trunk bare and installed a new liner. Instead of carpet, I called the PPC folks. They offer a nice material. I’m not really sure how to describe it, but it’s sort of a super heavy weight spun acrylic felt. The nice thing about it is it stretches and conforms nicely to the trunk contours. I was able to install it in one piece with minimal cutting and fitting. I polished up the brake bracket, both master cylinders, and painted the stock booster. Removing and reinstalling the brake/clutch bracket is a lot of work in tight spaces.
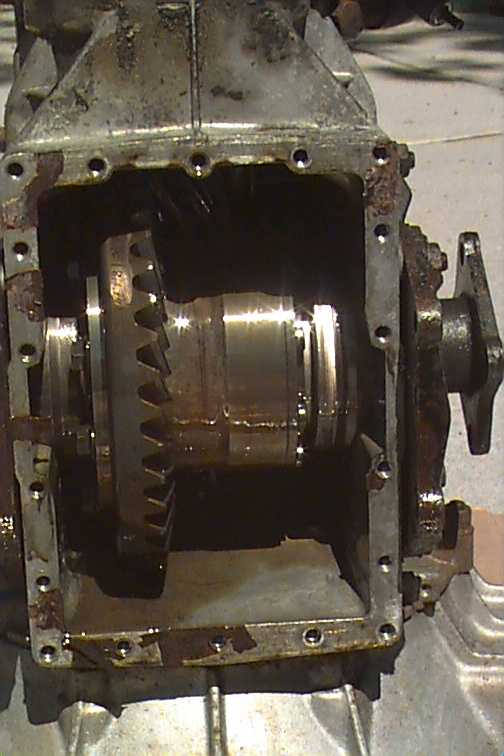
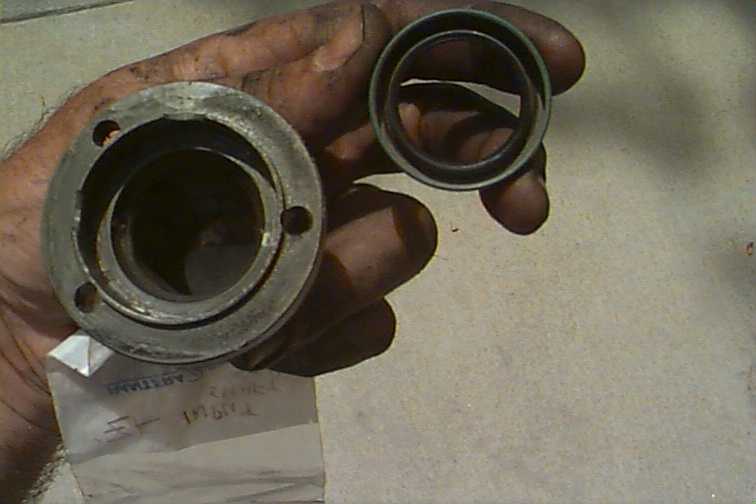
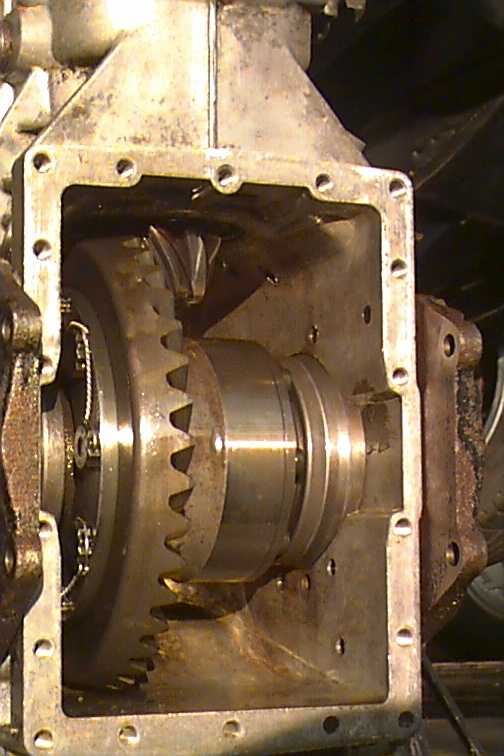
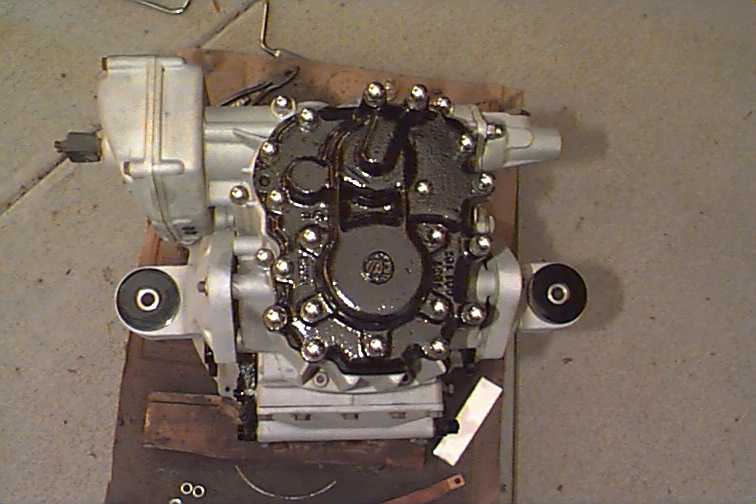
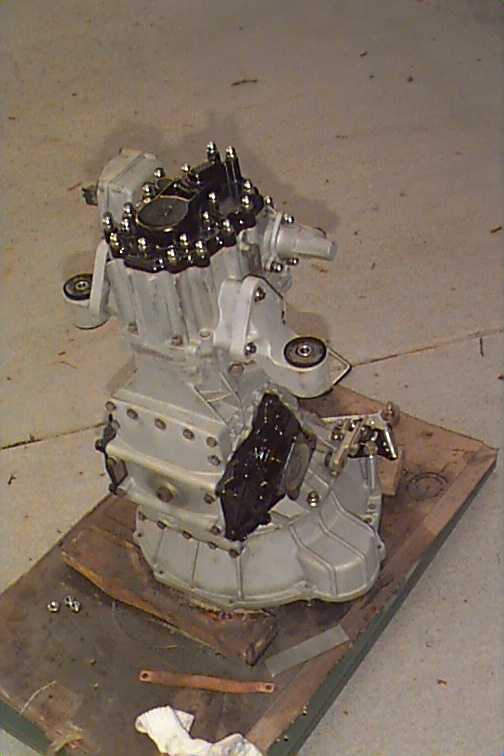
While it was out of the car, I spent some quality time with my ZF. It needed to be safety wired and I figured I’d replace the input shaft seal as well. When I got the lower cover off, I must say I was relieved to see what every Pantera owner wants to see; a pristine looking ring and pinion, no debris of any kind, and nice clean lube. Digging the old seal out of the old carrier was no treat. You just have to dig it out of there since there are no holes provided to tap it out. Safety wiring in the ZF is a bit of a challenge as well. There’s no room to get a torque wrench in there, and since I bought the 19mm twelve point ARP bolts, I couldn’t use a crow’s foot. Snap-on makes a box end extension but not larger than 17mm. As it turns out, 19mm is within .002" of ¾", but the they only offer up to 11/16 in standard. Soooo…., I used a box wrench as shown, recalculated the torque, practiced a little on a nut and bolt held in my vice to convince myself that I could repeatedly produce 70 ft-lbs, then had at it one bolt at a time. Even with safety wire pliers, it’s still tight space to operate in.

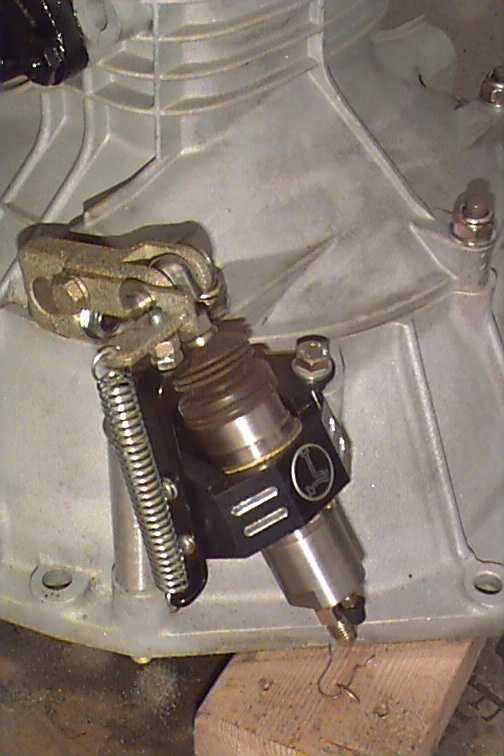
My ZF has always shifted and behaved nicely, so the rest of the job was merely cosmetic. I buttoned everything up, removed the speedo adapter, put rubber caps on everything, and packed the area around the axle seals with small diameter plastic tubing to make sure that the sand stayed on the outside. After about 100 lbs. of silica sand it was clean as a whistle. I did some masking, a little black paint, and then some details. Ya-know. Stainless acorn nuts, stainless long throw slave cylinder, and a billet slave cylinder mount.
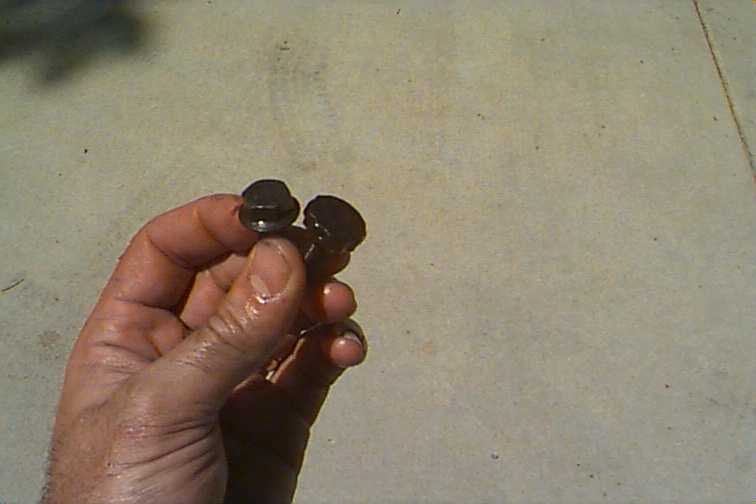
I had to fab a new clevis pin since the old one had developed a case of the crud. So a short trip to the lathe with a little hunk of stainless, add a couple of stainless washers and snap rings, and problem solved.

I was also pleased to see the stock ground strap was solid copper. Just bead blast and it looks new. While the car was bare, I did take the opportunity to run new brake lines. I was gagging on the cost of stainless lines so they’re just plated steel. I added a set of stainless coolant bottles and billet caps to go along with the stainless coolant tubes.
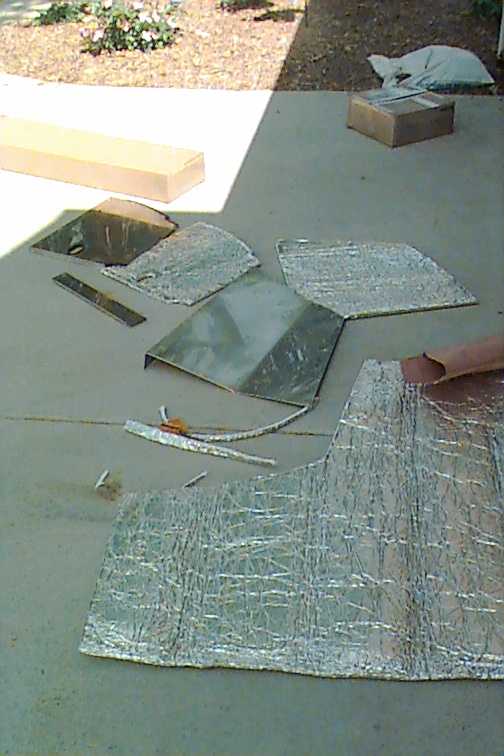
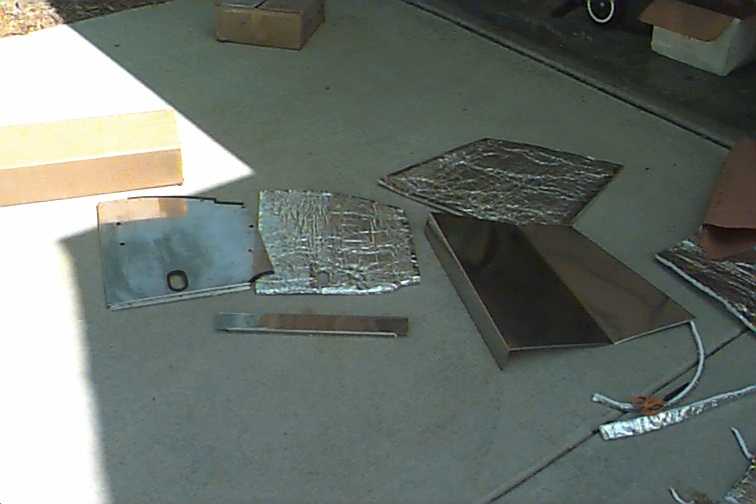
I made the mistake of standing a little too close the shear and brake at work one day, and before I could stop myself, I had bought some stainless sheet, made some patterns, and was bending up a stainless fire wall and tank shield. I installed some new foil backed jute and I must say, it looks to be well worth it. It should wear very well in the engine compartment and hopefully suppress a little more sound.
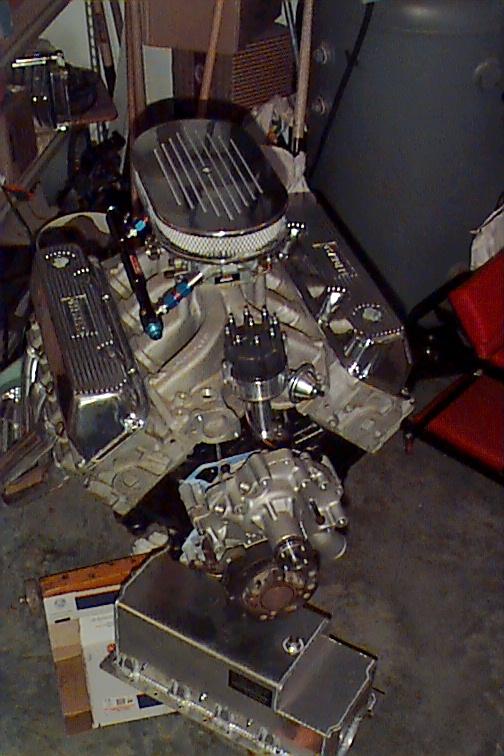
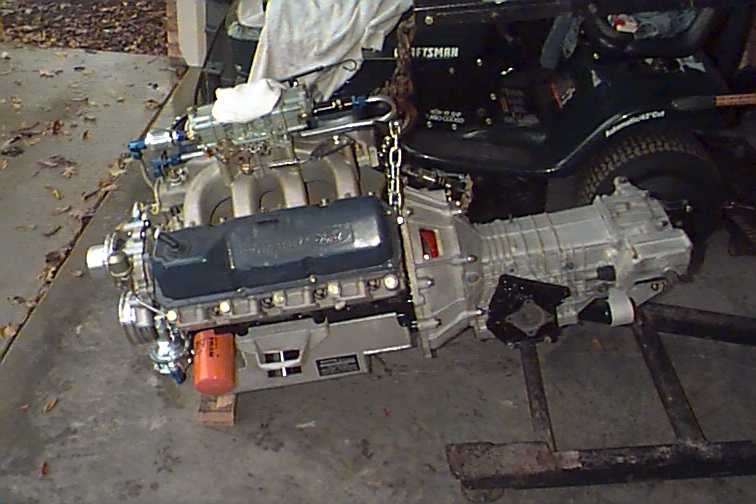
At long last, I’m buttoning up the engine with the final touches. I had a set of those stud girdle rocker covers. They draw a lot of comments and add that retro-nostalgic component to the job. I think they look cool but are a pain to use as girdles. I’m going to use a set of spacers and run this nice set of Angus Racing/Jo-Mar girdles.

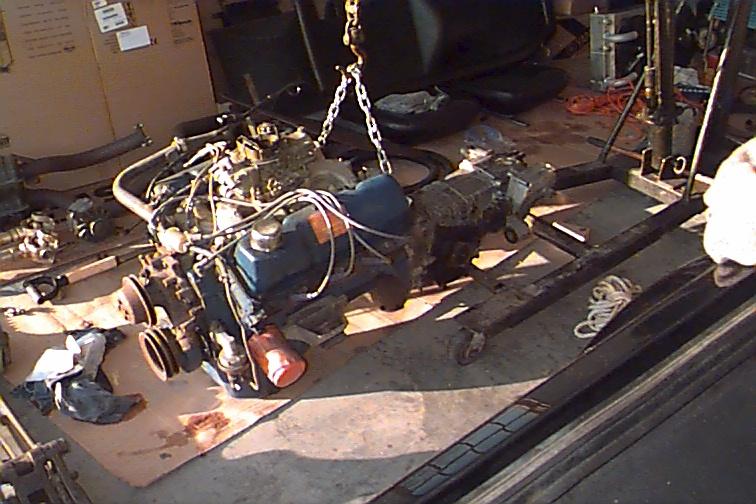
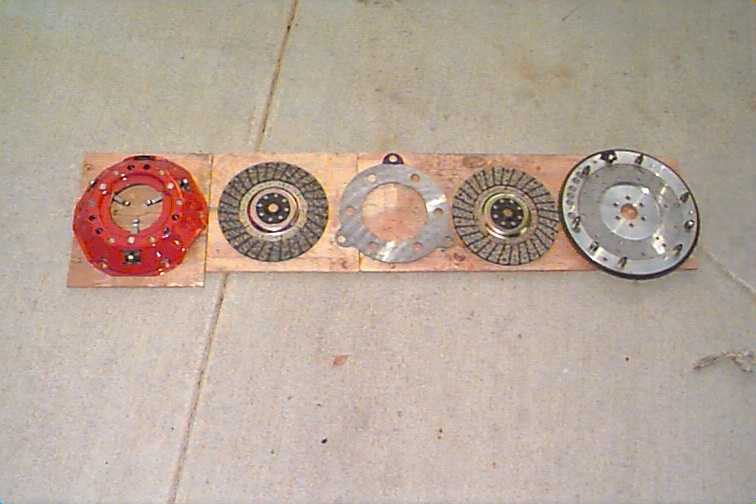
Anyway, on goes this niiiiccccce dual disc clutch from PPC, the ZF, and back into the car it goes. Sliding the engine and ZF back in came off pretty much without a hitch. I’ll have to reroute some of my fuel line plumbing. It felt good to have the power plant back in the car.


I held off on fabricating the AC and alternator bracket until I got the engine situated in the car. I didn’t want to put a lot of work into it and have an interference problem at installation time.
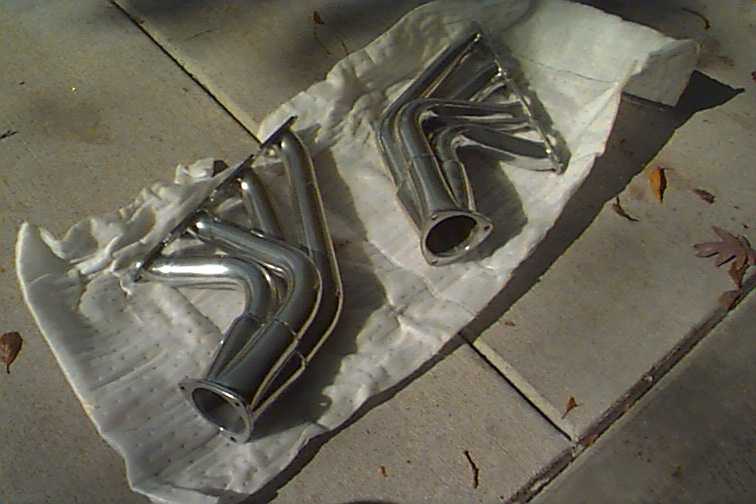
I was bummed when I tried to fit up the headers. The combination of the taller 9.5" deck but mostly the high port location on the A3s and big collectors created some interference on the passenger’s side shock coil. No two installs are ever the same. -Too bad. They were worked and fitted nicely around the collectors and cylinder head flanges. Instead of hackin’ up these nice ceramic coated headers, the PPC folks said they’d take’em back and tack together a new set for me to cut and fit. The old ones will make someone happy. Gotta like those PPC folks. I’ll piece in a 2 ½" tail pipe after the headers are done.
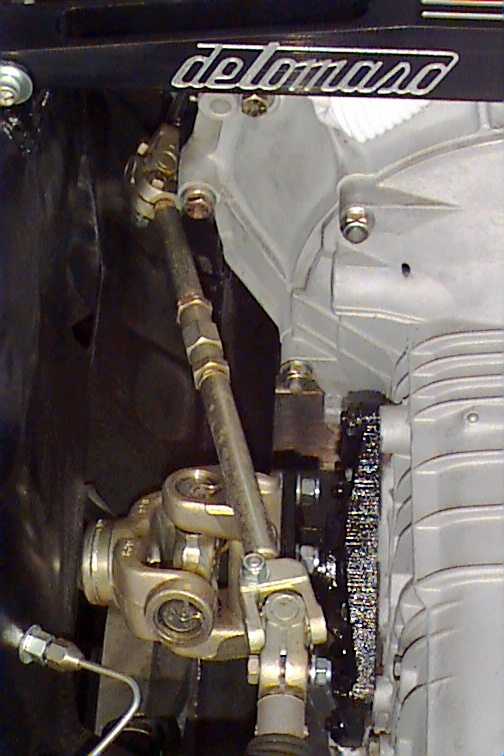
I nearly had a heart attack when I was installing my shifting linkage. I bought PPC’s set up with the stainless rod and spherical rod end for support. It barely clears the little bump-out in the 10-quart pan I had installed in order to clear the main girdle.
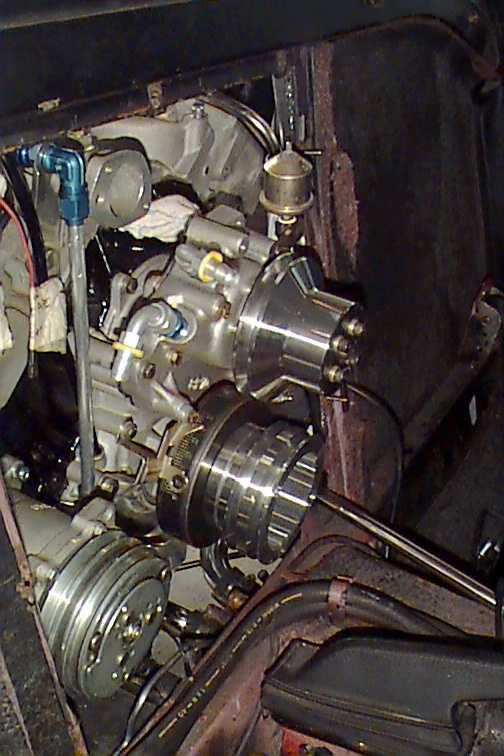
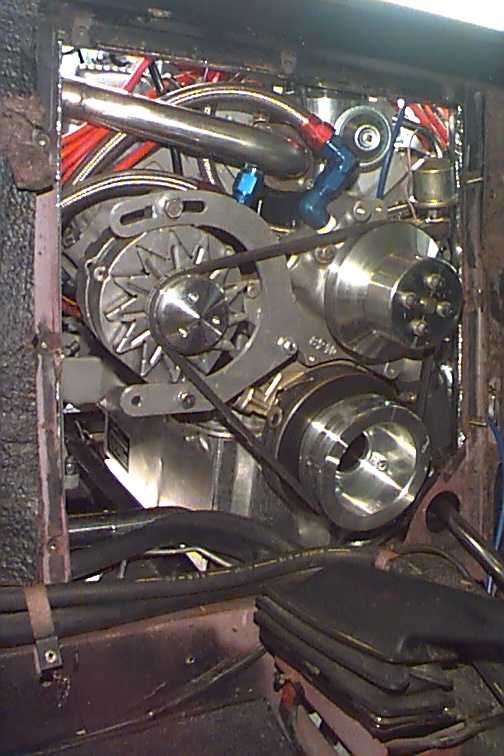
Getting the pulleys lined up was more of an issue than I expected. I don’t know if the nose of my crank was turned to a non-standard dimension, the Weiand water pump snout was off, or maybe the after market harmonic balancer contributed or what, but I ended up having to make a spacer in order to get things to line up.
I spent some effort on the upper coolant tube from the Windsor water neck back to the coolant tank. You have to turn quickly to avoid the bulkhead and then again to shoot between the firewall and valve cover. No sweat. I fabbed and fixtured up the pieces and made another trip back to my buddy with the black-belt in TIG welding. It doesn’t hurt that he’s a gear head with a nice T-bucket roadster.
Anyway, it’s November in Iowa and becoming pretty clear that the car isn’t gonna be shreadin’ rubber before the snow. My finger will be twitching on the trigger come spring. I’ll keep you posted. Like I said, anybody can take a car apart…….
September 7, 2002
After many interruptions and unavoidable delays, I’m back on the road!
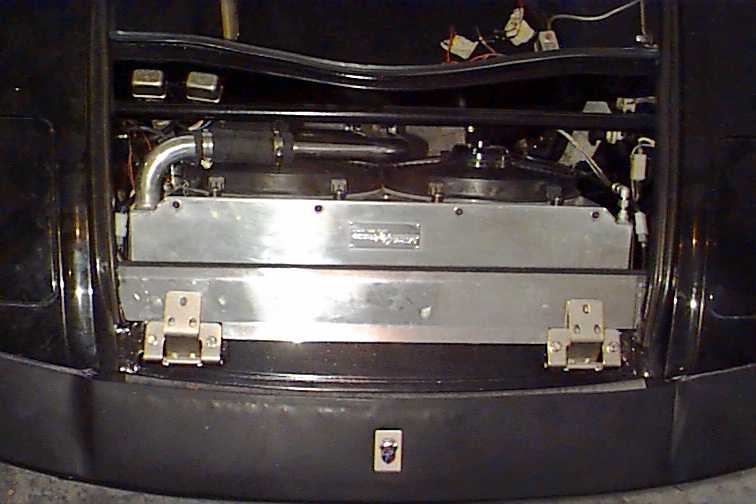
I had completed the thermostat housing/radiator tube assembly as well as the return tube. That allowed me to complete the entire large diameter cooling circuit. I decided that I would install valves so I could isolate the heater core. I used Earl’s valves. They’re ½" npt on one end and a –10 bulkhead fitting on the other. This made them easy to mount on the firewall with a simple bracket. I would like to attend some club and track events at some time in the future, so it seemed like this would be a wise thing to do. Since the radiator can take considerably higher pressure than the heater core, and as I understand it, it’s absolutely no fun to be in the cockpit if the core lets go. It should yield the additional benefit of a cooler cockpit during the summer as well. The braided stainless is nice but takes some effort. I included the heater bypass circuit typical to Windsor water necks on my fabbed tube assembly in the 5/8" (-10 AN) size.
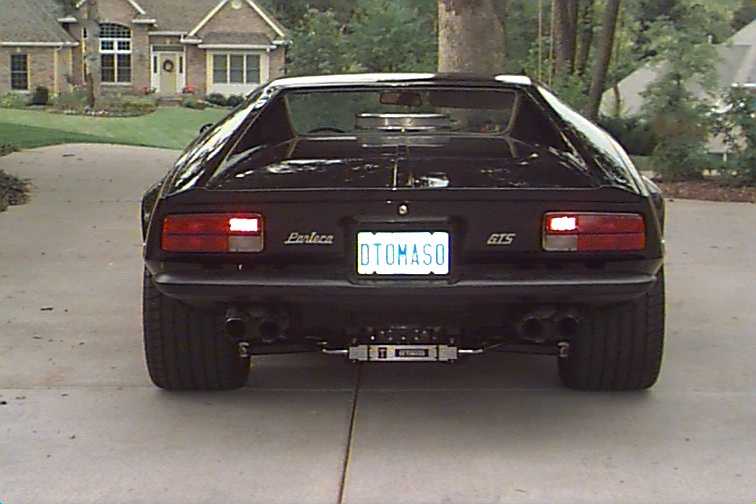
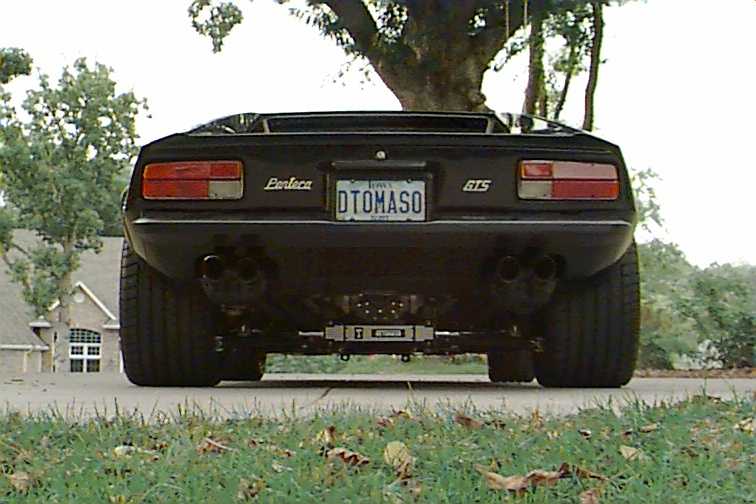
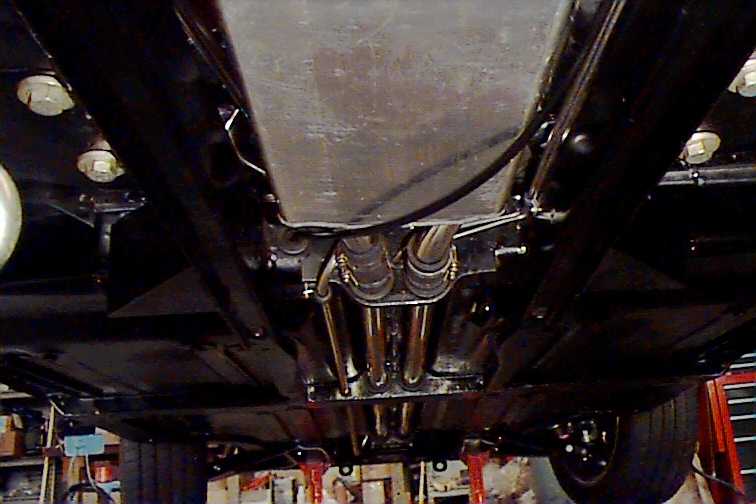
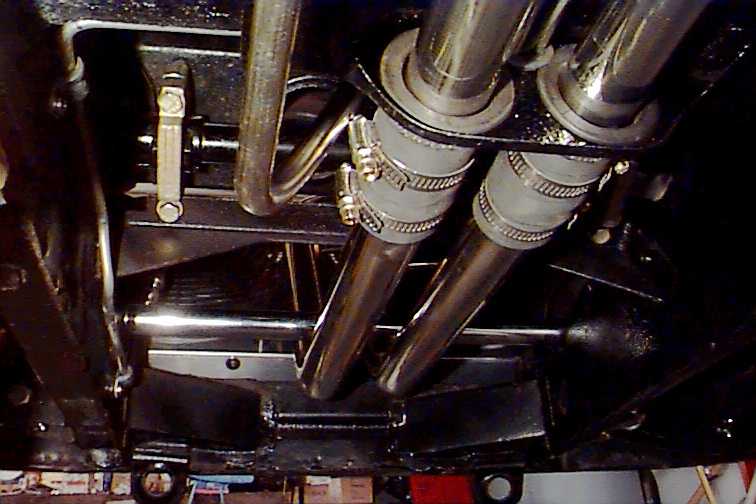
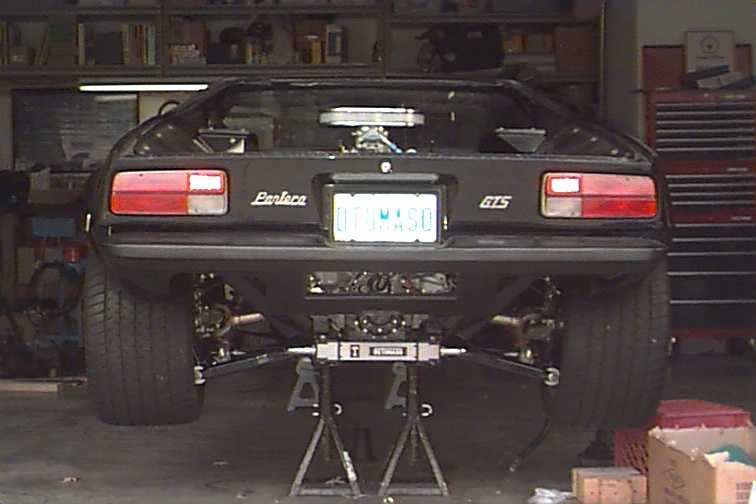
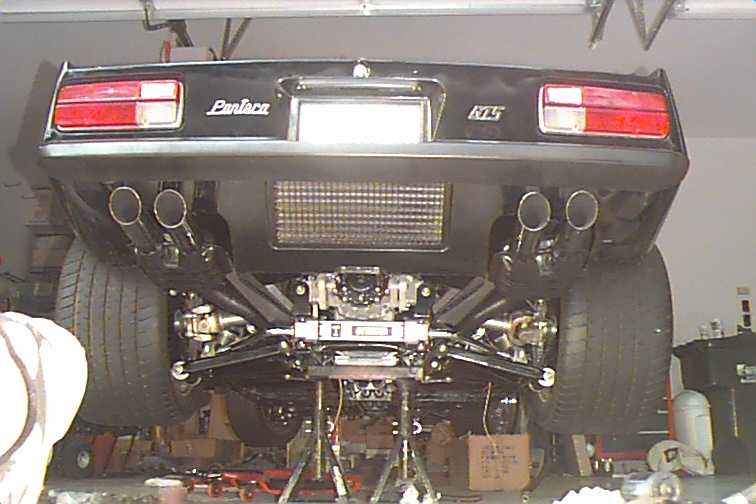
As noted earlier, I needed to modify the tail pipes to match the collector location on the headers as positioned on the tall deck block and high port heads. Even though there is some performance price to pay, my mental image of the Pantera rear view just has the traditional muffler cans and twin resonators burnt into my mind. I decided to keep the cans off my GTS exhaust and pieced in some 2 ½" mandrel bent tube. I tack welded everything while it was hanging in place, removed the assembly, added a couple of O2 sensor bungs (have a fuel mixture monitor and still see fuel injection in my future) and completed the welding. I masked chrome tips and sand blasted everything before applying black satin ceramic coating from Tech Coatings. This stuff is supposed to air cure, and then fire with only exhaust heat to achieve full cure. –We’ll see. Though I’ve seen both, I prefer black exhaust to silver, especially on a black car. Anyway, here they are hung on the car.
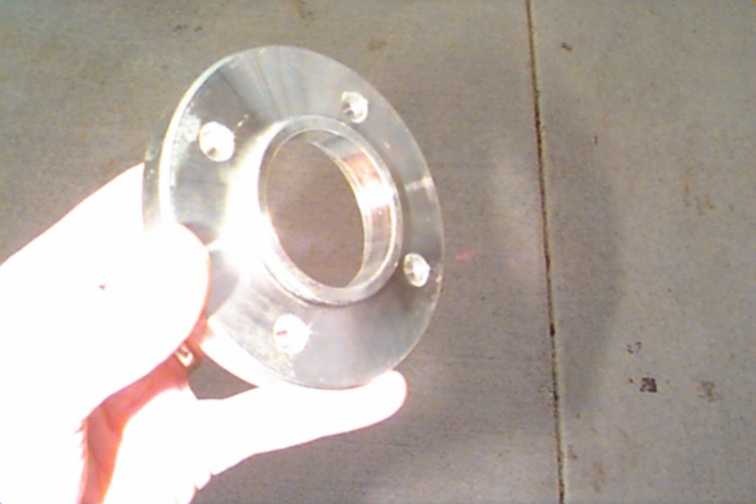
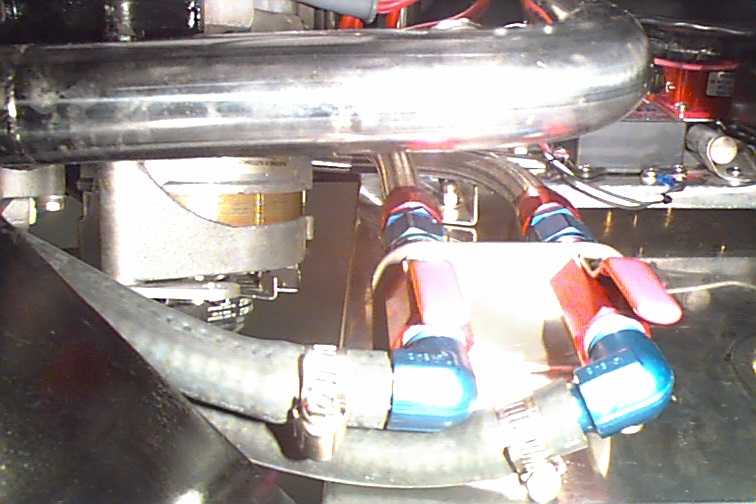
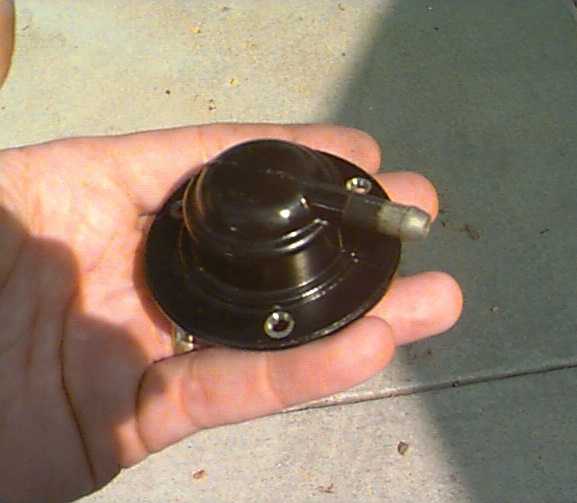
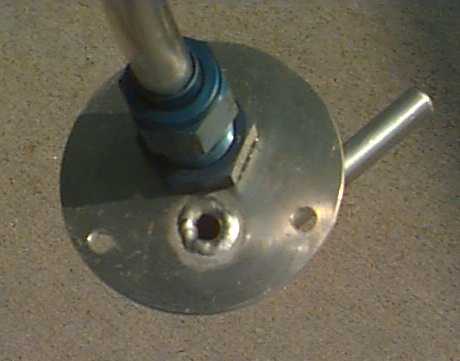
The fuel plumbing was a bit of a hassle. I doubt that ½" plumbing was required on my car, but most of my fuel components were already ½" (-8) AN fittings (fuel log, filter, shut off valve, carb inlets etc.), so I stuck with it throughout. I’m thinking I’ll be happy with this decision for future engine upgrades. I contemplated routing the larger ½" plumbing into the gas tank through the drain, but was decided against it for several reasons. The drain plug was an oddball metric thread. I would have had to drill and tap it and wasn’t real enthusiastic about it machining on a fuel tank even though it had been dry for the better part of a year. Also, I would have been picking up fuel from what is originally intended to be the sediment trap. Even though my fuel line was well filtered, I’d immediately become aware of any bad fuel. Probably most importantly, the plumbing on the bottom of the tank would be susceptible to being hit by road trash, thus increasing the hazard of fuel fire. I decided to go in through what was originally the vent port. I made a replacement flange with a vent, ½" aluminum dip tube, and –8 900 bulkhead fitting through the new flange. I figured this way I could keep the fuel sender in place, and just cap the original pick up tube. This seems to be the best of all worlds since I get big plumbing in fairly sanitary manner, and no permanent tank mods.
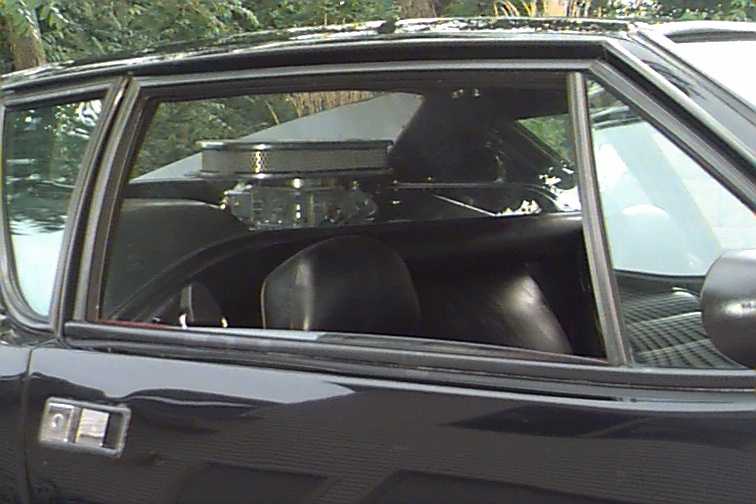
![]()
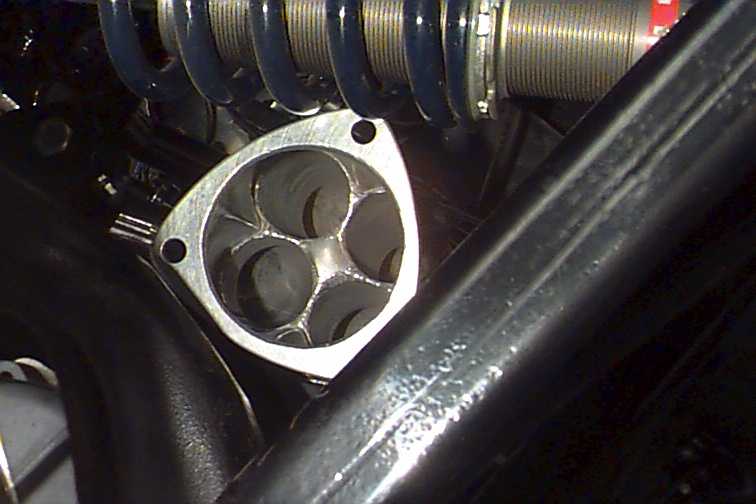
When it comes to carbs, my attitude isn’t quite the same as for the fuel line. Bigger isn’t necessarily better. I decide on a 750 HP series Holley on my stroker. It should be plenty of carb for how I’m set up. I figure with the stroke at 4.100" and 4.030" bore, the way I’m cammed, at 6 krpm your already past due to grab another gear. (However, I could probably stand to be geared a little taller, but a new ZF 5th gear and/or ring and pinions isn’t in the near term plan). Anyway, even at 100% volumetric efficiency, the above only calls for 730 cfm or so. Truth be known, I’m sure this is plenty. Especially with the HP series Holley. The temptation is always there to over carb, because you want to believe you need it. On street machines, that usually gets you is a mixture so rich that it tears your eyes at every stop sign, ridiculous mileage, and poor throttle response to boot.
I had the usual trials and tribulations with the first turn of the key, compounded by some forgetfulness from nearly two years of interrupted progress.
Anyway, on with it! I installed fluids, primed the lubrication system, dropped in the distributor, turned the key, and…….Well,,,,, uhhhh…not yet. –No spark. After a little investigation I discovered that I inadvertently pulled the negative wire off the coil primary sometime when I was crawling around in the engine bay. I quickly repaired it and then…. ignition. However, after a couple of minutes I shut down I shut down to make sure I had the air out of the cooling circuit. I opened up the line on the heater bypass circuit, cupped the pressure tank inlet with my hand, and helped the coolant through the circuit a little with my air hose. After adding a fourth gallon of coolant, I eventually got water out the bypass circuit. Sooo, give it another try and….success. Well, sort of. -Big coolant leak from my thermostat-housing flange. Rats! I was pretty proud of my t’stat housing and tube, but as it turns out, it was very difficult (impossible in fact) to keep the thermostat positioned while shoving the other end into the hose on the pressure tank. The thermostat had walked out of the gland and was caught between the flange surfaces. I ended up having to stick it in place with a little silicone, let it set up, applied some high-tac on the gasket, and then installed.
As a tip to anyone that is going tall deck and high port heads, you may as well plan on moving your pressure tank. I wish I had done so prior to painting the engine bay. I had a couple of people ask me if I was going to move it. I thought it was optional. It really isn’t. The tall deck and high port heads make for very little clearance and poor placement with respect to bottom of the tank to the number four cylinder primary header tube and spark plug. This will have to come later. I’m too close!
Now, fire it up, set the fuel pressure on the log, and ………….Uhhh. Fuel is leaking out the fuel inlet fitting where it seats against the aluminum gasket at the interface with the front fuel bowl (how many "rats" is that?). What’s this? A puddle of fuel is slowly forming on the valley pan of the intake. To compound matters, I had also forgotten to install the diode on the number one pin of the voltage regulator, as the MSD instructions indicated may be necessary on "older cars". This became evident when I was urgently asking my wife to turn off the ignition so I could fix the fuel leak, as the engine continued to run. It wasn’t much of a leak, but fuel leaks are never a good feeling. Since I could choke it out with my hands, I went for the coil wire and decided to grab it off the coil (not off the distributor near the fuel leak) and discovered I was very well grounded. The floats were also set so high that fuel was beginning running out the top of the vent tubes. I guess I should have checked that e-bay carb that was (supposed to have come off a running car) a little closer. -My Bad.
Anyway, yank the carb (because I can’t get a wrench on the fitting due to interference the window, and no clearance around the float bowl), lightly lube and tighten the fitting, back the floats down, install new float bowl gaskets, and …… Yep! That’s-what-I’m talkin-about. I had read an article in a previous POCA news letter that had a couple of dyno pulls on an engine set up very close to mine with a 750 dp. So I jetted at 70 and 72 on the primaries and secondaries respectively. It’s pretty rich but I’d rather approach being in tune from the rich side of the curve. I’ll fine tune after it’s rode-worthy and properly timed.
From previous readings on the PI Bulletin Board, I knew I needed an MSD tach adapter for the tachometer to work properly with the MSD ignition, so I had it on hand. For those of you wanting to run an MSD 6A(L) box, you’ll need the 8920 tach adapter. Panteras have voltage-triggered tachs (the black wire(s) on negative side of coil primary). You can use the red, orange, and light blue wires (at least that’s what color they are on my ’74) connected to the positive side of the coil primary as the switched 12-volt source. The ballast resistor can also be eliminated. With this, just follow the MSD instructions. Even with the isolation diode installed, there is still a second or two run-on after the ignition switch is turned off. I haven’t traced it yet, but it may be some back feed from the radiator cooling pans. I’ll have to try isolating them with a couple more diodes.
Now for the other details, check all the instrumentation; oil pressure, coolant temp, fuel, and alternator, are all registering reasonable readings and the coolant fans are coming on in the staged fashion as intended. I proceed to get the wiring cleaned up, bleed the brakes, bleed the clutch, and adjust all the accelerator and shift linkage.
Now, just install the bulkhead, seats, hood, deck lid, and it should be time for the shake down cruise. ……And it is sweet indeed.
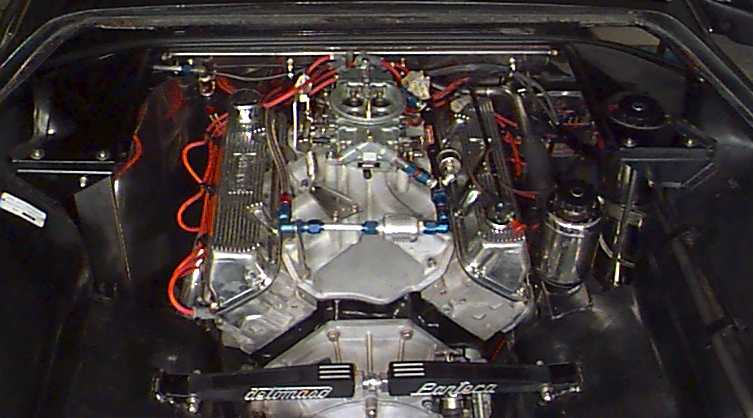
There are still plenty of details to attend to and tuning, but after a couple of minutes of warm up, it idles comfortably at 1 krpm, and pulls impressively from 2.5 krpm up; especially 3-5.5 krpm. Definitely a vast improvement and will be fun for a while, but as you all may know, it’s never enough.
I’m already planning the next engine project. This winter, I think I’m going to have make a run at individual runner fuel injection, a more aggressive cam, and who knows, maybe even a new tall deck alloy block to go along with it.
Somewhere down the line I’ll also be needing Euro Bumpers, steel GTS flares, paint, some better seats and restraints, perhaps some chassis stiffening, and a roll bar. We’ll just have to see what the Iowa winter brings.