The Pantera Place
"Your de Tomaso
Connection"
Air Conditioning System
Upgrade
By Mike Dailey
June 17, 2001
The original Pantera air conditioning system used a Ford, York style,
piston type, compressor. The system worked pretty well for the cars in seventies
and most of the magazine reviews didn't have any negative comments. When I
bought my Pantera in 1998 the A/C worked and held the R-12 refrigerant OK, but
the compressor crankcase leaked oil so I haven't used it very much. The other
problem is that the engine does not have a fast idle solenoid to speed-up the
engine idle when the compressor is running so the compressor load would slow
the idle too much. The York style compressor takes some significant HP from the engine
to run.
Some of the Pantera owners that have the stock compressors think that they
may work better than the new rotary type compressors and they could be
right. For many people the York compressor is a great solution.
With that in mind my first approach was
to buy a refurbished Ford, York style compressor from NAPA auto parts for
$95. I was thinking about a low buck approach to repair the system
because I don't use it very much. After more thought and realizing that,
more than just the compressor would need to be replaced, I changed my mind
and ordered a Sanden SD-508 R-12 rotary type compressor from Pantera East. To
install the compressor an adapter bracket must be used to mount the new
compressor on the original mount.
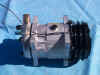
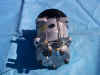


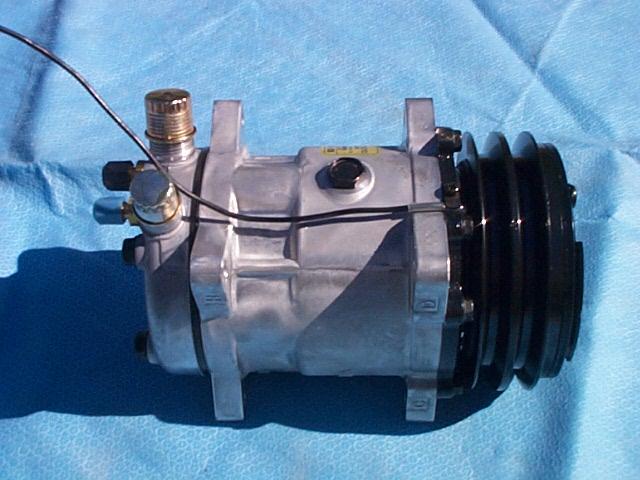
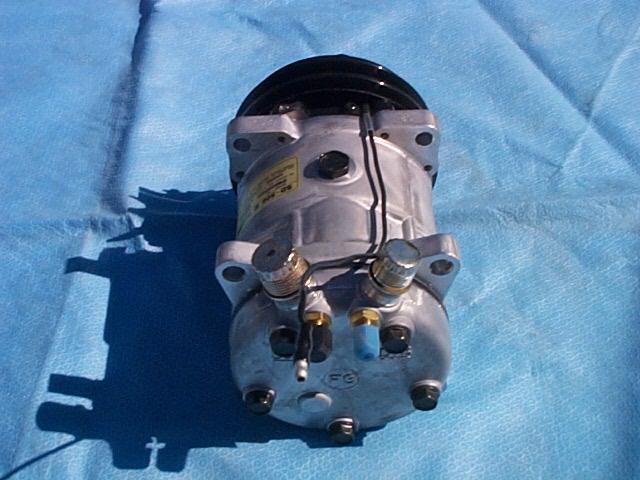
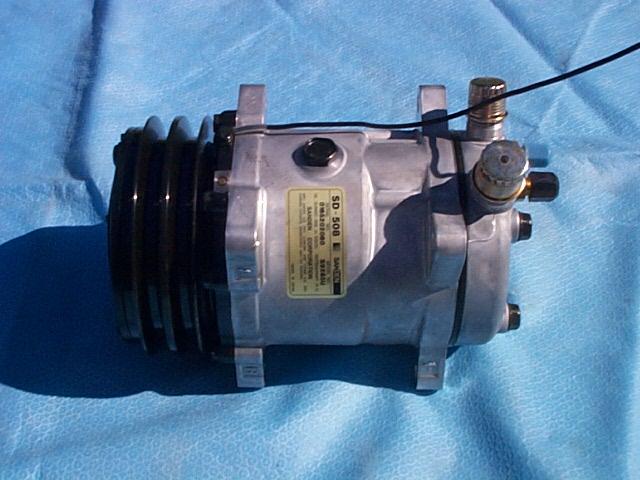
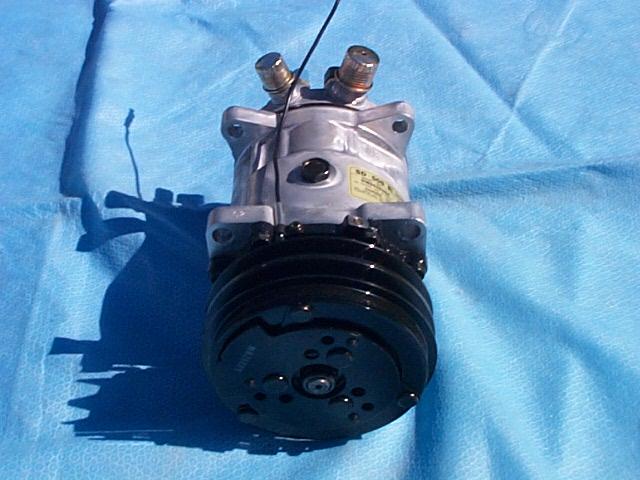
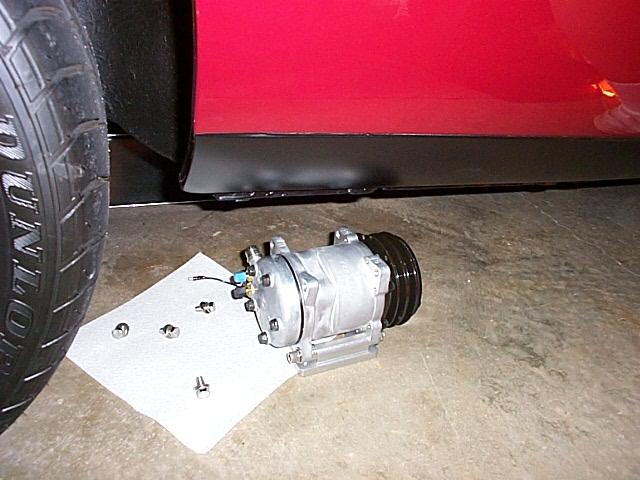
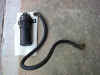
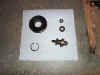
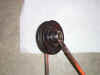
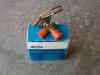
View of the Pantera East Sanden SD-508 R-12 rotary type compressor.
The compressor can also be used with R-134 but this one was ordered with R-12
service fittings.
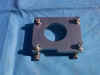

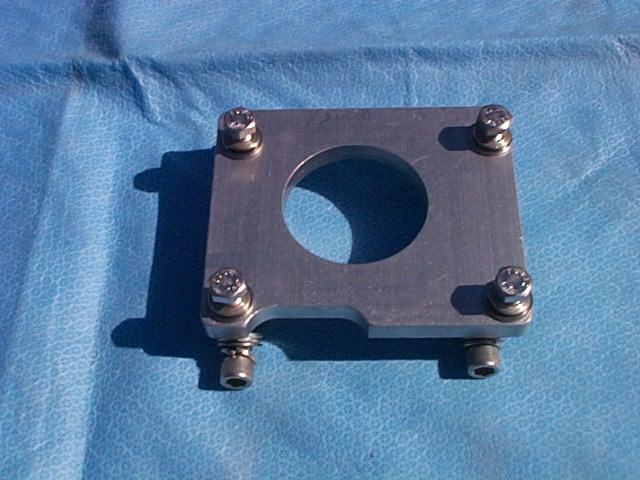
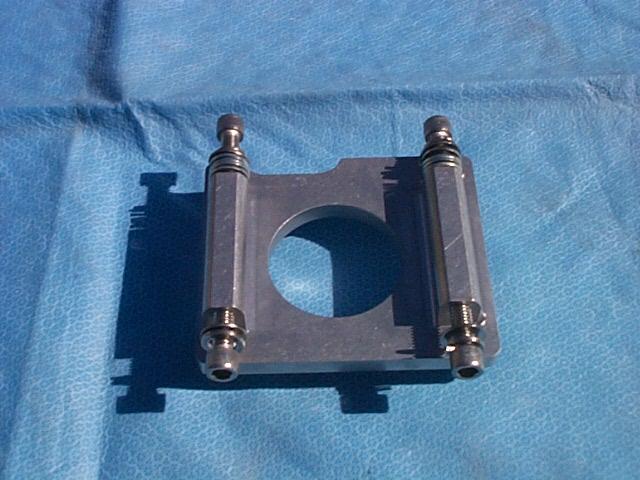
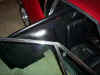
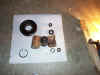
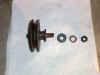
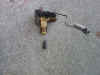
View of the Pantera East adapter bracket. The bracket is a very nicely
made, machined aluminum unit.
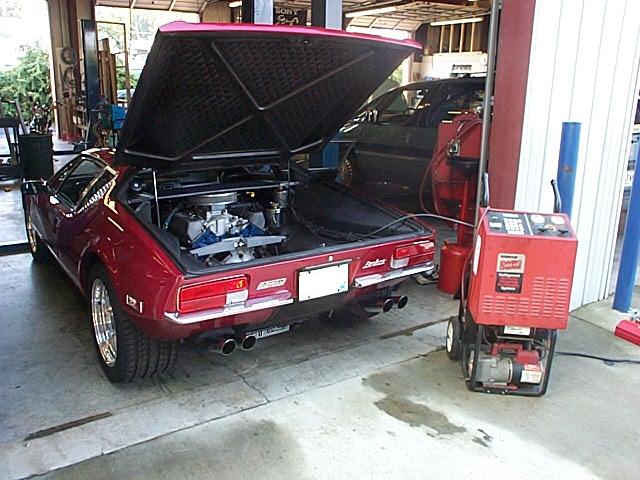
The next step was checking out the existing system. I ran the system
for awhile to check it out and found that it still worked but from the sight
glass I could see that the system was low on R-12. The sight glass
is located on the top of the receiver dryer. With the system running
only a few bubbles should be moving by the glass. A lot of bubbles
indicates low R-12.
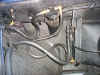
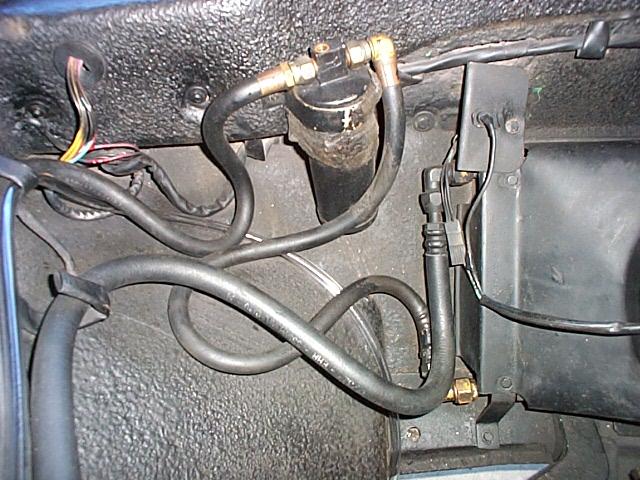
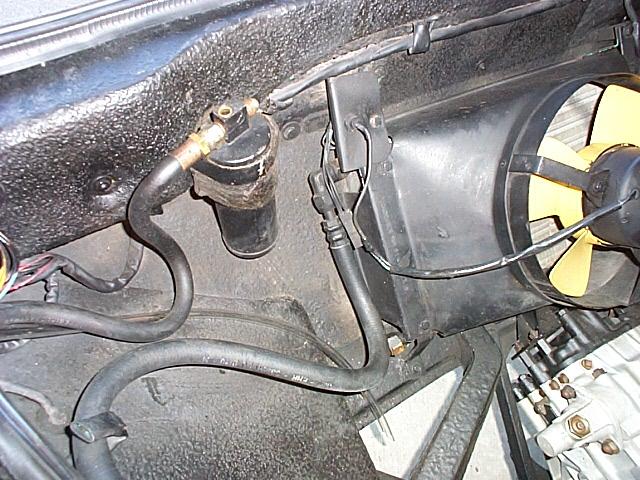
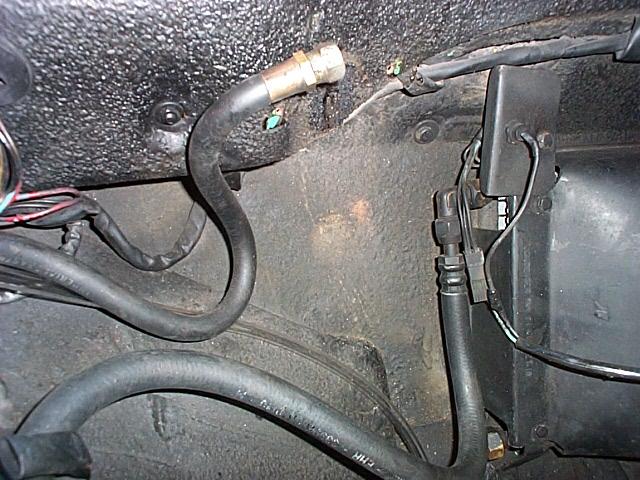
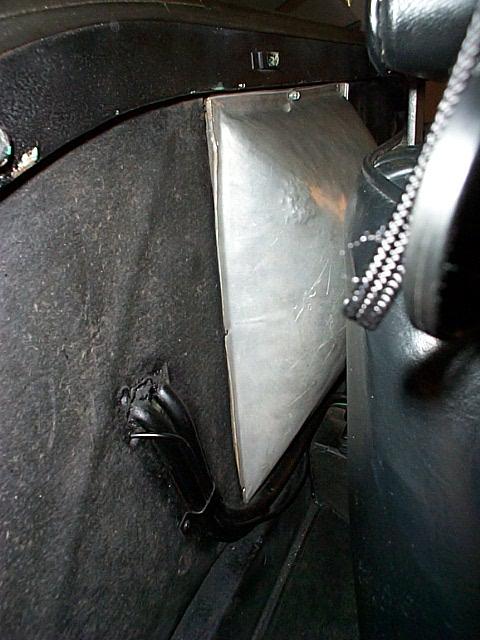
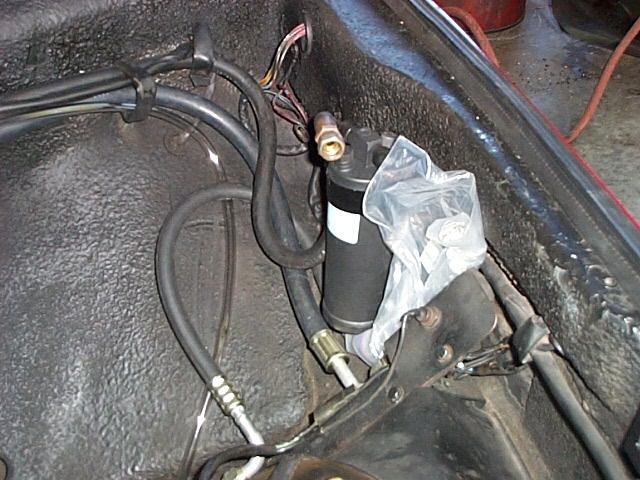
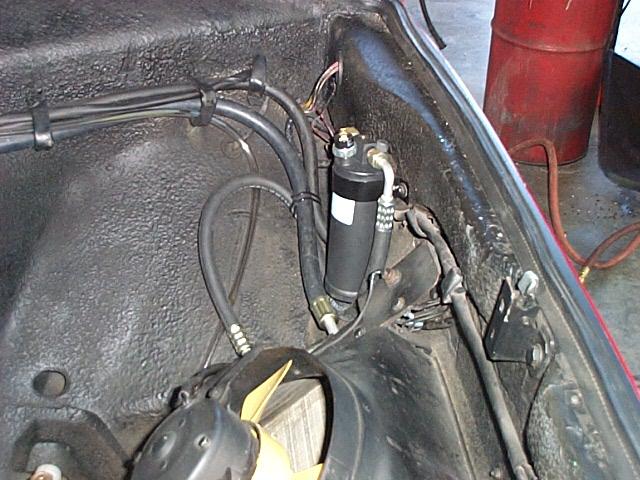
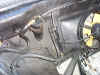
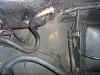
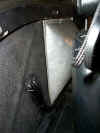
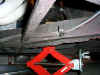
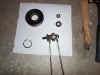
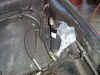
View of the receiver dryer. It is mounted in the back of the engine
bay next to the condenser shroud. The clear hose visible in the image is the
coolant overflow tank vent.
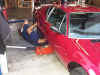
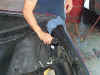
The next step was cleaning the condenser. I put a plastic tarp in the
engine bay and padded the area with old news papers. I removed the four
bolts holding the condenser and moved it back so I could have access to the
back side of the condenser and placed the fan side of the unit on the news
papers. I sprayed 409 cleaner on the condenser and scrubbed it
lightly with a brush. I then sprayed it with water and then blew it out
from the fan side with compressed air. There wasn't much to clean, but I
wanted to make sure it was completely clean. I gave the back side condenser
fins a very, very light coat of flat black paint because it is visible from
the back of the car. There was some oil in the lower corner of the condenser
and on the lower A/C hose. Oil on the A/C parts is an indication
of a R-12 leak. I'm not sure if it is the condenser or the hose connection.
I ran the A/C system some more after I cleaned the condenser and hose and did
not see any more oil.
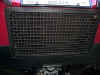
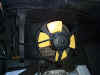
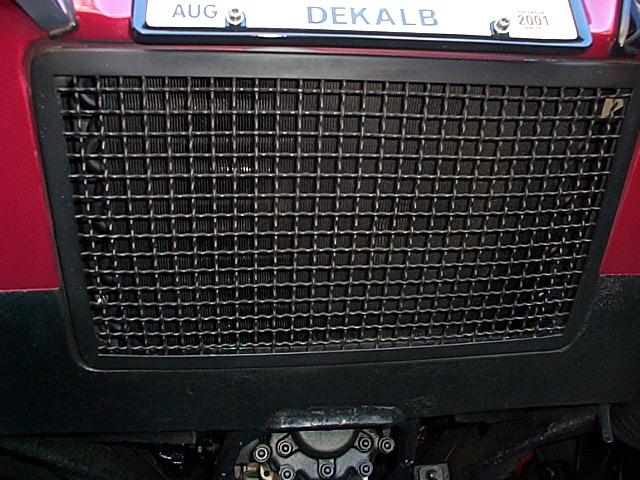
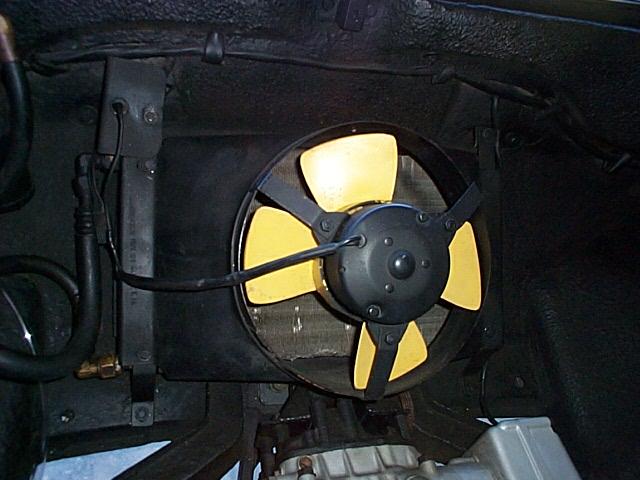
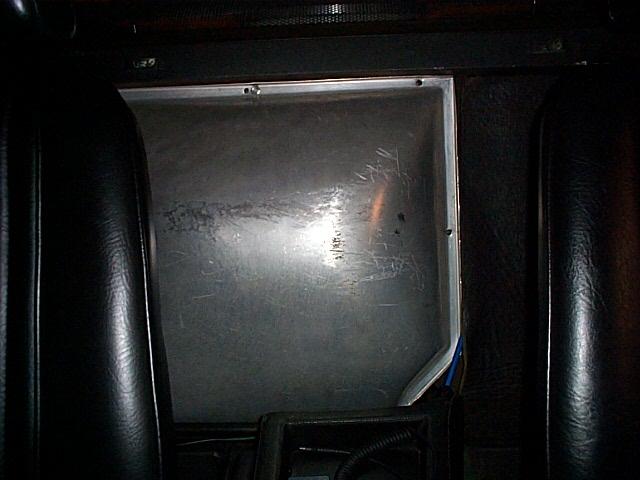
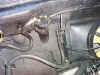
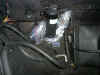
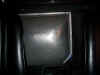
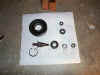
View of the condenser and condenser fan
The next step is finding an A/C shop to do the A/C work. I plan
to remove the old compressor without removing the hoses from it and move it
out of the way and temporally wire it to the frame rail of the car. I don't
want to vent the R-12 because it is super expensive and also I think it is illegal
to vent R-12 into the atmosphere. Then I plan on installing the new
compressor myself. I don't want the A/C shop messing with the
compressor installation and the inside of the car. After I get it
installed I'll drive the car to the A/C shop.
I hope to install the new compressor myself and have the A/C
shop evacuate the system of the existing R12, install a new receiver dryer,
install a new hose from the compressor to the condenser, a new hose from the condenser
to the receiver dryer, remove the old compressor and hook up the hoses to the
new compressor. I would like reuse the hoses that connect to the evaporator because they run through the passenger side rocker panel on
the 71 cars and are not fun to replace. I'm also hoping that the
expansion valve is OK that is located up front with the evaporator.
After all of the hoses are in installed by the A/C shop the system is then
evacuated for at least 30 minutes and tested for leaks. If the system
holds a vacuum the system can then be charged with R-12. Some
shops have equipment for cleaning and scrubbing your existing R-12 and recharging
the system with your R-12. After the system is charged with R-12
the system is checked for operation. I want to see if I can find a shop
that can supply a receiver dryer that has a pressure switch so I can add it to
the compressor relay logic that will shut down the system if too much pressure builds up in the condenser.
I've also located a new condenser and I'm debating if I should replace it
too. The condenser fan tends to suck in exhaust fumes that corrode
the condenser fins where they contact the tubes. This causes the condenser
to loose efficacy, but my condenser looks good from the outside.
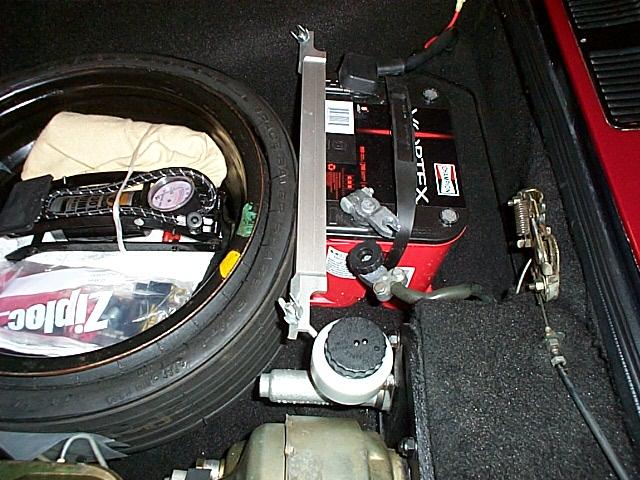
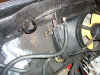
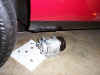
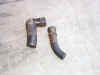
One other item I had to fix was a bolt that was used for the back mount of
the compressor bracket. Someone back in 1991, when the new engine was
installed, used a bolt that was too long and bottomed it out in the treads of
the block. After three days of soaking it with penetrating oil and
having no luck, I ended up using my air impact wrench on the lowest setting to
get it loose. It was hard getting the heavy impact wrench, two U joints
and extensions around the headers, motor mounts, etc. I let the impact wrench
bang on the bolt for awhile and then went back to a box end wrench, before I
rounded the corners off the bolt, and luckily it came loose.
June 21, 2001
During the last few days I've talked to a number of A/C
shops to find one that can do the work on the Pantera. Some of the shops
I talked to, did not have a lift to put the car on to do the work, didn't want
to work on the Pantera or they were too far away for easy access. I
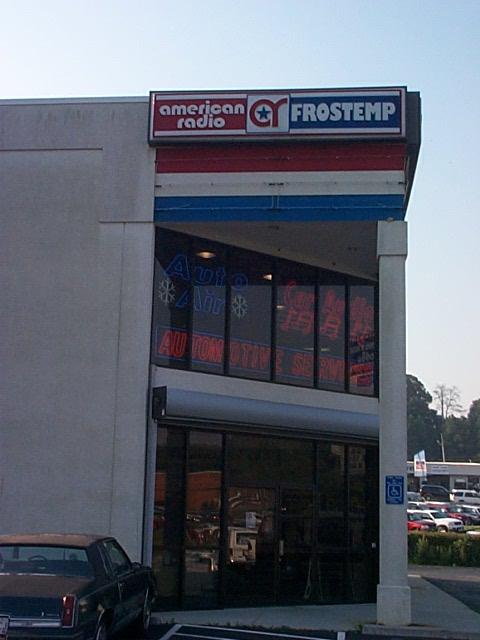
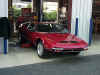
decided that I would get an estimate from the Frostemp A/C shop that is nearby
and I drove the car over to the shop today to get an estimate.
Needless to say, it is not possible for a shop to give an exact estimate
on a car like the Pantera. The folks at Frostemp were very helpful
and we discussed the approach to getting the system upgraded. They
didn't have any problem with me replacing my own compressor and recommended
that they evacuate the system before I start my work, so I would be able to
remove the old compressor from the car completely to provide more
access. Frostemp has one of the machines that can evacuate the system
and measure the amount removed so I will not need to pay for a complete
recharge with R-12.
They looked at my existing A/C hoses and thought I should be
able to reuse them. This was good news because of pathway of the evaporator
hoses on my car. They created an estimate to include the replacement of
the compressor to the condenser hose and the condenser to the receiver dryer
hose, a new receiver dryer with a pressure switch and some new O ring type
connectors for the hoses. They thought it would be possible to put new
ends on my two existing hoses to convert them to the new style O ring
type. We discussed different ways to hook up the pressure switch.
They recommended, just wiring it in series with the main A/C control switch
but I'm thinking it would work better if the pressure switch only caused the compressor
relay to dropout and left the condenser fan running. This way the condenser
fan could continue to cool down the condenser while the compressor was stopped.
As I'm installing a new compressor they talked with me about converting the
system over to R-134, but I think it would be better to stay with the
R-12. I know that R-134 would work Ok, but some Pantera owners
have said that it did not work as well as the R-12 because of the small size
of the Pantera evaporator and condenser. R-134 systems usually have a larger evaporator
and condenser to improve the efficiency of the R-134.
The expense so far includes the Pantera East parts as
follows:
Pantera East Parts
|
Item |
Amount |
|
Sanden SD-508 compressor (with R-12 fittings) |
259.49 |
|
Mounting bracket |
74.50 |
|
Shipping |
9.14 |
|
Total |
$343.13 |
The Frostemp estimate is as follows:
Frostemp Parts And labor
|
Item |
Amount |
|
Receiver dryer |
$49.80 |
|
Pressure switch |
$31.40 |
|
8’ of #8 hose |
$71.20 |
|
2’ of #6 hose |
$12.80 |
|
5 fittings |
$49.20 |
|
Evacuate and recharge (1LB R-12) |
$45.00 |
|
Subtotal Parts |
$259.40 |
|
Tax |
$18.16 |
|
Subtotal Parts |
$277.56 |
|
Labor estimate 6.4 hours |
$441.60 |
|
Total Frostemp |
$719.16 |
|
Total Pantera East |
$343.13 |
|
Total Estimated Cost |
$1,062.29 |
Frostemp has estimated 6.4 hours to do the work to be
on the safe side, but I'm thinking that they might be able to get it done in
less time if everything goes well. So far the projected cost of
the upgrade is about $242 more than if I just replaced the stock compressor
with a rebuilt unit.
I've been running the A/C some to see if I can locate the leak that caused
the oil on the condenser hose and lower corner of the condenser. I want
to make sure that the condenser is not leaking. Frostemp said,
that if the condenser leaks, it is usually very noticeable so I'm thinking it
is the hose connection that was leaking and the oil ran down to the
condenser.
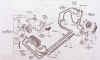
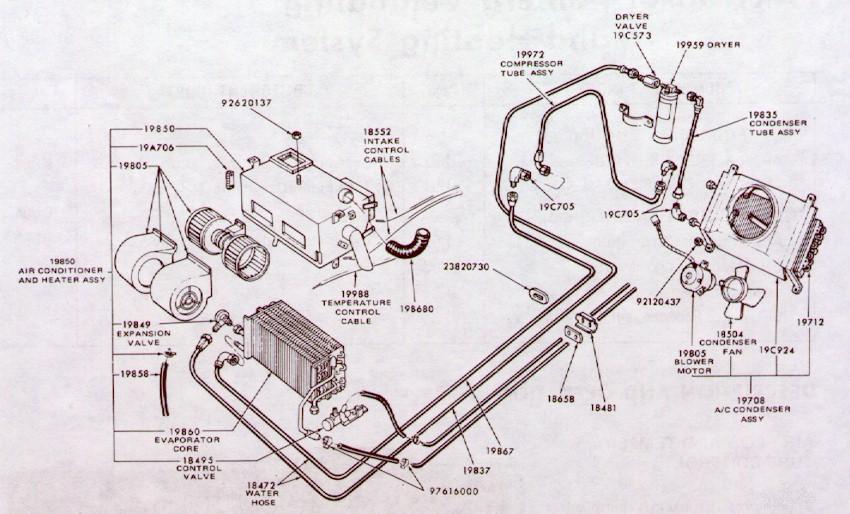
The image above is a diagram of the Pantera A/C system. Consult the
Pantera service manual for more details on the system. The
above drawing does not show the A/C compressor but is connected at the part
numbers 19C705 and 19972.
The following is a very simplistic explanation of how the A/C system
works:
When the system is serviced with R-12 and ready for use and the A/C control switch
on the dash is turned on, the compressor clutch is engaged and condenser fan
starts. As the engine runs the compressor is turned by a drive belt on
the main crank pulley and the compressor
pumps the R-12 to the condenser and through the receiver dryer. The compressor
can move much more R-12 than the system needs to operate. The compressor
is controlled by a relay that is controlled by the deicing switch that cycles
the compressor off if the evaporator gets too cold.
As the
R-12 is compressed in the condenser heat is released by the R-12 as the air
is moved over the outside of the condenser by the condenser
fan and carries away the hot air. The R-12 flows from the
condenser to the receiver dryer. The receiver dryer has selica inside that absorbs
any possible moisture in the R-12, has a filter and holds excess R-12.
The receiver dryer also has a sight
glass in the top for observing the flow of the R-12. If only a few
bubbles are observed, the system R-12 level should be correct. The R-12
is being compressed into a liquid state as it cooled in the condenser with the flow regulated by the
expansion valve located at the evaporator. The expansion valve regulates
the release of the R-12 into the evaporator by sensing the temperature at the
exit of the evaporator.
As the regulated stream
of R-12 enters the low pressure
area of the evaporator the R-12 contacts the tubes of the evaporator and expands
into a R-12 gas as it absorbs the heat on surface of the tubes.
The R-12 is absorbing the heat inside of the evaporator. The air moved
over the outside of evaporator tubes by the blower causes the heat in the air to
be absorbed by the evaporator tubes. As the heat is removed from the air it releases some of
its moisture content and condensate forms on the evaporator tubes and drips
down to the bottom of the A/C/heater assembly and runs out a vent in the front
of the assembly. Air with the heat removed feels cold so we then have
cold air blowing out of the A/C vents in the dash. The downstream side of the evaporator is
connected back to the suction side of the compressor where the R-12, with the absorbed
heat, is pulled into the compressor, compressed and pumped back to the condenser
and the cycle starts over again.
This is a very simplistic view of
how it works and does not address the details of how the system regulates its self,
etc. But it gives you the big picture of how the A/C system works and
the bottom line is that the A/C system removes heat from the air passing over
the evaporator and on the Pantera dumps it out in the engine bay. A
great place to put more heat!
Stay tuned! Over the next few weeks I'll be getting the system
evacuated, installing the compressor and getting the A/C shop work done.
I will add the images of removing and installing the new compressor and the
work at the A/C shop.
August 1, 2001
Over the last few weeks I reviewed my parts
list with Pantera Performance to see if there were any parts that they could
provide that would be less than the local A/C shop. After the review I
ordered the compressor to condenser hose that will save about $40 on the
project. I always try to support the Pantera vendors whenever possible.
September 14, 2001
The project has been dragging along as I collected the parts
for the project. I received the hose from Pantera Performance weeks ago
and today I decided it was time to get the project underway again.

I drove the Pantera over to Frostemp located at 5689 Peachtree Industrial,
Chamblee, GA 30341, 770-458-8585. I needed to have the system evacuated
to remove the existing refrigerant because you do not want to vent it into the
atmosphere.
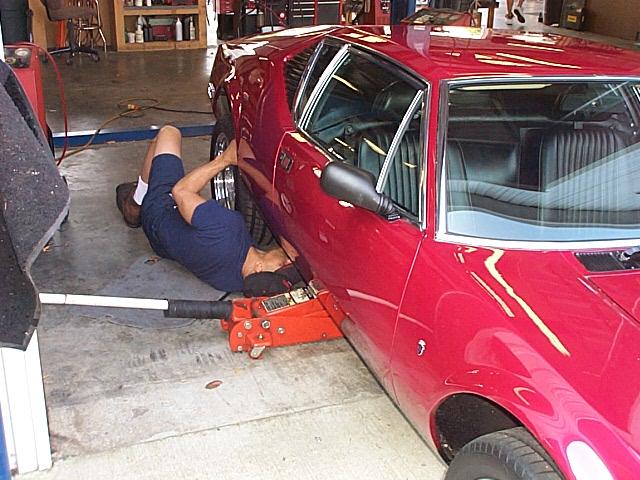
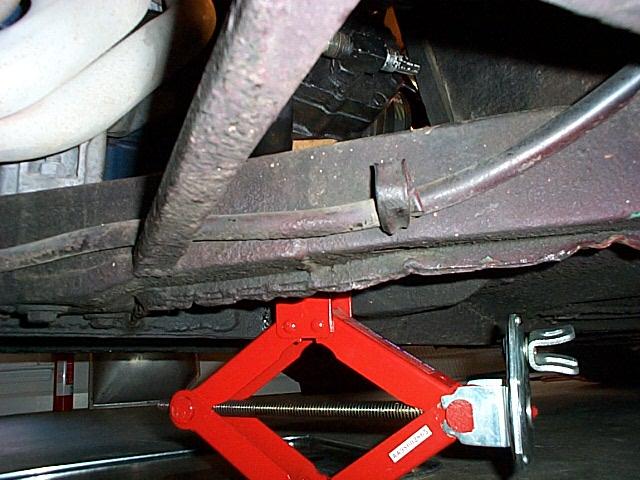
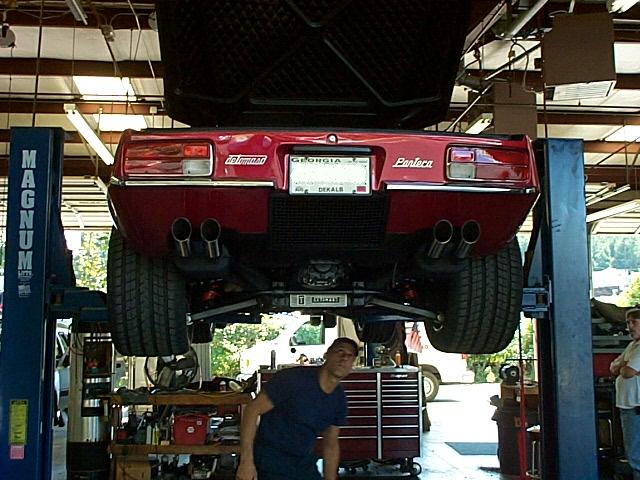
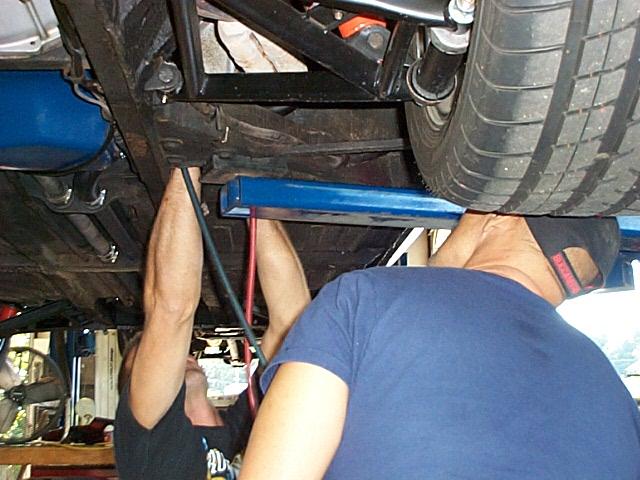
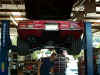
We decided to jack up one side of the car to gain access to the AC service
fitting rather than put the car on the hoist. Anytime someone is
going to jack up your Pantera make sure you help them find the correct jacking
points.

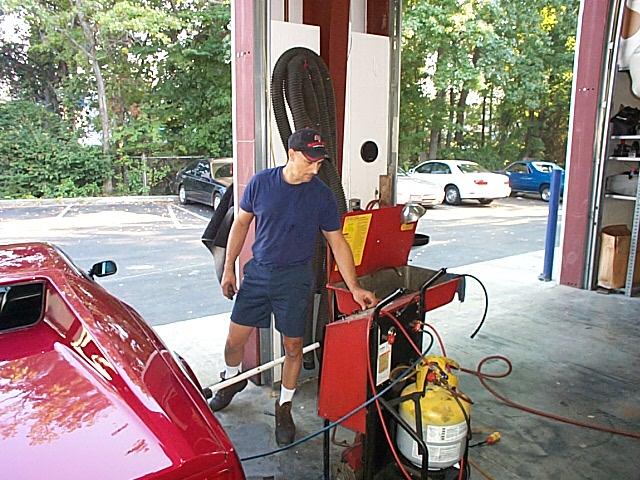
The evacuation pump was used to remove the existing refrigerant.
The amount of refrigerant was noted and I will get credit
for it when we refill the system.
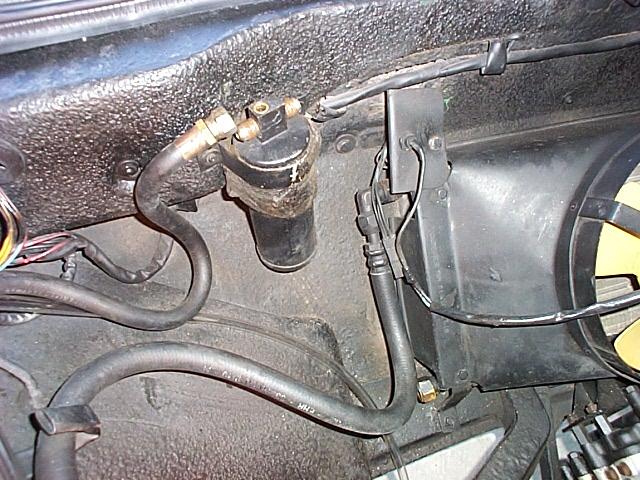
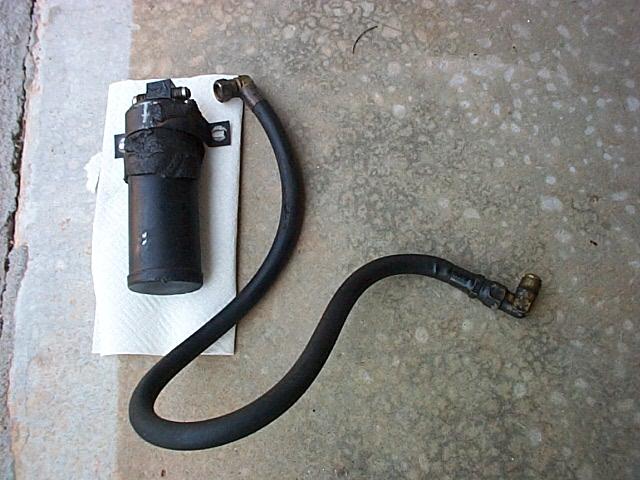
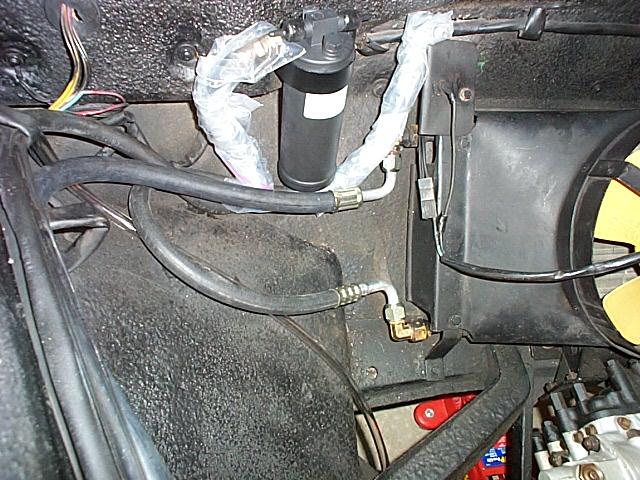
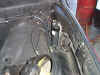
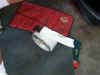
I returned home and removed the existing dryer and the short high pressure
hose from the condenser. I took the hose back to Frostemp and they made
a new hose and I picked up the new dryer and the pressure switch. The
pressure switch can apparently open on a high or low
pressure system condition. It is not very visible in the last image, but
the right side of the hose covering is split open from the tight 90 degree
bend of the original installation. The black sticky stuff around the
dryer was apparently done at the factory to help hold the dryer in place and
is not necessary and is very messy.
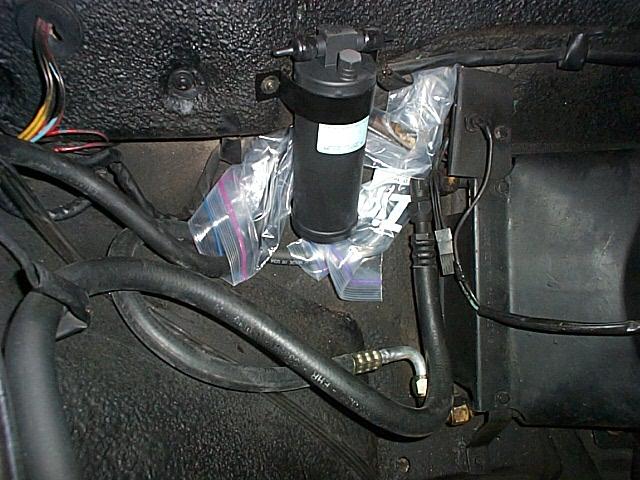
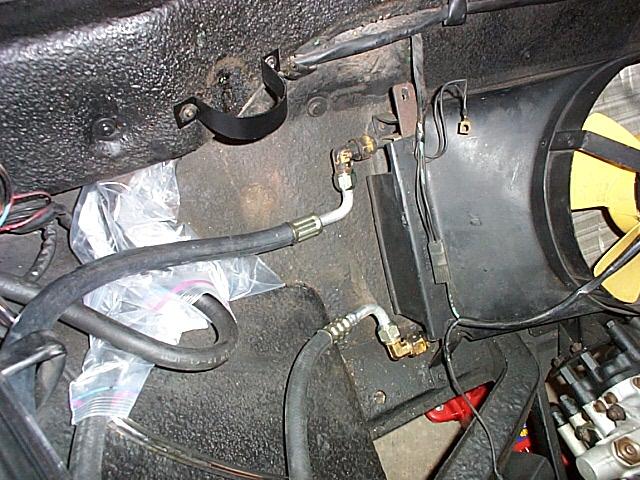
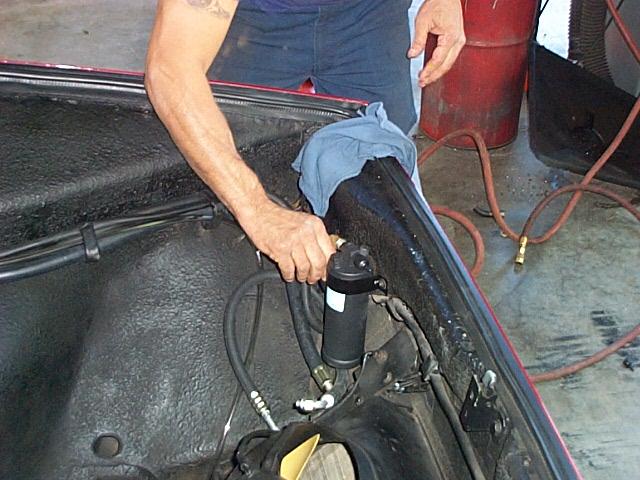
The next step was cleaning up the old dryer mounting bracket and mounting
the new dryer. I installed the new high pressure
hose from the condenser but did not connect it to the dyer because I want to
keep the new dryer sealed until it is time to charge the system. I
covered the hose ends with heavy plastic bags to keep them clean. Note how the
new hose has a 90 degree end fitting to eliminate the sharp bend in the rubber
hose.
AC Project Cost To Date
|
Item |
Amount |
|
Receiver dryer (Frostemp) |
$31.00 |
|
Pressure switch (Frostemp) |
$19.00 |
| Compressor/Condenser hose
(PP) |
$68.70 |
Condenser/dryer hose
(Frostemp)
|
$60.00 |
|
Evacuate system and make hose |
$69.00 |
|
Subtotal Parts |
$247.70 |
|
Tax |
$3.50 |
|
Subtotal Parts and Labor |
$251.20 |
|
Total Pantera East |
$343.13 |
|
Total Cost (to date) |
$594.33 |
The Frostemp hose ended up costing about $20 more than the hose I could
have purchased from Pantera Performance. See what happens when you don't
support your Pantera vendors and buy both hoses! The remaining cost
should be installing new O ring hose ends on two hoses, connecting the hoses
and recharging the system. That's if, everything else on the system
checks out OK!
September 15, 2001
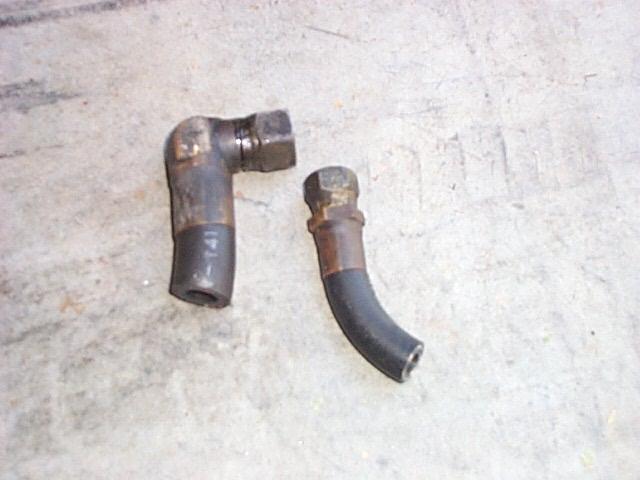
The plan for today was to replace the compressor to condenser hose.
The hose connection on the upper condenser fitting was super tight and I
had to carefully heat the hose nut to get it loose.

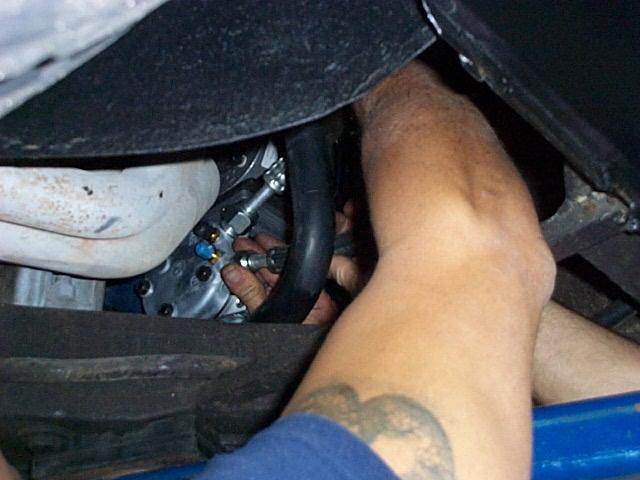
The compressor fitting was very tight too and I used a floor jack on the
end of the wrench to get it loose. Image on the right shows the old hose
on the left.
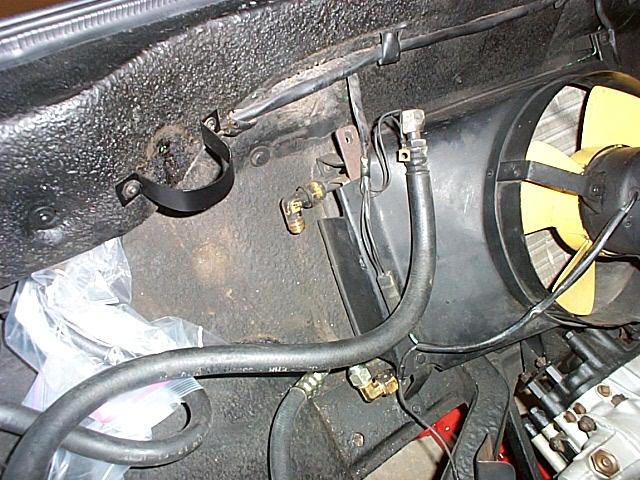
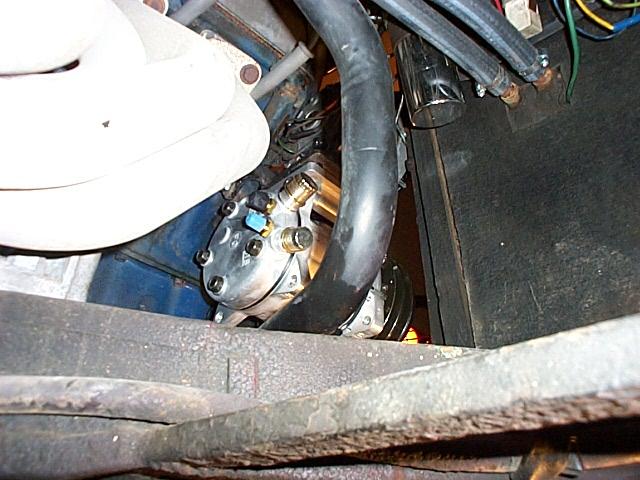
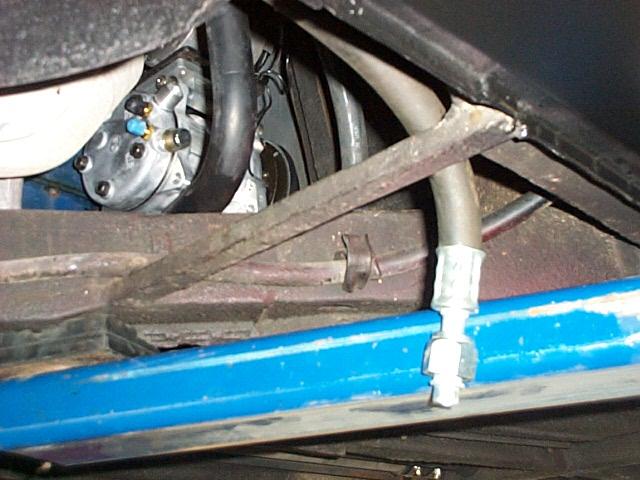
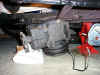
View of the completed hose installation. I found that the lower 90
degree flare fitting on the condenser had a small smashed area on the fitting
so I replaced it. All of the flare fittings should carefully
inspected for damage and then tightened very tight.
September 16, 2001
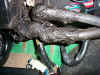
The plan for today was to remove the old compressor and install the new compressor.
The first step was to disconnect the battery.


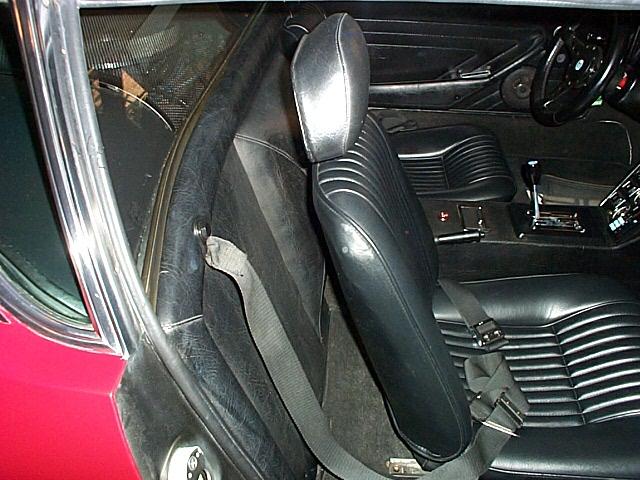
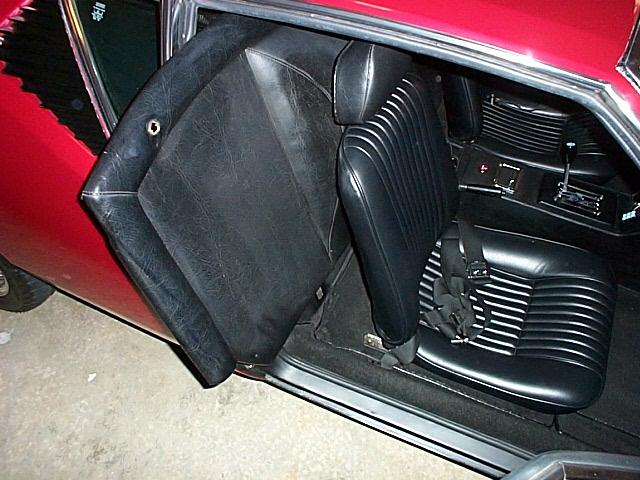
To remove the firewall, the seat belt connections are removed from both
sides and the seats moved to the full forward position. The firewall is
lifted up and then pulled out. Keep the firewall away from the weather
strip.
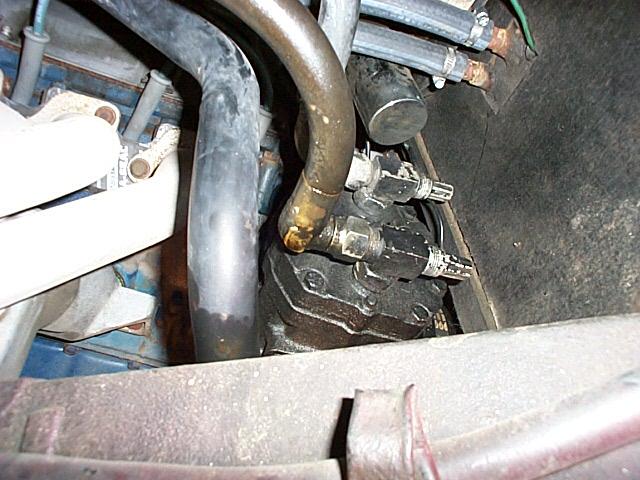
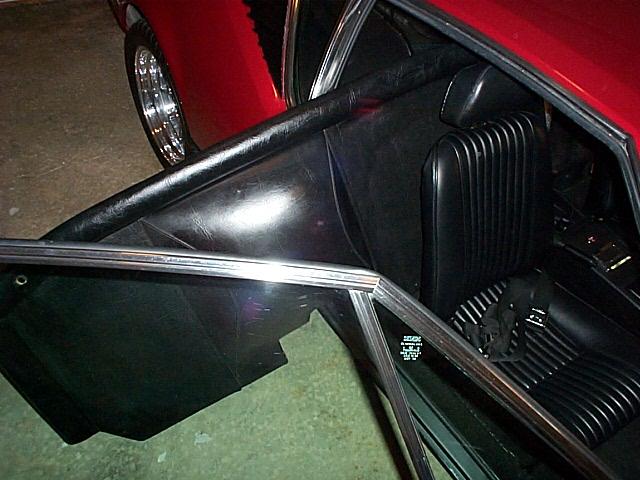
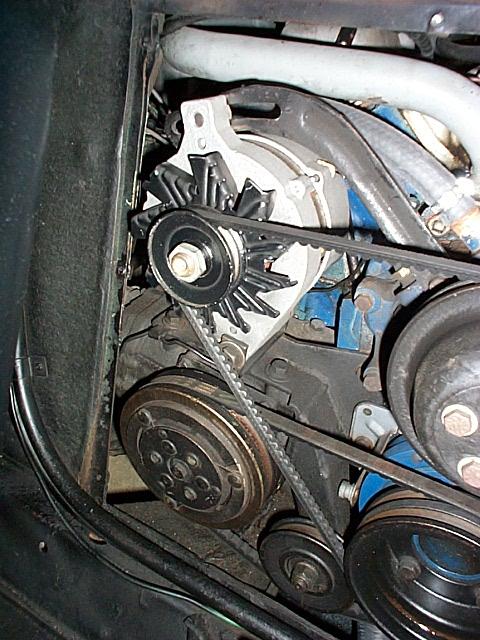
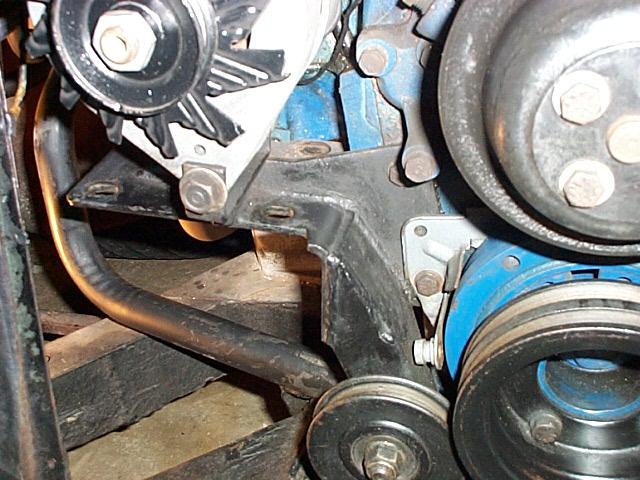
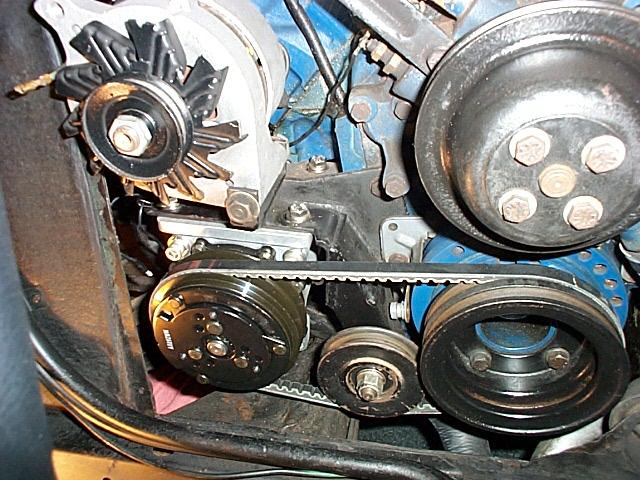
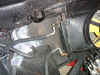
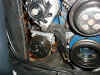
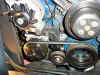
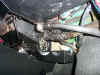
Next, the bolts holding the firewall hatch are removed to expose the front
of the engine. The AC compressor is visible in the last image.

The bolt on the top of the alternator was removed and the drive belt
removed.
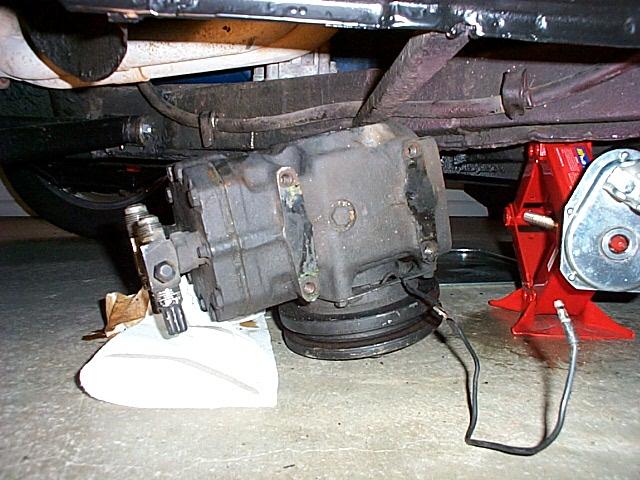
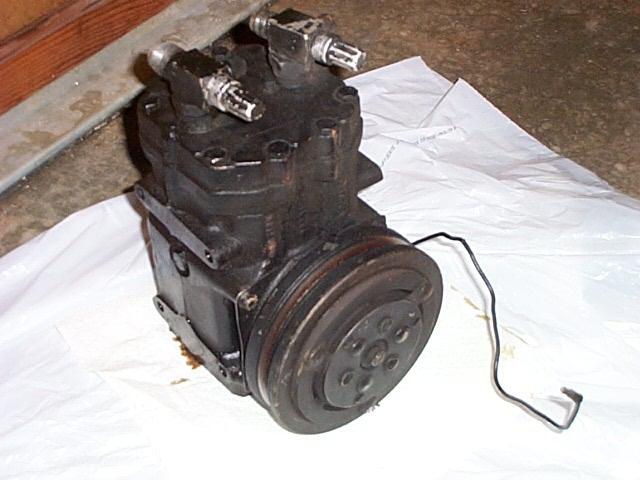
The stock compressor is 35 lbs so I used a block of wood and a floor jack
to support the unit.

The four bolts were removed from the compressor mount and the tension idler
loosened to remove the drive belt. The compressor
must be moved away from the engine and over the angle frame rail and then to
the back to remove it. Watch you fingers and hands, it's
heavy!

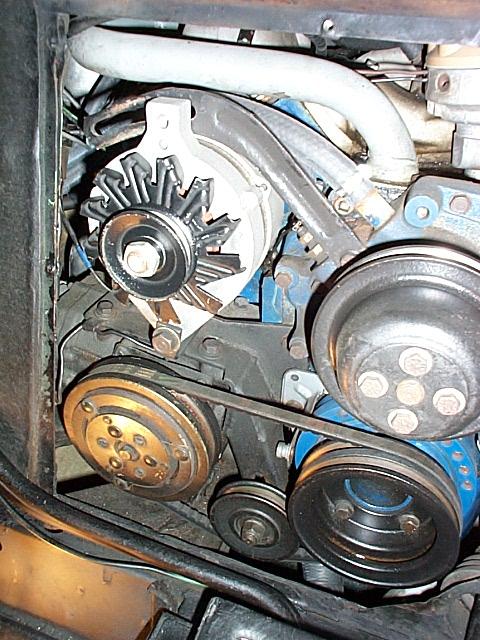
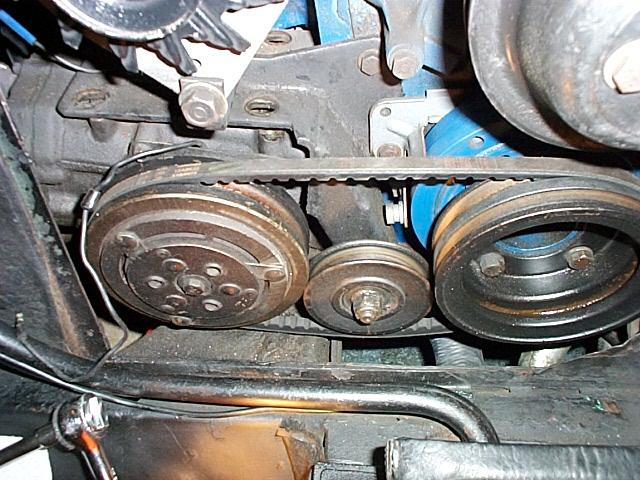
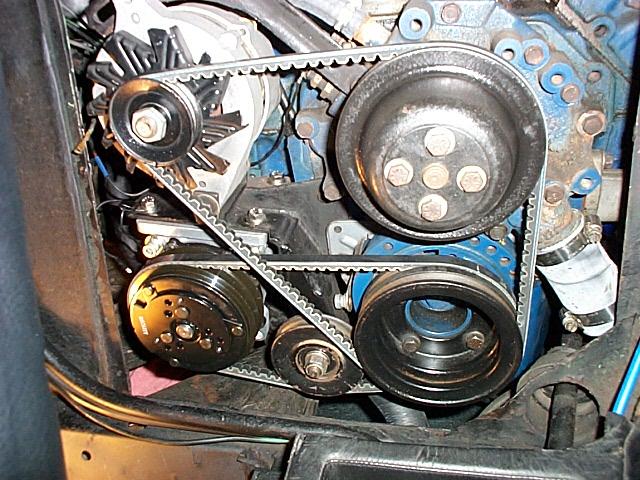
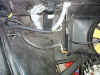
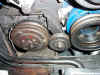
The compressor mounting space and the view of the monster compressor.

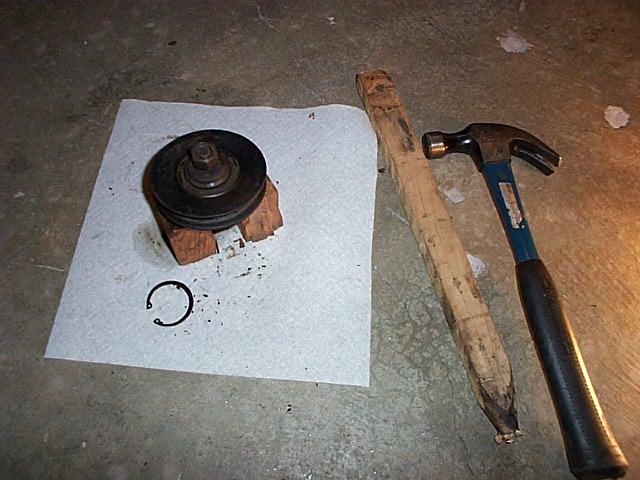
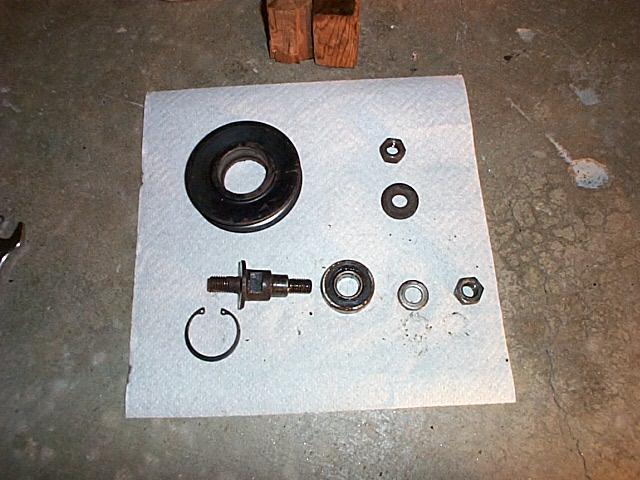
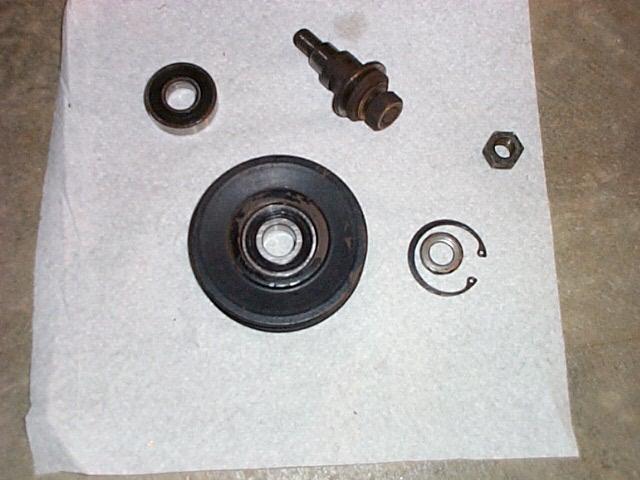
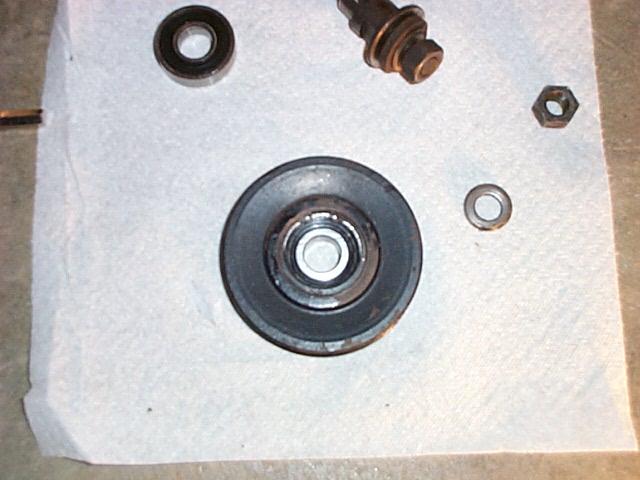
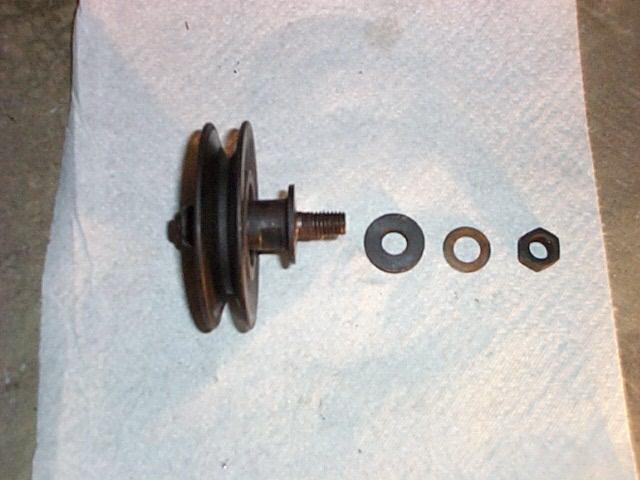
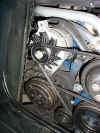
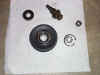
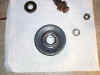
I noticed that the idler pulley bearing had some play so I decided to
replace it. I just used some wood blocks and light hammer blows on
a wood block to
disassemble the unit.

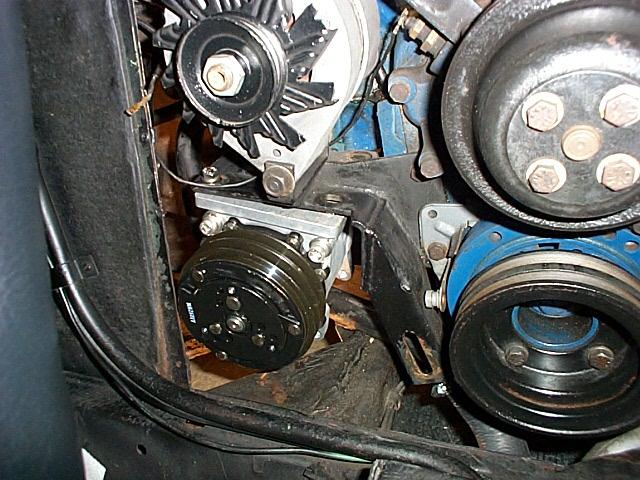
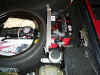
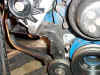
The new unit is only 18 lbs so it was a little easer to handle. It goes
back in the same way the old one came out. The new compressor has a
mounting bracket that has washers to adjust the front to back position of the compressor.
I used the old compressor as a template for this adjustment by putting the new
compressor on top of the old unit and then adjusted the washer positions align
the two pulleys.
September 17, 2001
The mission for today was to install the idler pulley, belts and have the
system serviced with refrigerant.
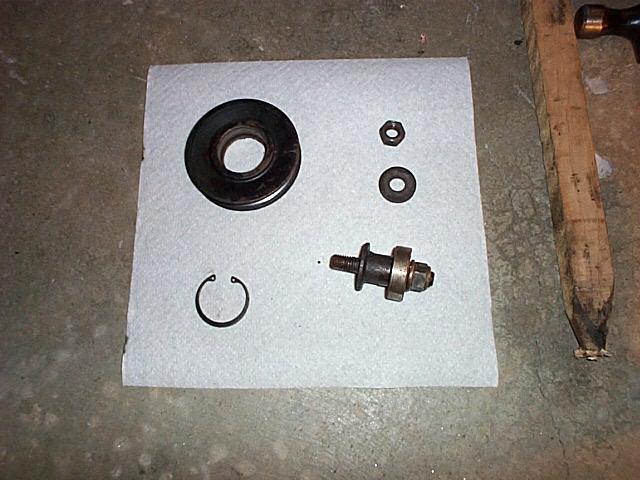
I found a new idler bearing at NAPA auto parts, part number
6203-2RSJ. Dick Koch helped with the part number because the number on
the bearing was not fully readable. The actual part is
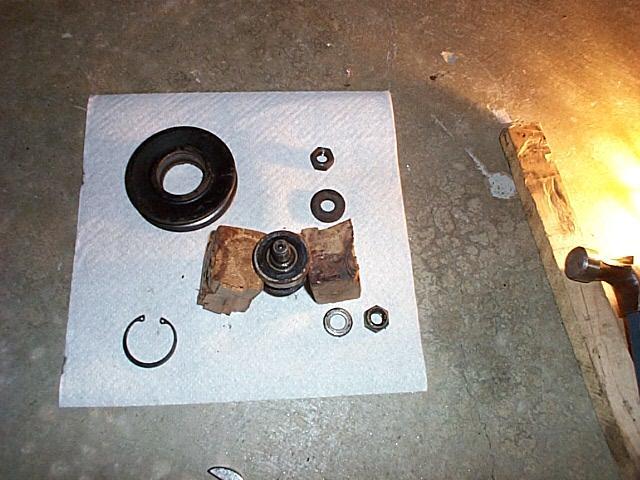
6203-2RS1 but the J works fine too. I used the old bearing to tap in the
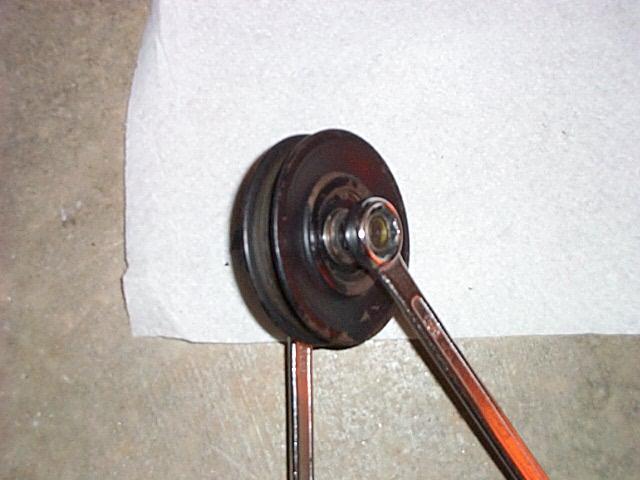
new bearing and replace the snap ring clip. The center mounting bolt was pressed
in by tightening the nut on the front side. After installing the new
bearing I noticed it also had some play, but it was a good idea to change
it.

The next step was installing the new belts. I used NAPA belt number
9355 for the compressor and belt number 7405 for the water pump and
alternator. I then started the car to test the belts. I
added some heat shrink tubing on the compressor clutch power wire and left the
wire loose to be connected at Frostemp. I installed only the engine
hatch and headed over to Frostemp. It turned out that they did not
need access to the front of the engine.
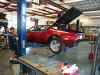

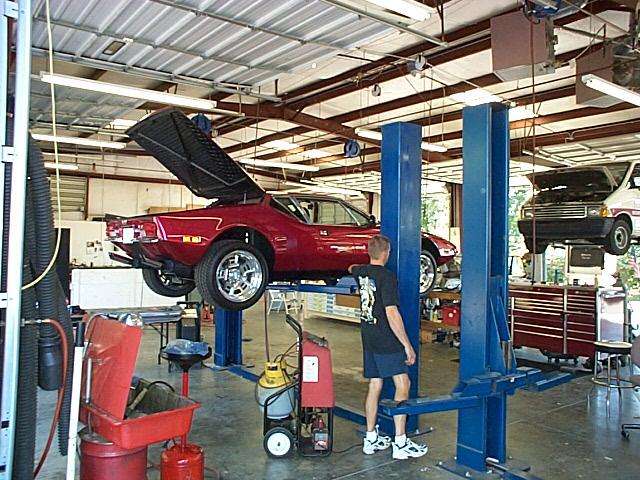
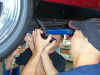
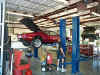
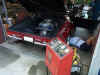
Because much of the work was going to be done from under the car they put
it on the lift. Frostemp need to replace two of the existing hose ends
with O ring type connectors, connect the hoses to the dryer and compressor and
service the system. The compressor and dryer are sealed when new,
so I did not want to open them until all of the hose connections were
ready.
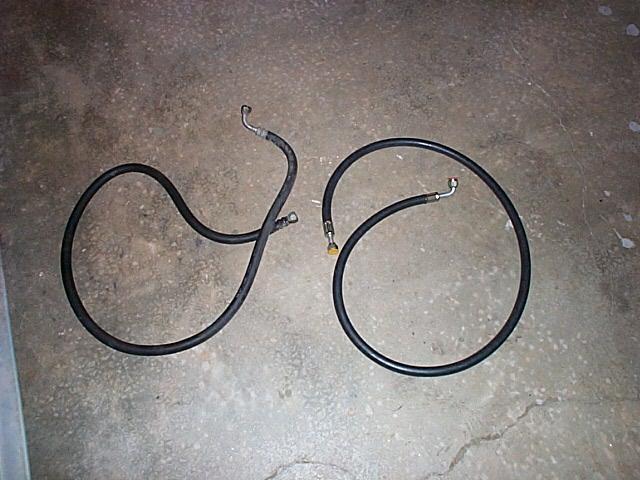
The two old hose connections were cut off the existing compressor to evaporator
and the evaporator to dryer hoses. The hoses
were in good shape and I decided to reuse them because they are routed through
the rocker panel on my car.


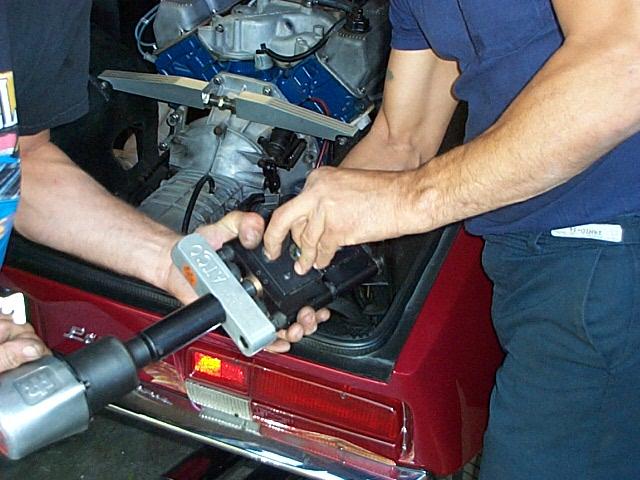
A special tool is used to install the new hose end. The hose end
fittings were made with a longer metal part to move the rubber part away from
the headers. The AC compressor clutch power wire was connected at
this time.


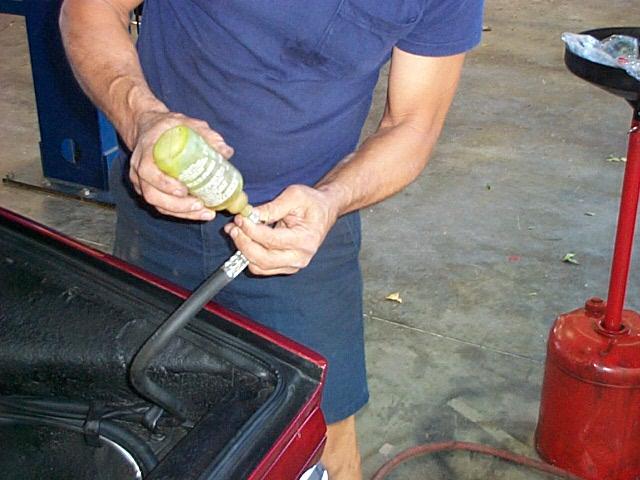
After the compressor was connected they moved to the dryer. A new O
ring end connector was installed on the dryer to evaporator hose and a special
dye was added so the system could be checked for leaks.
The hoses were connected to the dryer and the pressure switch installed in
the dryer. I plan to wire in the pressure switch
later.

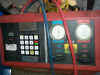
The R12 servicing machine was connected to the compressor service fittings
and the system pumped down to 30 inches of vacuum to remove all moisture.
Any moisture boils out of the system in the very low vacuum. The
system was held at the low vacuum for 30 minutes.
After the the system was fully vacuumed the system was charged with two lbs
of R12 and lowered back down for a test run of the AC system.

When the car was lowed back down I started the engine
(wow, ice cold air!) and all of the system was monitored to make sure it
was working correctly including the condenser and expansion valve. The
AC temp control on the dash was also tested to make sure it would regulate the
temp and cycle the compressor as needed. I ran the car for about
five minutes while the system was tested for operation. Everything
checked out perfectly including the efficacy of the condenser.
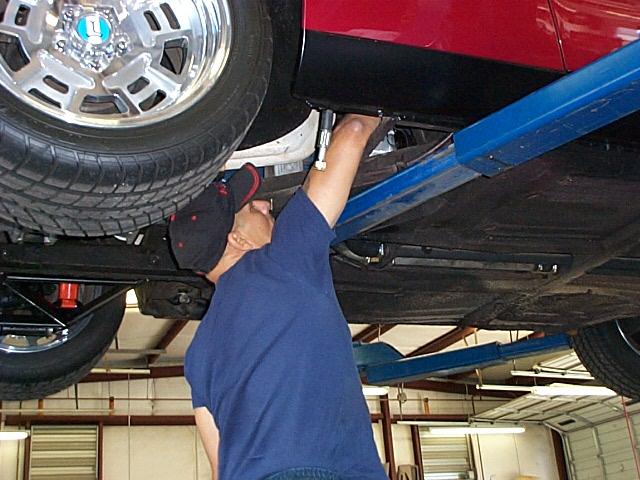
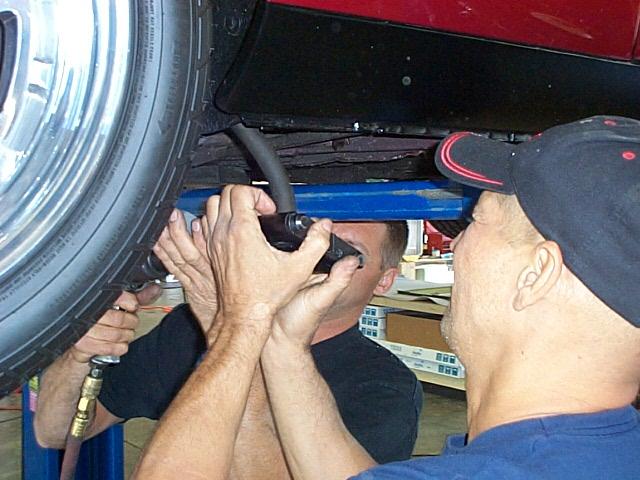
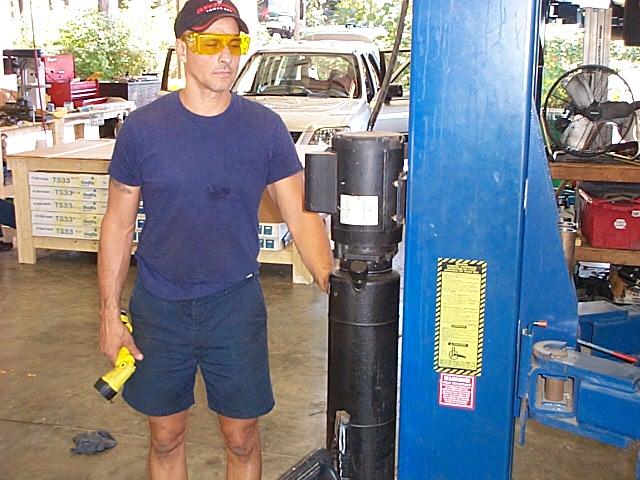
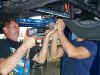
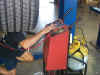
The next step was checking the system for leaks. Above, Juan Suarez
uses a special black light and goggles to look for the leaks of the dye that
that was added to the system before start up. All of the
connections were checked with this tool. Next, a special R12 snifter
was used to check inside the car to see if there were any leaks under the
dash, compressor, dryer, condenser and all of the fittings.
So far the system works great! I can hardly tell when the compressor
is on (completely silent) and has very little impact on the idle speed (possibly
25 to 50 RPM or so). I can say, that the cool air is very cool
deal.
Because I started out with a working AC system the risk of finding problems
with the evaporator, expansion valve, condenser, existing hoses that I reused
and AC controls was low. If you start out with a non working AC system
the results could be different.
Thanks to Pantera East for the Sanden compressor and cool mounting bracket,
Pantera Performance for the hose, NAPA for the belts and bearing and great job
done by the team at Frostemp; Juan Suarez, Chuck Ragsdale, David Wiley and
Teri Dutton.
Total AC Project Cost
|
Item |
Amount |
|
Receiver dryer (Frostemp) |
$31.00 |
|
Pressure switch (Frostemp) |
$19.00 |
| Compressor/Condenser hose
(PP) |
$68.70 |
Condenser/dryer hose
(Frostemp)
|
$60.00 |
|
Evacuate system and make hose |
$69.00 |
|
Subtotal Parts |
$247.70 |
|
Tax |
$3.50 |
90 degree flare elbow (Ace) |
$3.07 |
| Idler bearing (NAPA) |
$9.69 |
|
AC fittings and clamps (Frostemp)
|
$69.00
|
| Evac and recharge
(Frostemp)
|
$96.60 |
|
Subtotal Parts and Labor
|
$429.58 |
|
Total Pantera East |
$343.13 |
|
Total AC Project Cost |
$772.71 |
Note: I didn't count the cost of the belts as they are a normal maintenance
item.
August 14, 2002
After completing my system upgrade last September the A/C seemed to
function great and would provide 40 degree air at the dash vents when the ambient
temp was 95 degrees or higher. But, last week I noticed on an one-half
hour drive that the A/C air at the dash vent would creep up to 55 or 60
degrees when the car was underway on the highway. After all of the work
that went into the upgrade I wanted to make sure that it was working correctly
so I took the car back to Frostemp and Juan check the
system.
The system functioned perfectly at idle, there were no leaks
in the system and the R12 level was fine and we had 40 degree air. But, Juan
noticed that the pressure on the low pressure side of the system slowly dropped
some when the engine was ran at 1500 RPM indicating the the expansion valve
was not regulating the R12 flow or the screen is plugged up some in the
valve. Another expansion valve problem indicator was that when the car
was shut off the pressure in the system took too long to equalize between the
low and high side. The dreaded
expansion valve problem had struck! It was working OK last year so I strongly
recommend that the valve be replaced if you are doing a upgrade.
By not replacing the valve during the upgrade it I'm
faced with a cost of $48 for the diagnostic test today and an estimated $282 (includes 2 hours labor)
to evacuate the R12, install the new expansion valve, vac down the system and recharge
the system with my own R12. I have a new expansion valve on its
way from Pantera Performance and will cover the installation during the next
few days. The valve is only $51! I'm going spend some
time getting the gooey A/C insulation off the expansion valve and fitting and
see if I can save a little of the labor cost of the valve
replacement. It looks like it would take Frostemp at least an hour
to get all of the gooey A/C insulation off the valve and fittings.
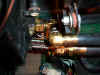
The
expansion valve is located between the end of the high pressure hose and the
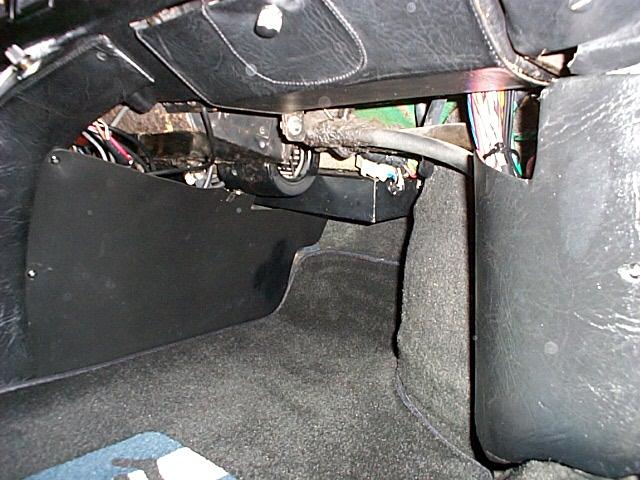
inlet of the evaporator under the dash.
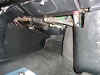
View of the high and low pressure hose connecting to the evaporator.
The gooey A/C insulation
can be seen on the end of the hoses. On the 71 Panteras the A/C hoses go
through the passenger side rocker, up past the fuse box and to the evaporator.
Later cars have the hoses running through the center console.
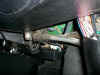
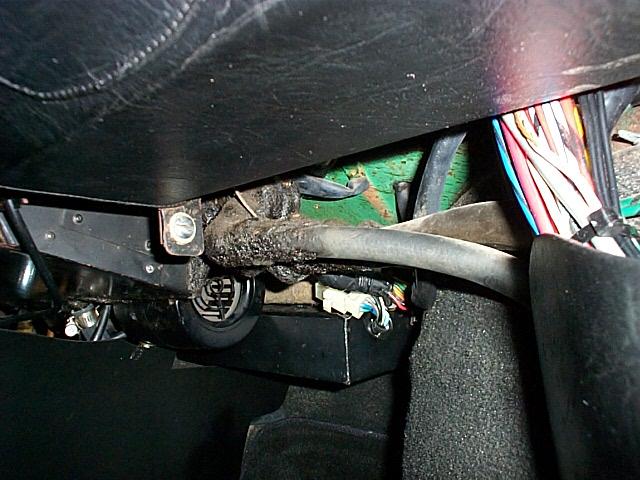
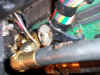
In this view, the expansion valve can be seen covered in gooey
A/C insulation after the right angle turn at the end of the high pressure hose
in the foreground.
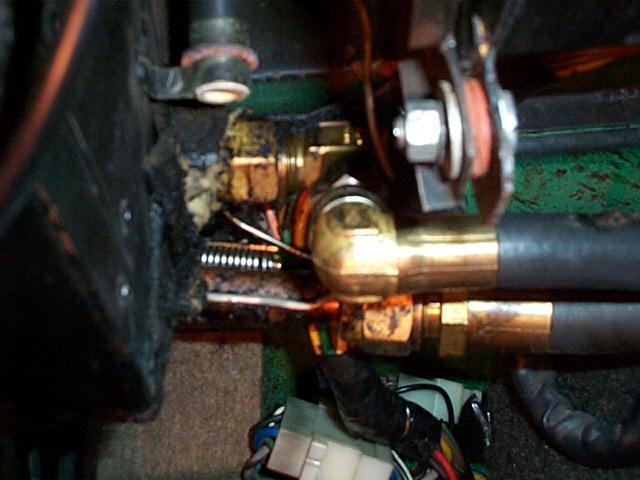
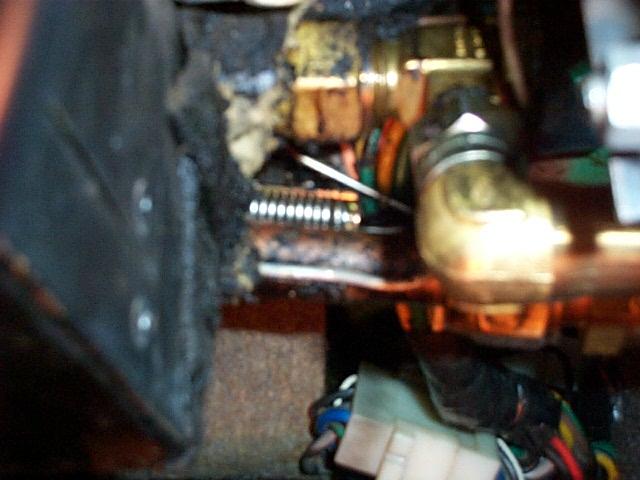
This is a close up view of the hose connections and the gooey A/C insulation
that I need to remove from the high pressure hose end and the expansion valve.
The expansion valve is on the hose at the top of the image. The small
wire going into the insulation is the capillary tube from the deicing
switch.
I guess the
whole world now knows that the original color of my Pantera was the very rare,
exotic, 1970s and exclusive lime green!
Using latex gloves I started pulling the gooey A/C insulation
off of the high pressure line and expansion valve. I found that the insulation
had to be removed from both hoses because of the fittings were so close
together.
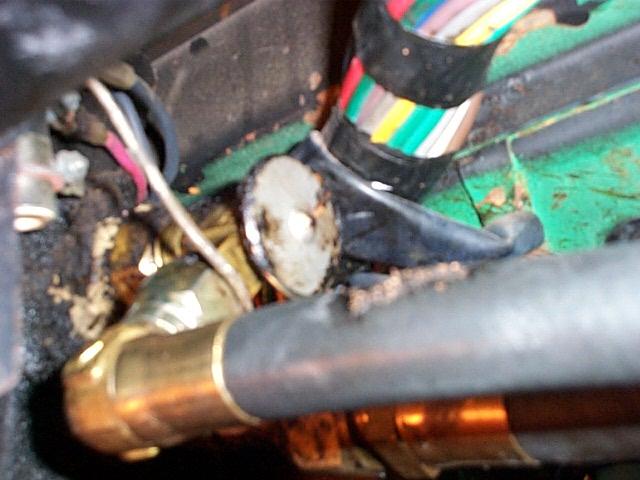
The round diaphragm of the expansion valve is visible in this image. The gooey A/C insulation
is super sticky and wanted to stick to the gloves. I used a little mineral
spirits on a paper towel to clean off some of the goo.

In this view the capillary tube coils of the expansion
valve is visible and is held to the low pressure line from the evaporator with
a clip. The capillary tube from the deicing switch can be seen in front
of the low pressure line. Both the expansion valve and the deicing
switch measure the evaporator temp at the exit of the evaporator.
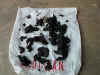
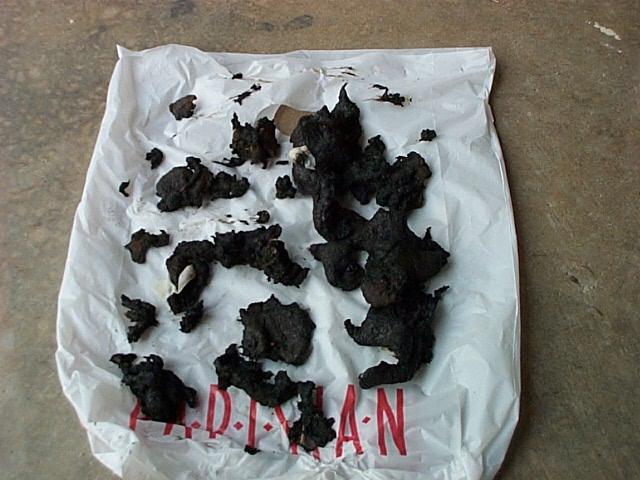
A pile of gooey A/C insulation (cork wrap).
August 17, 2002
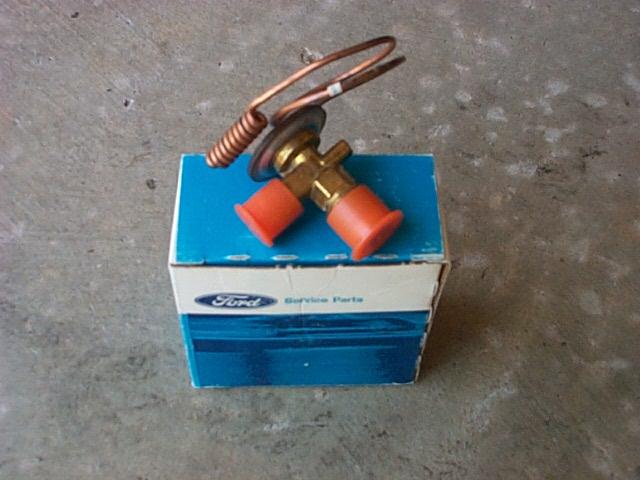
View of the new expansion valve
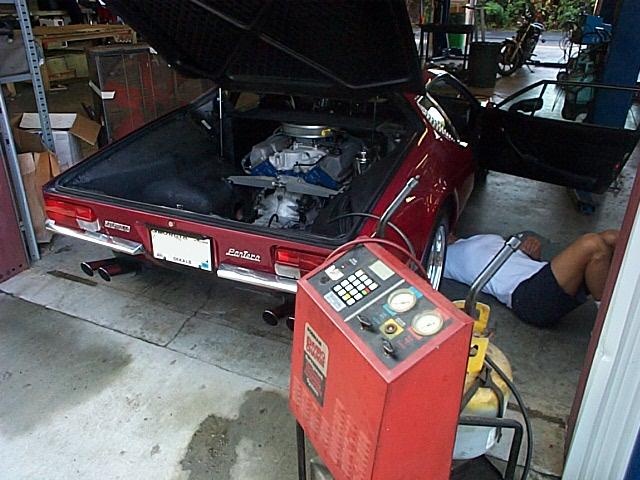
August 19, 2002
Juan hooks up the A/C controller to the Pantera A/C system. The R12 was then removed
from the system so the expansion valve could be removed.

Juan removes the expansion valve. We removed the
floor mat and put some plastic down to protect the floor if oil dripped out of the hoses.

View of the evaporator case with the expansion valve
removed.
View of the old expansion valve with the infamous screen removed from the
inlet of the valve. I'm not sure if the screen is plugged up yet because
some light can be seen through the screen.

View of the new expansion valve installed.
The clip that holds the expansion valve capillary coil to the evaporator pipe
is not in place yet.
The cork wrap is a strip of black sticky insulation
is used to insulate the evaporator pipes.
View of the
cork wrap in place around the pipes and expansion valve.

After the valve installation was complete the system was vacuumed
down, held at a low vacuum for 30 minutes and then recharged with R12. Juan
then check the high and low side pressures with the engine at idle and at 1500
RPM. The pressures looked good and after the engine was shut off the the
pressure equalized at the correct rate. The cost was as follows:
| System check out and trouble shooting |
$48.00 |
| New expansion valve |
$57.00 |
|
Evacuation, expansion valve replacement, recharge and test (1.5 hr)
|
$248.10 |
| Total valve replacement cost |
$353.10 |
| Cost of original system |
$772.71
|
| Total cost of system to date
|
$1,125.81 |
Luckily they were able to evacuate and reuse my
R12!
August 20, 2002
I ran a short 20 minute test on my newly repaired A/C system today.
The sky was a partly overcast and the outside ambient air temp
was 92 degrees and the humidity was 42 percent (super low for Atlanta in
August). The Pantera had been parked in the garage in the shade and the
inside temp was 92 degrees. After starting the car and turning on the
A/C the A/C outlet temp was about 40 degrees within a few minutes.
When underway the hot sun was not flooding
the passenger compartment like on the typical Atlanta day. The driving
was done around secondary roads with the speed not exceeding 50 MPH with both
windows closed. Within 15 minutes the inside temp of the car at the passenger
seat was about 69 degrees and the A/C outlet temp varied
between 40 and 44 degrees with the blower in the low position. It looks
very good so far, but I need to run a test in the hot sun. It was cold
enough inside of the car that my glasses fogged over completely when I got out
of the car and within a few minutes a large puddle of condensate formed under
car from the evaporator drain.
August 21, 2002
I ran an another test today in the hot sun. The sky was a mostly clear and the outside ambient air temp
was 94 degrees and the humidity was 48 percent. The Pantera had
again been parked in the garage in the shade and the
inside temp was about 82 degrees. The A/C outlet temp quickly went down
to 40 degrees after a few minutes of running and the hot sun was shining into
the inside of the car. I ran the car continuously at 60 MPH and after
about 5 minutes the A/C outlet air temp had slowly moved up to 49 to 50 degrees
while the inside of the car stayed around 79 - 80 degrees.
The amount of heat generated in the engine bay by the engine
and A/C condenser on a hot day is incredible. When I got back to the garage I pulled
out the trunk liner and the metal body parts, e.g. wheel houses, the back area
of the car around the trunk liner were too hot to touch. I expect that
the system is working about a good as I can expect for the heat of Atlanta and
for how hot is gets in the engine bay. The heat is so intense I expect
the the condenser is having problems releasing its heat. The new expansion
valve has improved how well the system works but it's hard to compare because
the system's efficacy is impacted by the outside air temp and the hot engine
bay. I'll do some more testing when the weather cools down sometime
later in the year and update this page.
August 25, 2002
I ran an another twenty minute test today. The sky was a mostly clear and the outside ambient air temp
was 88 degrees and the humidity was 57 percent. The sun was
shining inside the car most of the time during the test. The Pantera had
again been parked in the garage in the shade and the
inside temp was about 82 degrees. The A/C outlet temp quickly went down
to 40 degrees after a few minutes of running and the sun was intermittently shining into
the inside of the car. I ran the car continuously at 60 MPH and the A/C outlet
vent temp varied between 40 degrees and 45 degrees and the inside air temp went
down to around 77 degrees. It would appear that the engine bay temp and
outside air temp is impacting the ability of the condenser to release its
heat. Overall I think the A/C is working about the best that can be
expected considering the placement and size of the condenser. The inside
air temp was slowly dropping and I think on a longer drive the the air temp
could go down to the 70 degree mark with the outside air at 88 degrees.
After all this work and expense I'm glad I stayed with the R12 because the
Pantera A/C system needs all the help it can get and the improved efficiency of
the R12 over R134 helps.
August 28, 2002
The early cars (before #1910 or so) had fresh air
supplied to the A/C/Heater box from an elongated vent if front of the
windshield under the grill work (the opening is toward the center of the
car). On these cars the top A/C control lever is marked AIR –
OFF. I’m lucky to be the owner of #1887 that also has the pull for
fresh air knob option that directs conditioned air at your legs. The really
odd thing about the fresh air intakes is that they are down stream of the
blower fan? Because the outside air enters from the top front of the
box, it looks like some of the air could even be flowing in down stream of the
evaporator. I ran a test on the air flow. With the AIR – Off
lever in the AIR position, the blower motor on, the car at rest and found that
a lot of air
is blowing OUT of the outside air vent. It must be blowing some of my
cold A/C air out of the car at rest and getting hot outside air pushed in at
speed when the air pressure is high at the air intake. I think I just
found the cause of why my A/C vent air temp is warmer at speed! It just
might be that I need to close off the outside air. I'll do some more
testing later.
August 29, 2002
I did some more testing and it looks like closing the
outside air control solves the A/C air temp problem. With the outside ambient
air temp at 92 degrees, the
A/C outlet temp stays at 39 to 40 degrees and does not
change with the speed of the car. This hot air bypass problem will only happen with the
early cars that have the outside air intake on top of the A/C box. The
later cars (in the 1974 time frame) that have an outside air control, pick up
the air, up stream from the blower. Another de Tomaso Pantera puzzle
solved!
July 23, 2009
A couple of years ago I noticed what looked
like refrigerant oil on the bottom back of the compressor and there were a lot
of bubbles in the sight glass. I quit using the system, but today I
decided to tackle the apparent leak. I took the car to Sims Radiator in
Atlanta because they have good reputation for A/C work and had Freeze-12 to
recharge the system.
They are located at:
5580 New Peachtree Road
Chamblee, GA 30341
Phone: (770) 451-2004
Hours: M-F 8:00-5:30 Sat. 10:00-2:00
The system already had leak detection dye
and they quickly found that one of the service fittings was leaking at its
seal where it threads into the compressor. They replaced the O
ring on the fitting and vacuumed the system down, tested it for leaks
and it was OK. They added two ounces of oil to make up for oil that was
lost with the leak and charged the system. The Freeze-12
seems to work great and I'm getting about the same outlet temp that I had with
R12.