When I found my Pantera in 1998, I was pleasantly surprised to discover that someone had installed very expensive S.E.V. Marchal E2 Amplilux Headlights. Marchal Amplilux headlights were a popular upgrade to auto lighting systems in the 70s. The low beam (called dip beam) has a cut off pattern on the top of the beam and the high beam is a very intense and focused round beam of light. These lights were standard equipment on a few exotic cars and each light can sell for $400 or more in today's market.
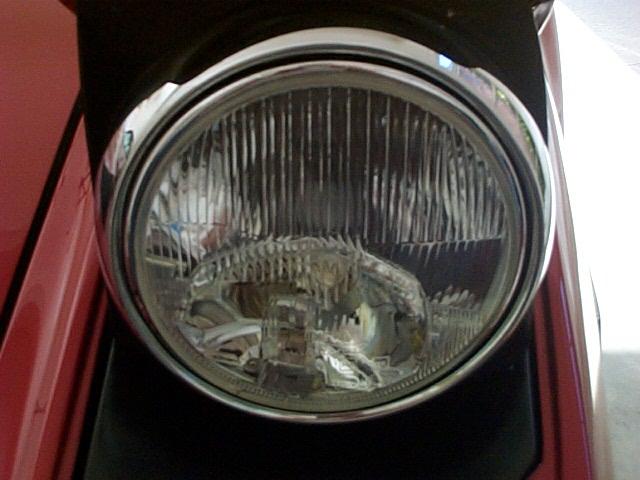
View of the SEV Marchal E2 Amplilux Headlight
The lights were available as 7" assemblies and fit the standard mounting rings and housings used on the stock Pantera. The lens assembly is much deeper, front to back and will not easily fit in cars that have shallow light housings. The dip and the full beam each use a single filament halogen bulb. Like most all other light units, only the upper half of the reflector is used for the dip beam. Rather than using a separate light assembly for high beam (like the four light cars of the 60s and 70s) there is another smaller reflector located in the unused lower area of the light. The lower reflector uses a H3 bulb in its focal point to provide the high beam and the dip beam uses a H1 bulb. The dual reflector and dual bubs engineered into each light assembly made them very expensive to manufacture but the Marchal lights were the very best solution until dual filament halogen bubs were available in the mid 70s. The high manufacturing cost and the dual filament halogen bubs eventually killed the production of the lights. Although the Marchal Amplilux lights have been around for a long time the lights still provide a very unique cut off low beam and a super intense, far reaching, pencil like, high beam that is not easily duplicated in a single light assembly. That is if you can find them and have the $$$!

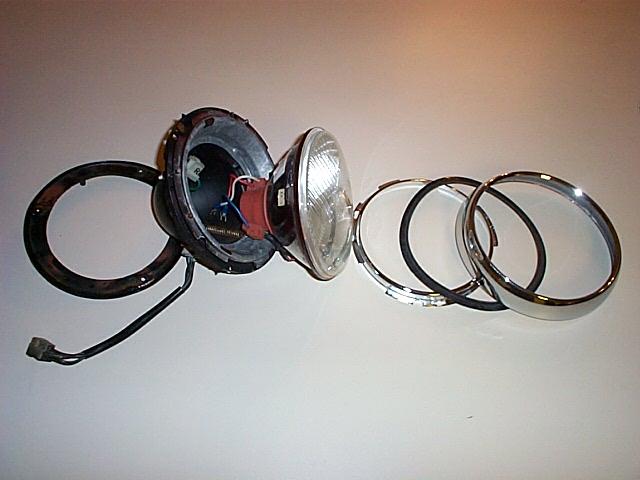
View of the Marchal lamp and the standard Pantera mounting system showing the Marchal lamp.
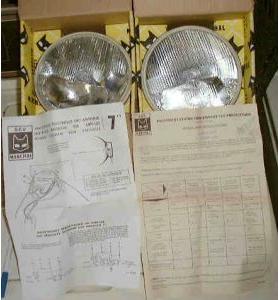
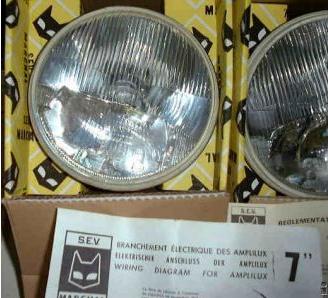
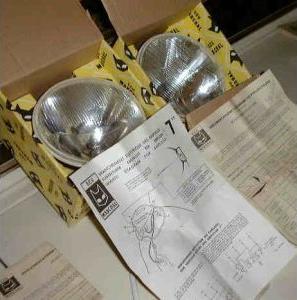
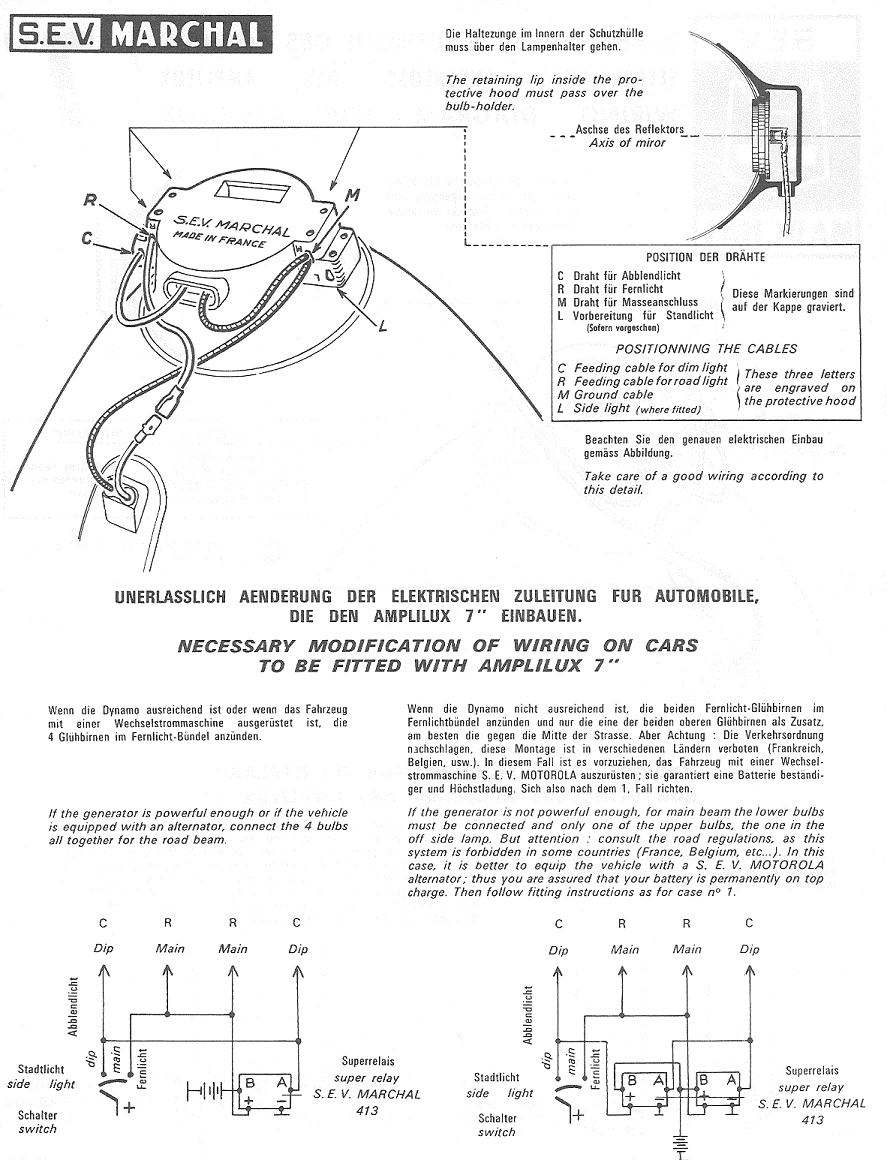
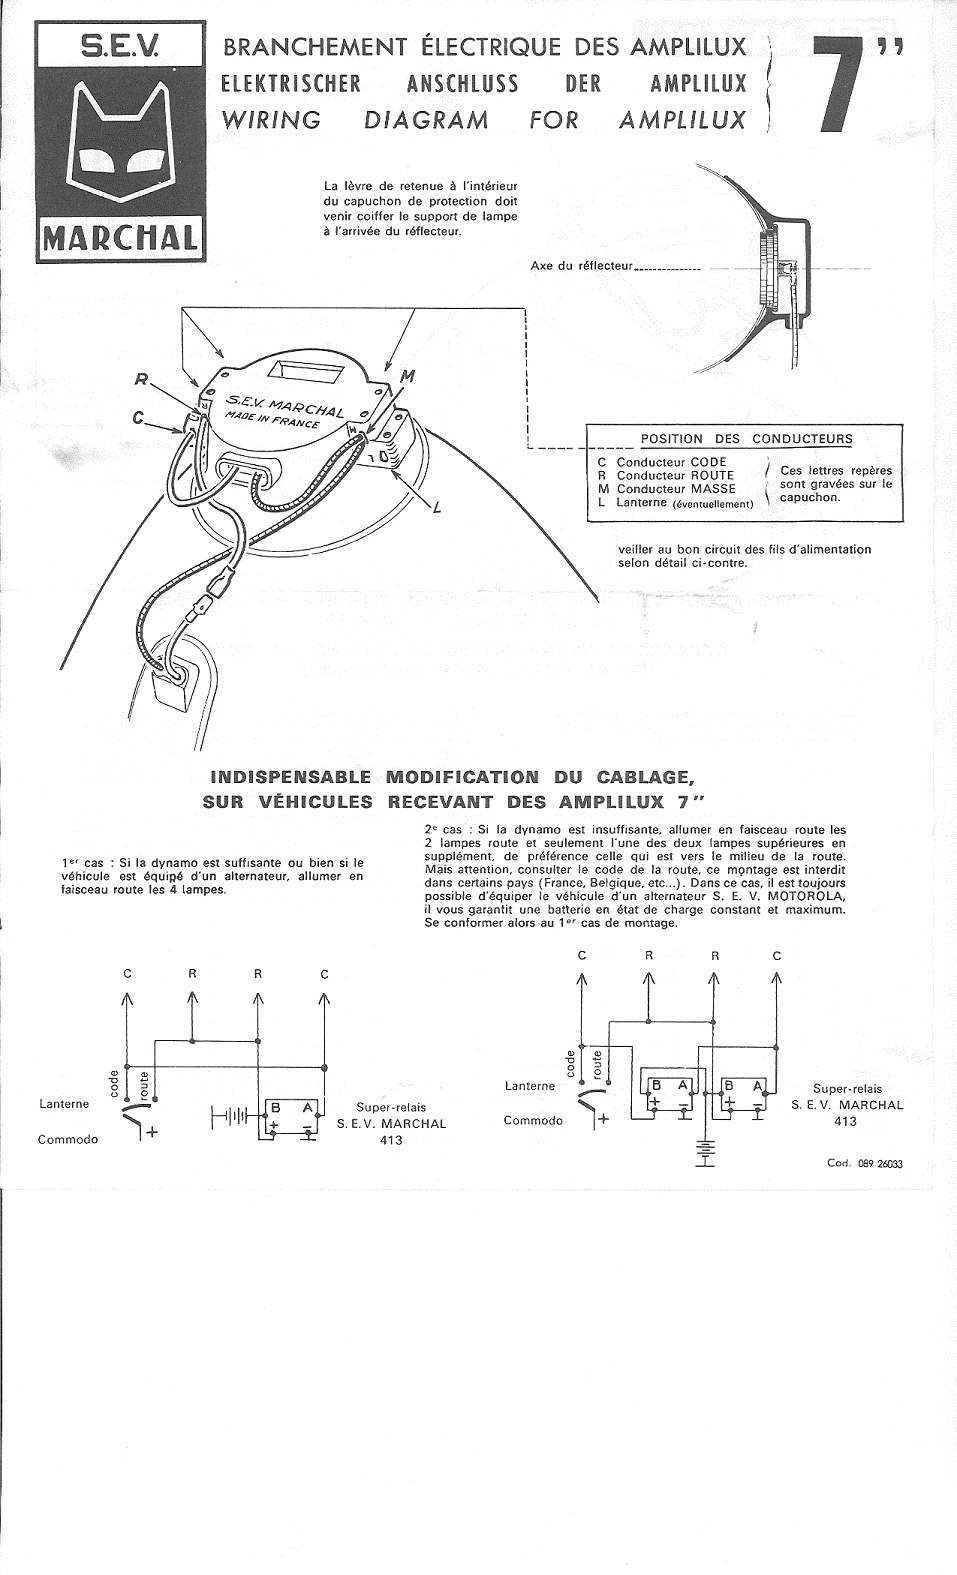
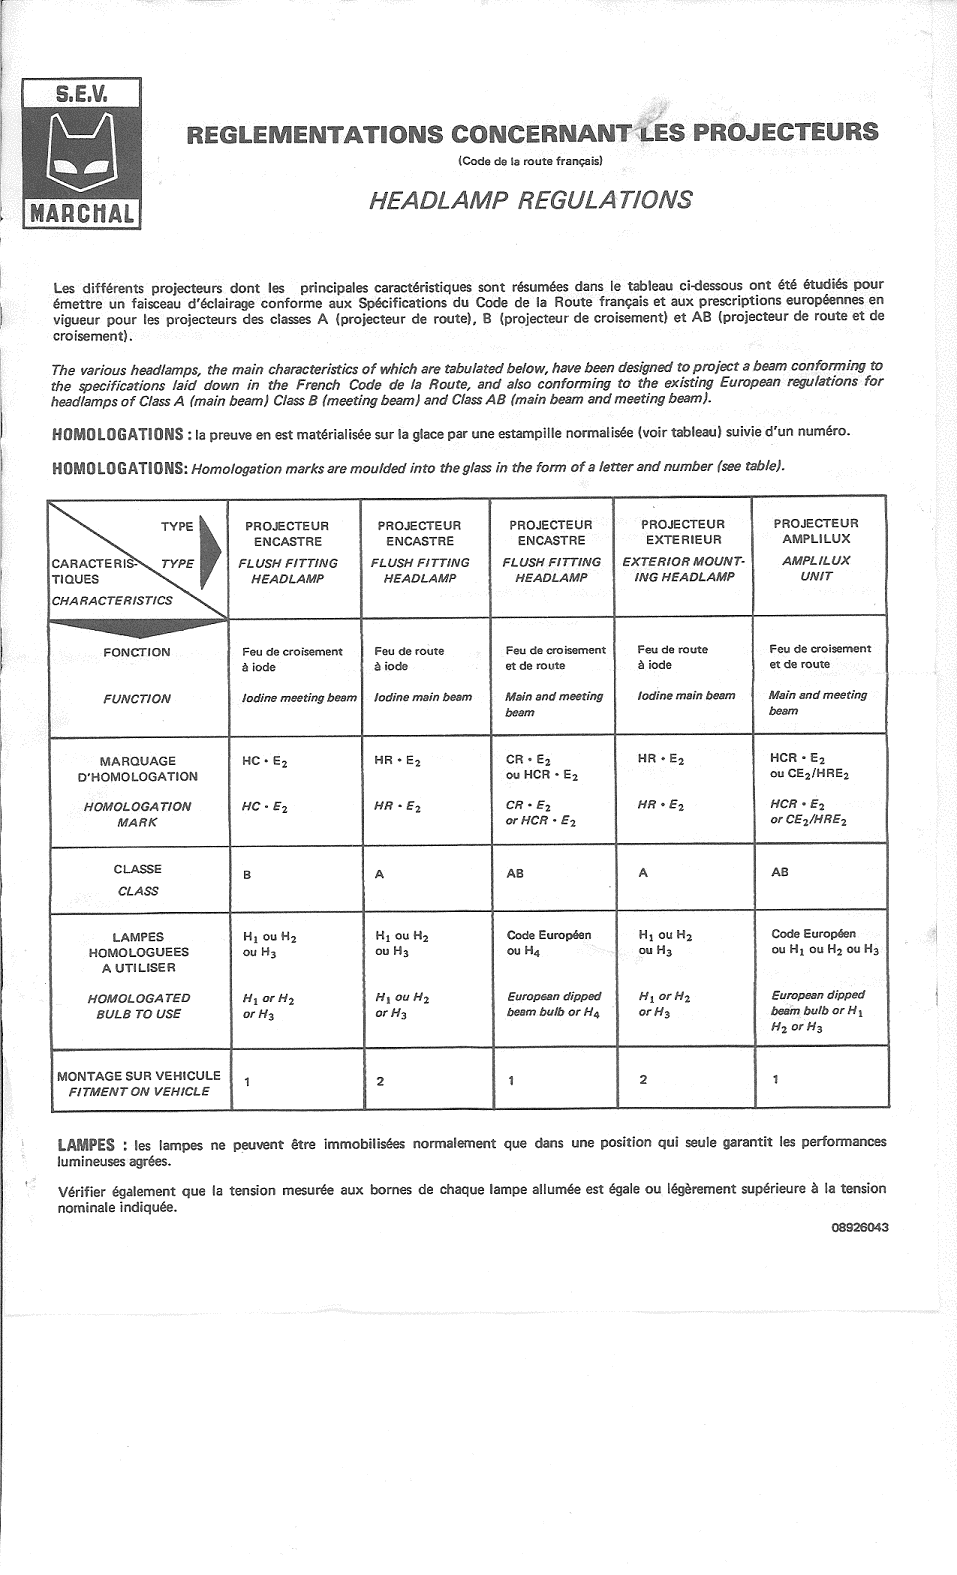
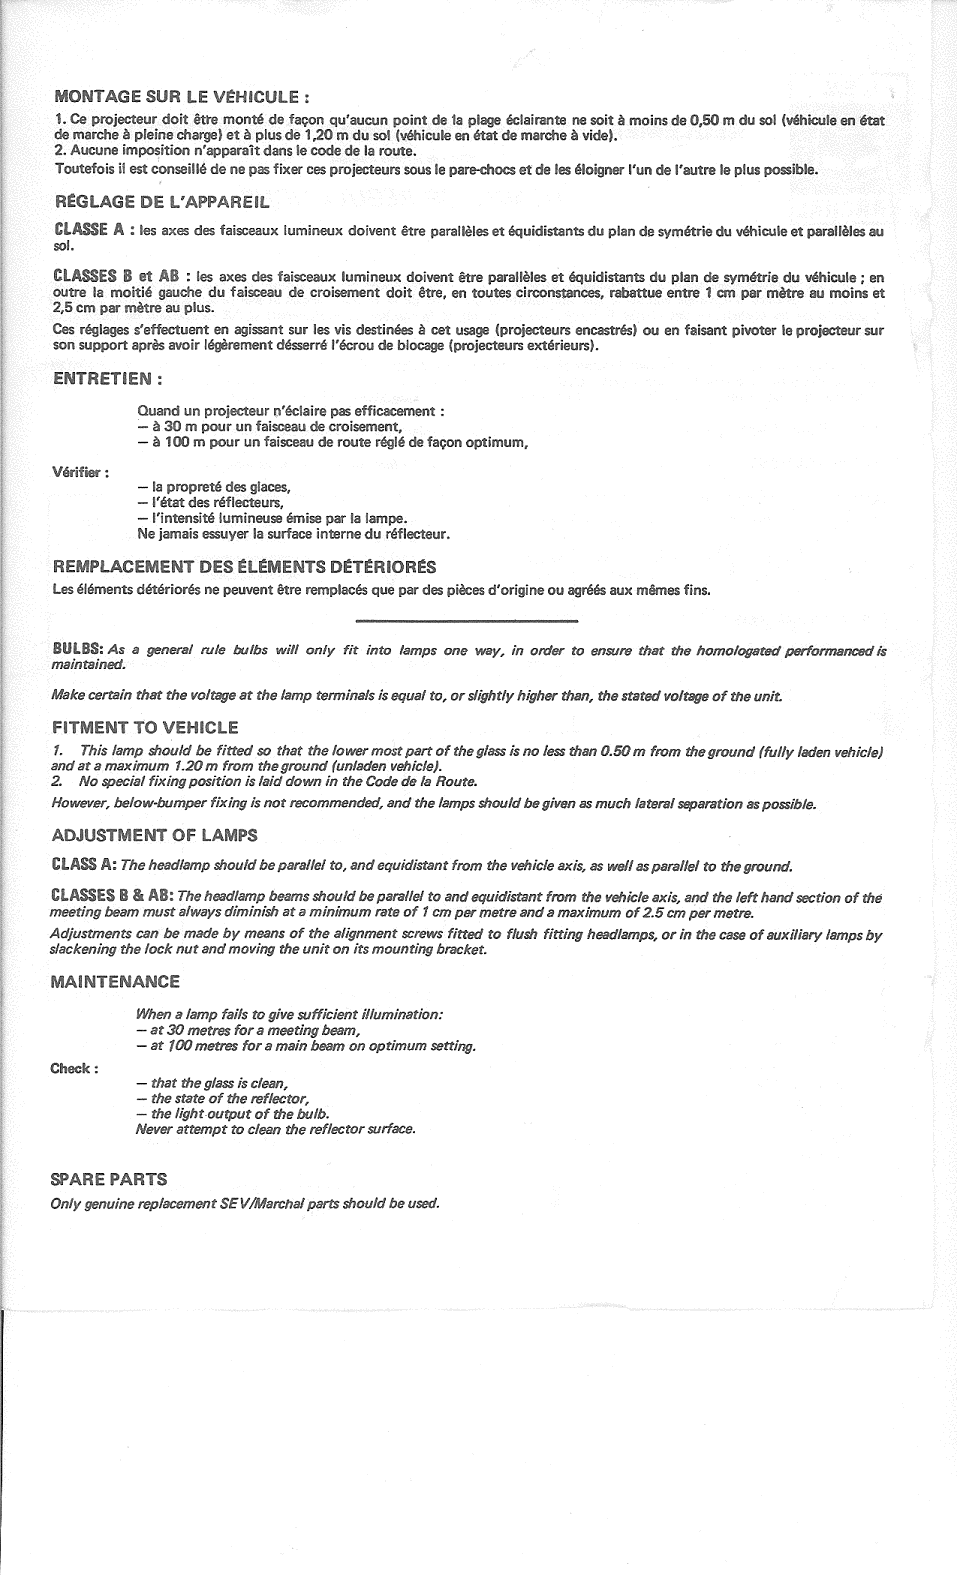
The following images are a set of the original Marchal instructions and specifications that came with the lights and were provided by Dick Koch.
My car has the headlight relay modification that offloads all of the the headlight current load from the headlight switches. On my car the dip light is extinguished when the high beam is selected.
Beam Alignment
The Marchal headlights require manual alignment because of the reflector design and because of the intense light beam created by the Marchal lights, it is very important to make sure they are correctly aimed to prevent blinding of oncoming drivers. This Daniel Stern Lighting website has an excellent article on how to do the manual alignment
An additional note from Daniel Stern Lighting about adjusting the Ampliluxes:
There are additional aim factors to consider when you run Ampliluxes!
You might not have been aware that the Amplilux is the _only_ 7" round lampset on which the high beam aim can be adjusted independently of the low beam aim, which is very helpful in dialling in the headlighting beam distribution on vehicles used in nonstandard conditions (off road, competition, etc.).
Lift away the red oval rubber flap that weather-seals the high beam (H3) bulb. Look closely at the very bottom of the oval cutout into which the rubber flap fits, and you will see a small grubscrew with pinkish-red sealant on it. This is the high beam aim adjusting screw. It should've been set to the correct baseline aim adjustment from the factory, but for some strange reason they frequently set them to the low-limit position at the factory. This causes the high beam hot spot to hit the road much too close to the car (lower than the low beam cutoff), so must be adjusted.
The sealant will make it a little difficult to turn the screw; you'll need a small flat-bladed screwdriver with a large enough handle to gain some leverage. Sit or stand at a workbench about 25 feet away from a vertical wall in an area with subdued ambient light. Apply power to the low beam
(H1) bulb by a convenient temporary means and shine the beam at the wall.
Note the cutoff and "kink" where the cutoff begins to rise upward to the right. Now apply power to the high beam (H3) bulb, with the low beam still illuminated. The grubscrew needs to be turned clockwise until the centre of the high beam "hot spot" is just above the cutoff & kink. If you'll count the number of turns of the grubscrew from its fully slacked-off position to the correct setting, this will make it faster to adjust subsequent units. This separate adjustment provision is supplied so that owners of off-road and race vehicles can adjust the high beam independently to their own special purposes. Once you've got the grubscrew set correctly to its baseline position just above the cutoff, you can adjust it upward or downward to suit your particular needs. Once you've got it in position, you may want to apply a small dab of removable-grade anaerobic sealant (e.g. Loctite) so that it stays put.
Daniel can be reached at Daniel Stern Lighting He has found and purchased the last supply of Marchal Amplilux 7 lights and has them available at a reasonable price.
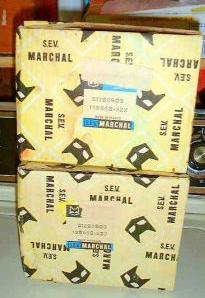
NOS Marchal Lights
The following images show a set of NOS Marchal headlights in their original boxes with the instruction sheets.