The Pantera Place
"Your de Tomaso
Connection"
1971 Pantera Bumpers
By Mike Dailey
About three years after I bought my Pantera I read a note on the de Tomaso forum that one of the guys had discovered that there were two different types of the early straight cut 1971 Pantera back bumpers. In this case, the two different types were on the same car bringing the issue to his attention. They are called straight cut, because the end near the license plate is cut off straight rather than rounded like the later bumpers found on 1972 cars.
I thought that it was interesting that two different bumpers could be on a car without being readily noticed, until I looked at my own car and discovered that it too had miss matched bumpers. I found it amazing that I hadn’t noticed it before, but once I saw them, the problem would not go away and I started hunting for two matching bumpers. It took a couple of years to find them!

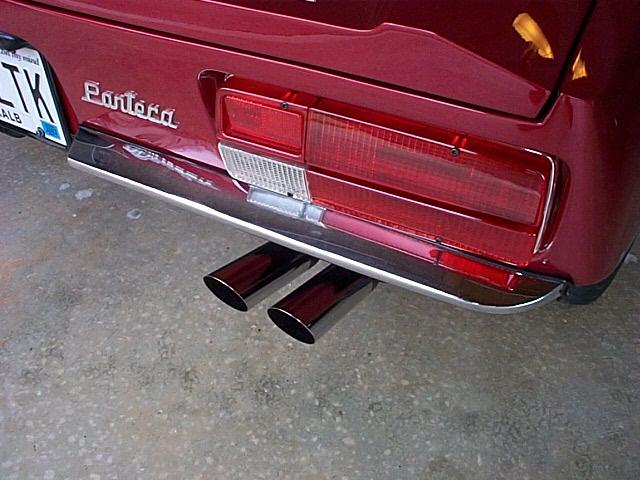
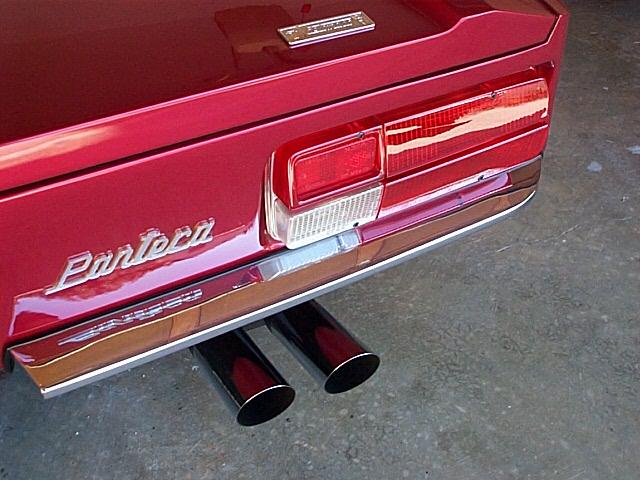
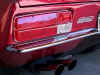
The image on the left shows the later wrap around type bumpers that were on the 1971 cars without the early flat deck lid. The image on the right shows the correct bumper for my car, #1887 with the flat deck lid. Note how the bumper on the left wraps slightly around the outside edge of the body and the one on the right does not. The left bumper was in very good condition but the right side bumper was only in OK shape.

Images of the new correct bumpers installed. It took a couple of years of hunting to find the correct bumpers because they are almost imposable to find. I found one NOS bumper on eBay for $215 and one re-chromed bumper for $348 that a Pantera parts vendor had in stock. Typically the vendors charge in the $450 to $550 range for each bumper. Pantera East supplied the new rubber trim that goes around the edge of the bumper. I used Amazing Goop adhesive very sparingly and glued only the last inch or so of the trim to the bumper where it wraps around on the bottom side of the bumper. It was glued after the bumper was mounted. The Goop was worked into the groove in the rubber trim with a paper clip and then pressed in place and the excess glue cleaned off.
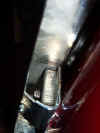
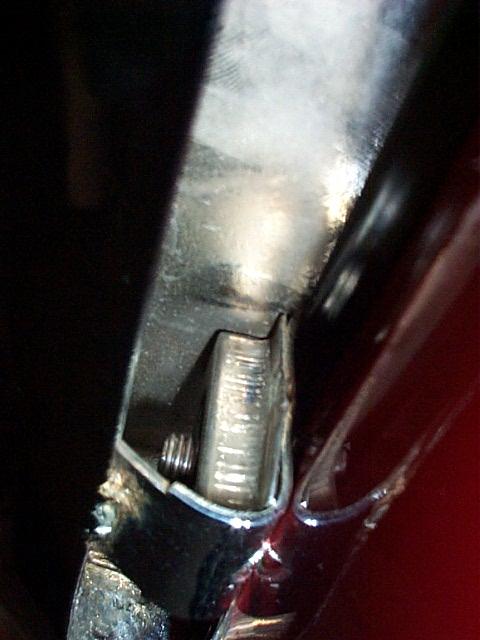
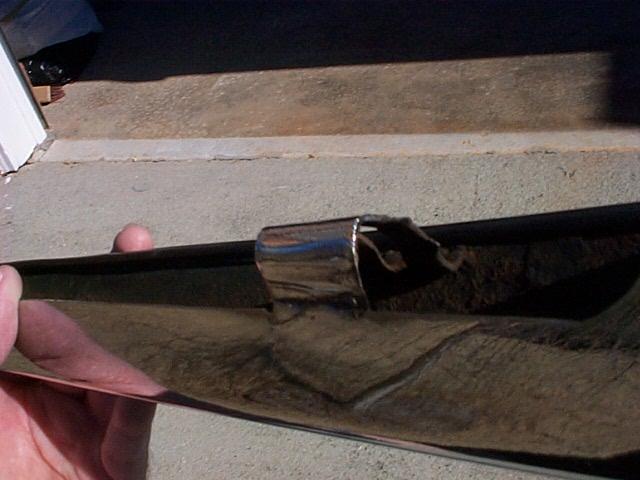
When installing the bumpers it is important not to over tighten the mounting bolts and make sure the bolt lengths are correct so they do not hit the inside of the bumper. The image on the left shows the underside of the bumper with the mounting bolts in place. The reflected image of the bracket in the body paint to the right of the actual bracket makes the image a little confusing. Notice how the square nut is captured inside of the metal boxed area on the bracket. The image on the right shows how over tightening will bend the mounting bracket and the box that holds the nut will fall off. The mounting bolts need to be just snug enough to keep the bumper from moving around on the body of the car.