The Pantera Place
"Your de Tomaso Connection"

Inboard U-Joint Bolt Removal

By Bill Taylor


All of the technical information and product information posted on this website is offered as general information and is not recommended, endorsed, guaranteed or presented as professional technical information.  It is recommended that you seek professional help for the repair or maintenance of your car.  Improper self-maintenance or repair of your car can result in serious injury and or death.  Use of this information is done at your own risk.   
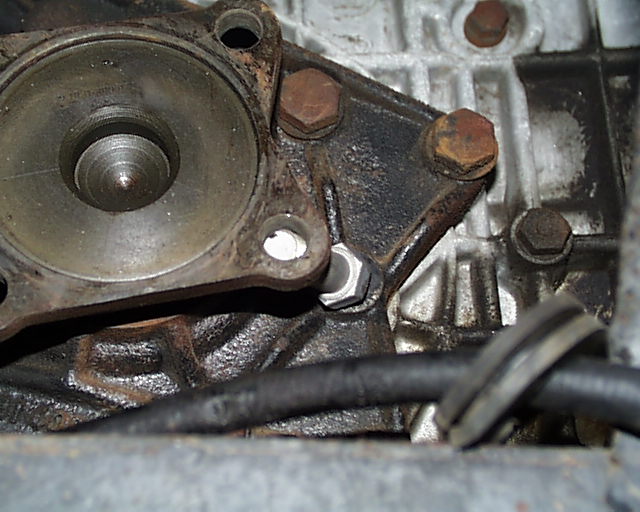
If the U-joint bolts of the inboard u-joint flange have been inserted from the ZF side, getting them out is a bit tricky ……. but it can be done. Here are two methods. Method 1 is dependent on the actual size of the cast reinforcement ribs on the side cover of the ZF. It worked on my car. Your mileage may vary. Method 2 should work on all ZFs.
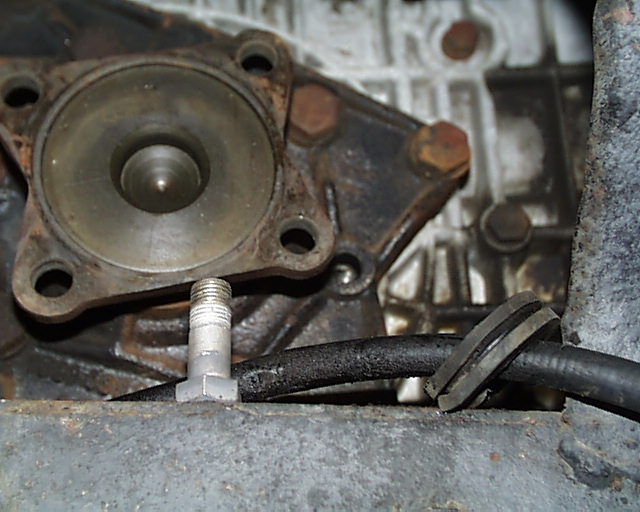
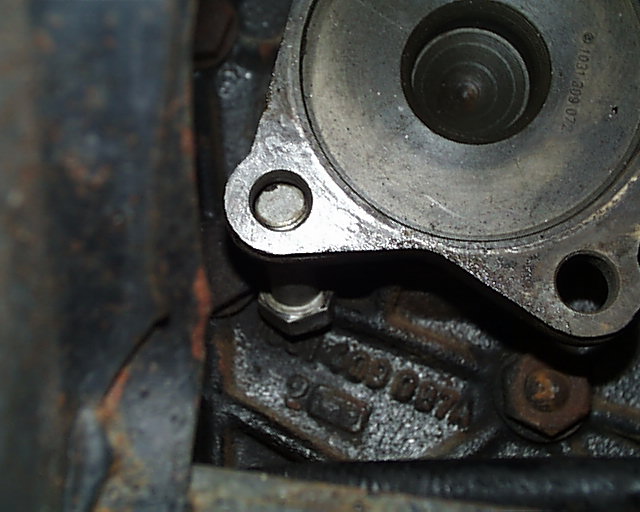
Method 1

On my car the forward bottom cast reinforcement rib adjacent to the bolt head shown in the picture below is lower than any of the other ribs.

 Bill Taylor Method 1 Step 1.JPG (68012 bytes)

Rotate the bolt to be removed so it is over the junction of the rib and the side cover bolt as shown in the picture below.  
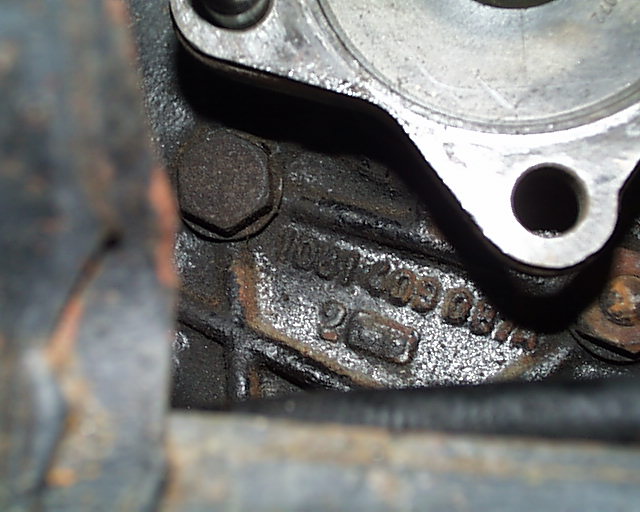
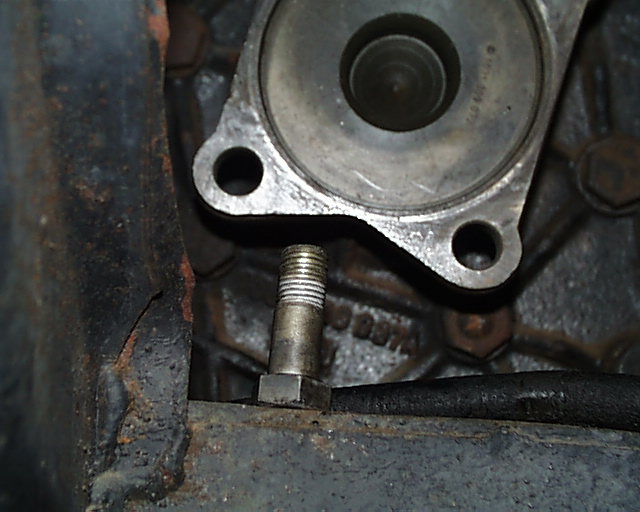
Bill Taylor Method 1 Step 2.JPG (69625 bytes)

Move the bolt head toward the ZF case as shown in the picture below.
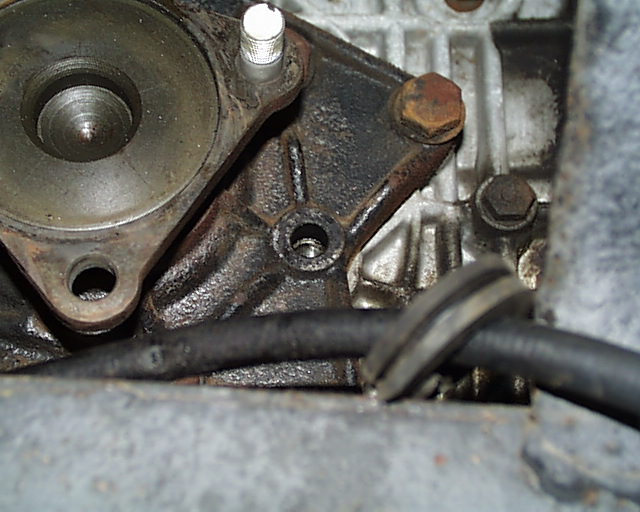
 Bill Taylor Method 1 Step 3.JPG (68003 bytes)

Rotate the bolt slightly and move it around slightly. You are looking for a “sweet spot” which you will find when the bolt sinks as far as possible toward the ZF case.   Rotate the u-joint flange clockwise while holding bolt head against the ZF case. The bolt should slowly be extracted from the flange as shown in the picture below.

Bill Taylor Method 1 Step 4.JPG (65866 bytes)

And the proof is shown below.

 Bill Taylor Method 1 Step 5.JPG (65190 bytes)

But, your castings may be different from my sample of one.
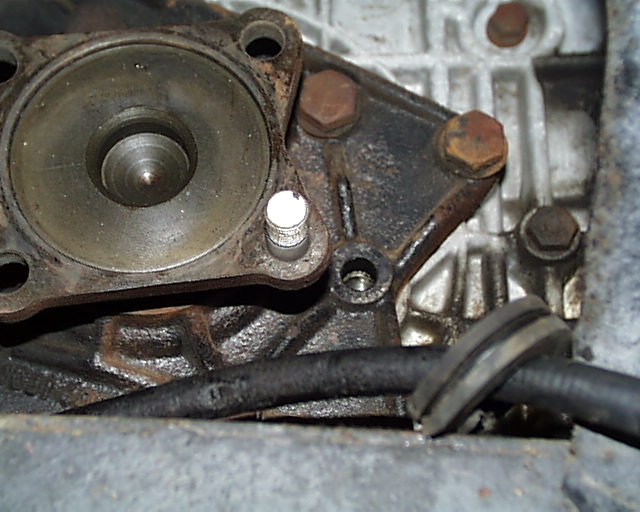
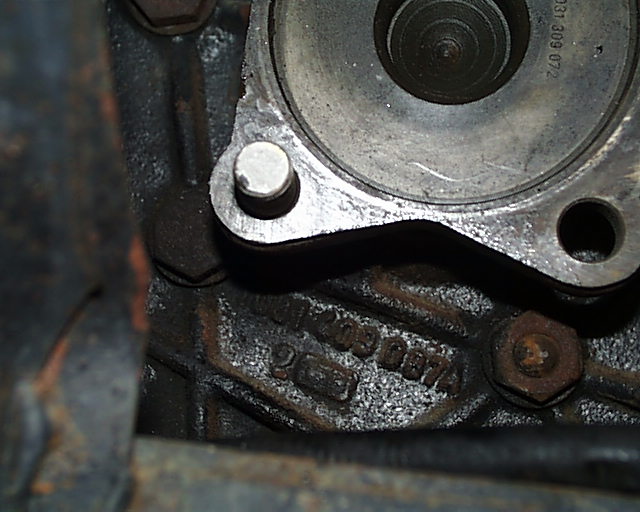
Method 2

Using a 17 mm wrench, remove the ZF side cover bolt shown in the picture below. This is a blind hole in the ZF. No fluid will leak out.

 Bill Taylor Method 2 Step 1.JPG (69619 bytes)

As shown in the picture below, rotate the bolt to be removed clockwise until it is just past the junction of the casting ribs and the hole from which the ZF bolt has just been removed.

 Bill Taylor Method 2 Step 2.JPG (69644 bytes)

Tilt the bolt in the direction of the hole from which the ZF bolt has been removed as shown in the picture below.

 Bill Taylor Method 2 Step 3.JPG (69828 bytes)

Slowly rotate the u-joint flange clockwise while holding the bolt head against the ZF case as shown in the picture below. The bolt will be rotated out of the flange.

 Bill Taylor Method 2 Step 4.JPG (70999 bytes)

And the proof is shown below.

 Bill Taylor Method 2 Step 5.JPG (69930 bytes)

Neither of these methods requires strength. They require somewhat of a “touch” to sense when the bolt is in the “sweet spot” so it will literally fall out of the flange.