The Pantera Place
"Your de Tomaso
Connection"
Replacing A Arm Bushings
By Fred Terry
|
All of the technical information and product information posted on this website is offered as general information and is not recommended, endorsed, guaranteed or presented as professional technical information. It is recommended that you seek professional help for the repair or maintenance of your car. Improper self-maintenance or repair of your car can result in serious injury and or death. Use of this information is done at your own risk. |
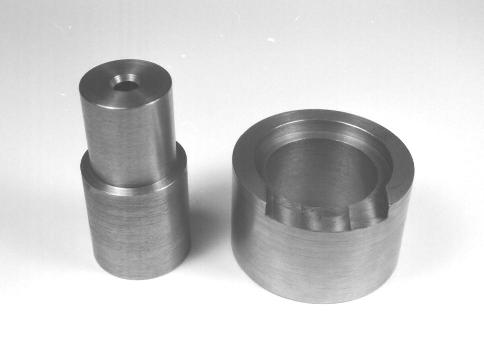
Fred Terry's bushing removal tool
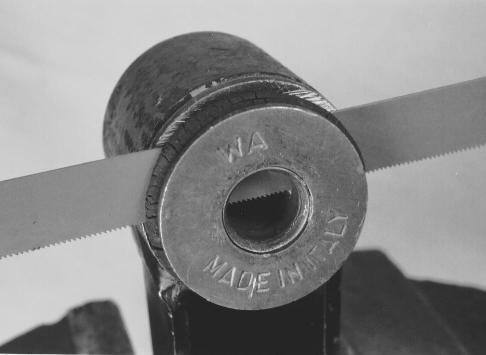
Step one – Using a 32-tooth hacksaw, remove the outer bushing flange from the bushing. Make the cut between the rubber and the flange of the bushing’s outer metal sleeve. Liberally apply WD-40 as a lubricant on the saw blade to allow it to run freely in the rubber. Once the flange is removed, trim off any remaining rubber using a razor blade or utility knife.
Step two – Remove the rubber bushing and inner metal sleeve by boring a series of closely spaced holes with a 5/32" drill bit around the perimeter on the inner metal sleeve. Once enough holes have been drilled, the rubber bushing and metal sleeve can be removed by grasping the inside flange with slip joint pliers and pulling with a twisting motion.
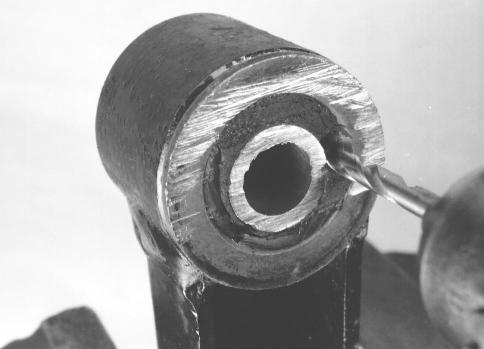
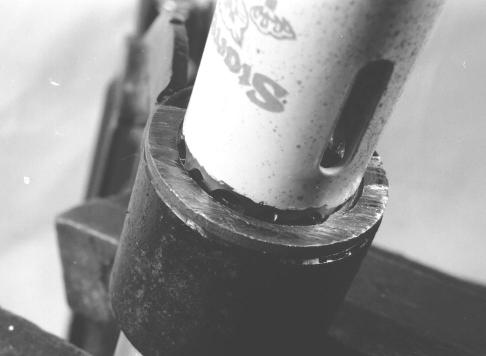
Step three – Install the pilot/driver in the outer metal bushing sleeve and lightly clamp it in a vice. Lubricate the pilot shaft of the 1-1/8" hole saw and insert it into the pilot hole of the pilot/driver. Run the saw at a slow speed to avoid chatter and make a cut in the flange at least 1/16" deep.
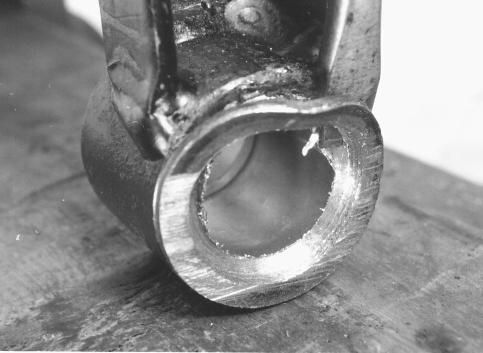
Step four – Place you’re A-arm on a wooden block and position the blade of the chisel in the seam between the flange and the A-arm. Drive the chisel to cut the remaining metal attaching the flange.
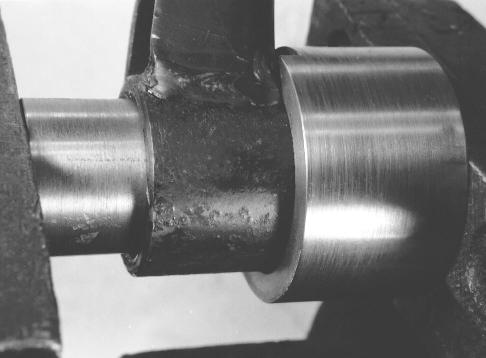
Step five – Install the pilot/driver in the outer metal sleeve and locate the driver support on the A-arm so its edge relief indexes with the weld on the a-arm frame member. If the edge relief is too narrow to allow the A-arm to fully seat, rotate the driver support end for end and center it to the bore of the sleeve. Clamp the assembly in a vice or C-clamp and apply pressure to drive the bushing out. Using a hammer has little value and will only serve to destroy your tools. If the sleeve is hard to start, apply a small amount of heat to the A-arm with a propane torch. Thirty seconds should be ample. Reapply pressure and drive the bushing out.
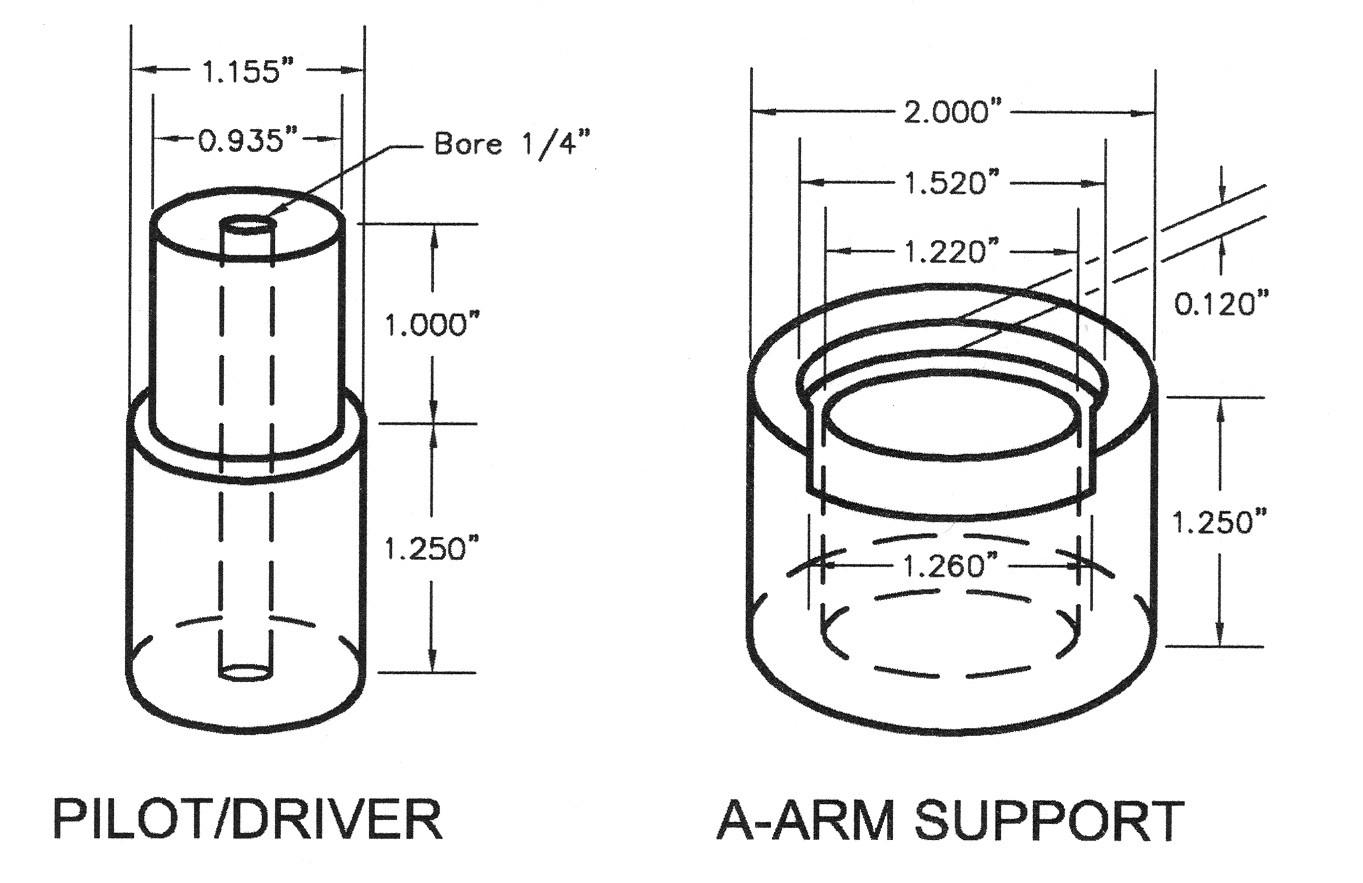
In addition to the Pilot/Driver and A-arm support, a modified hole saw and a sharp chisel are required. The chisel should be small, about 3/8" in width with a bevel on one side only. To keep from marring the a-arm, it is important that one side of the chisel is flat. One can be made by grinding a 45 degree bevel on one side of an old flat blade screw driver. Grind slowly so as not to destroy the temper. The hole saw is 1-1/8" dia. such as a Starrett Bearcat. The mandrel should be modified by replacing the ¼" drill bit with a ¼" rod. This will allow the rod to run as a pilot shaft in the pilot/driver without deforming the pilot hole. A stout 5" vice or heavy C-clamp is necessary to drive the bushing out. I understand Marino Perna of Pantera East may have a set of these tools for loan or sale (The bushing tool is available with the purchase of Pantera East bushing set, ED go to vendor links page) .
Drawing of Fred Terry's bushing tool. Click image to view.