The Pantera Place
"Your de Tomaso
Connection"
Pantera Hydraulic Clutch System
By Thomas Bechtel
Spongy clutch pedal? It’s likely one of two causes:
1) Air in the system.
2) Bad clutch master seals.
Contrary to what you have heard, the proper way to purge air from the clutch hydraulic system involves two people! Here is how to do it:
Connect a hose (preferably clear so you can see bubbles) to the bleed screw on the slave cylinder located near the clutch. Place the other end of the hose in a jar or cup filled enough with clean break fluid to cover the end of the hose (about 2" up the side of the jar with fluid). Remove the cap from the master cylinder reservoir, and make sure the level is topped off. Leave the cap off. Now the fun begins!
Have your buddy sit in the drivers seat with his (her) foot on the clutch. DO NOT press the clutch yet. At the rear of the car, at the clutch slave, slowly loosen the bleed screw ½ to ¾ turn. The trick is to open the screw just enough to let fluid slowly flow. Any more than that and you can actually introduce more air into the system, by air entering around the threads. Have your buddy slowly press the pedal to the floor, and hold it there. You should see fluid flowing down the drain the hose into the jar.
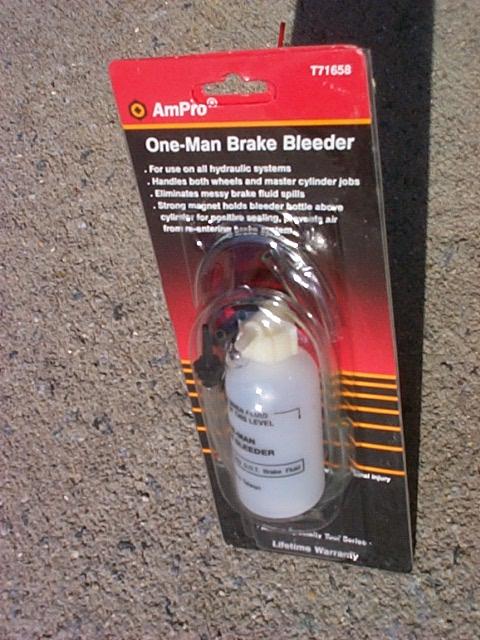

(Or you might want to pick up a one person bleeder kit shown above on the left and installed on the right, Ed.)
If you don’t, open the bleed screw just a wee bit more. Along with the fluid, you will likely see the notorious bubbles that are fouling the system. While the pedal is still held to the floor, close the bleed screw. Repeat process until there are no more bubbles. Remove bleeder hose. Tighten bleed screw. Top off master. Replace master cap.
Clutch still spongy? The next step is replacing the "stock" clutch master seals.
Replacing the seals on the clutch master cylinder is easy in itself, it’s just getting to the #$%^! thing that is a royal pain.
Assuming that you haven’t opted for one of those new aftermarket aluminum replacements (recommended, because they are more serviceable and of better design), and the stock unit is not to far gone (pitted, corroded on the inside), we’ll walk through the process.

Cover the fenders up front to protect them. Remove the battery. Siphon all fluid from the clutch master reservoir. Remove the hydraulic line that runs to the slave from the clutch master. Get a catch rag ready for residual fluid. Cover the now exposed end of the H line to protect it. There are two nuts that hold the master unit to the firewall. These nuts will release the unit but first the mechanism that attaches the master to the clutch pedal mechanism must be disconnected. Climb up under the dash and locate the horseshoe and pin mechanism (clevis) that attaches the clutch pedal throw shaft to the clutch master input shaft. Simply remove the cotter pin and pull the retaining pin through the horseshoe to remove it. Hold on to those retaining washers! There are actually two throw clevis’ that attach the pedal mechanism to the clutch master. Only the one needs to be disconnected from the side that joins directly to the clutch master throw arm. (More on this later)
Unloosen the two 13mm clutch master retaining nuts. (On the battery side of the firewall). It may be easier to remove the nuts if you first remove the fluid reservoir cup that is in the way. (I was able to do it without) There is a nut at the base of the cup. Turn counter clockwise to remove, go easy the cup is fragile.
Now for the retaining nuts: Guess what...the bolt shafts will probably begin to spin as well otherwise making it impossible to get the nuts off! Climb back under the dash and put a wrench on the bolt heads to hold them, while a buddy twists the nuts on the other side. You may have to further disconnect the clutch pedal clevis mechanism (the other half of the dual clevis) to get access to the bolt heads.
Once the nuts are free, gently pull the master through on the battery side of the firewall. Remove the rubber dust boot attached to the master input shaft. There is a retaining ring on the master that once removed gets you into the guts of the master. It can be removed with A pair of needle nose pliers. Once the ring is removed, a retaining washer will fall away and the hydraulic plunger and actuator spring will follow. That’s All there is! Notice on the hydraulic plunger that there are two seals. These are the culprits. The one normally closest to the front of the car is basically a round washer. Simply get a small tool and pry it off. The rear seal is actually a flange cup type washer, pull it off the same way. Notice which way the cup is facing, it must be replaced the exact same way. (Cup facing the fluid). Flush the bore with carb cleaner and completely air dry. Replace new seals on plunger. Lube the seals with new brake lube (or soak them overnight in DOT 3 fliud), and reassemble. IMPORTANT NOTE: If the clutch master bore is pitted and corroded, its unlikely that seals will fix the problem. The fluid will seek its way around the pits, causing lack of pressure. See rebuilding the clutch master cylinder.
Replace all parts in reverse order described above. Bleed the system as described earlier.
If that dosent fix the problem the next step is replacing the master clutch cylinder with an after market unit.
OK, you’ve tried every thing to fix that spongy clutch pedal and decided to replace the entire unit. Great idea! In fact, don’t waste any time replacing seals on the stock unit. It’s simply not worth the hassle. Spend 80$ on a nice new aluminum billet unit from Hall (other vendors have them too, including stock replacement units that bolt right in, ED) and life will be much better...Trust me. This unit is nice! ¾" bore, billet cap, serviceable, can be polished, and is ready to bolt in. Well, almost.
The fitting on the end of your existing hard clutch line must be removed and re-flared. This is easy, But you must be careful. More on this later.
After removing the existing clutch master as described in the previous article, it is now time to prepare the new unit for installation. The distance from the clutch pedal linkage to the clutch master on the new unit is important and must be as close to the old unit as possible.
Notice that the old clevis mounted on the old cylinder must be unthreaded and mounted on the new unit. DO NOT UNTHREAD IT YET! All that is critical is to get the same overall extension length of the two units to match. Here’s how to do it. On a flat surface, hold the old unit flush against the flat surface against the master mounting surface. Now measure the distance from the mounting surface to the end of the clevis. This is the length to transfer and "dial in" to the new unit.
Remove the old clevis, mount on the new unit, hold against the flat surface, and adjust to the measurement just taken. Lock it down. Finished. A little more prep work and we can bolt the master in the car.
To prepare the old clutch line for the new fitting, the old end fitting must be removed.
Being a hard line, there Is not much extra line to play with so cut as close to the very end as you can to remove the existing flair. A tubing cutter is great, but be careful not to cut off too much line, or you will come up short! Mine was so short that I had to use a hack saw on the very end so as not to "waste" any line length. The hacksaw method can get filings and dust in the line so be careful. (I put a qtip in the line first, cut off the end, then fished out the qtip, which brought all the filings and dust out with it) Slide off the old flair nut, slide on the new one, and flair the end of the clutch line tubing with a ¼" tubing flair tool.
Bolt in the new master unit, connect linkage under the dash. Attach hard line flair fitting to the master. Fill master with DOT 3 brake fluid. Bleed as described in previous article. Now the important part...adjust SLAVE cylinder linkage at back of car to allow 1-1 ½" clutch pedal free play. Start car, and slowly put in gear. Make sure the clutch is disengaging properly, with no grinding. If is not, continue to adjust slave linkage. This adjustment may need maintenance over time as the clutch wears, changing the setting.
Editor Note:
See this page on the clutch free play adjustment.