The Pantera Place
"Your de Tomaso
Connection"
Door Windows Which Go Fully Down
By Bill Taylor
Instructions for gaining access to the window mechanism, supporting the window glass, and adjusting the window guide rail system can be found in the Aerostar Power Window Motor Conversion and Taurus Power Window Motor Conversion articles. Reading these articles is strongly recommended before starting this modification.
The OEM Pantera window mechanism does not allow the window to retract fully into the door. Figure 1 shows a typical Pantera door window at the down travel limit. The window stops with approximately two inches of glass exposed.
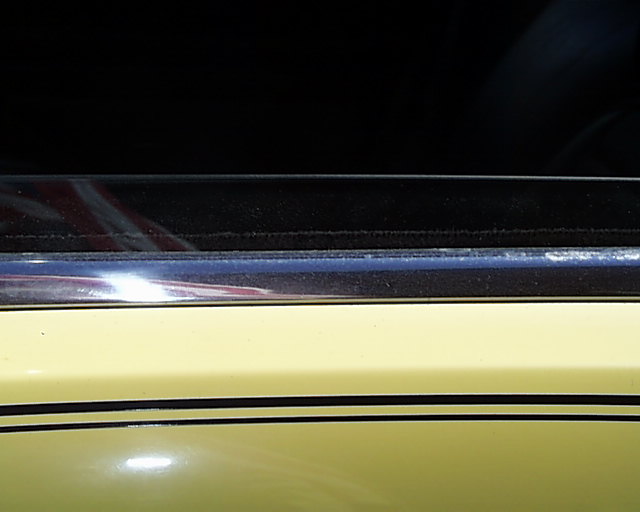
#1
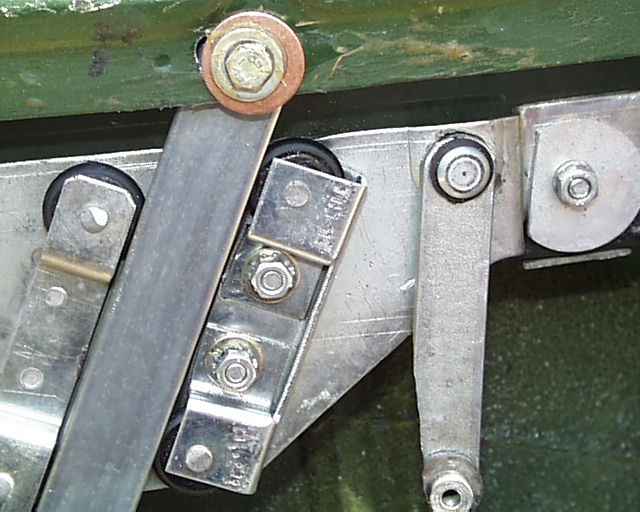
In order that the window go fully down, some or all of the modification shown in Figure 2 will be required.

#2
Modification #1 slots the holes in the movable roller bracket. This bracket can then be adjusted so the window mechanism moves freely on the guide rail and both the roller bracket and window lift bracket are easily removed for the many trial fittings which will follow.
Modification #2 is to lower, as much as possible, and widen the window mounting bolt holes in the window lift bracket by filing or grinding. This enables the static position of the window glass to be lowered in the window lift bracket and enables the window to be positioned in the bracket to minimize binding during movement. A larger washer will be required under the window mounting bolt after this modification. The large washer must be trimmed to fit as shown in Figure 2. This modification will lower the glass into the door approximately one inch.
As the window glass will now mount lower in the door frame, the window will not fully top out in the upper window track when the window is closed. Modification #3 removes approximately 1/8 inch from the entire top edge of the window lift bracket. This enables the top edge of lift bracket to go higher in the door frame when the window is being closed.
Modification #4 removes material from the edge of the window lift bracket lift arm. Details of this modification are shown (for the passenger side mechanism) in Figure 3. This enables the lift bracket arm to move further toward the roller bracket when the window is fully down.
#3
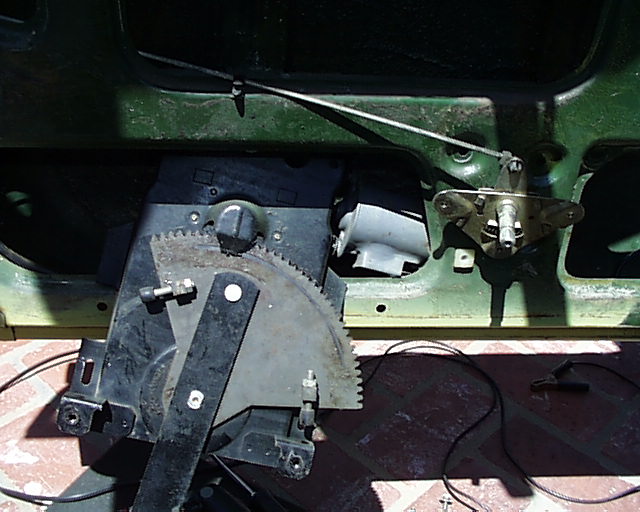
Modification #5 removes material from the lift arm pivot mounting area. This enables the lift arm to rotate farther before hitting the guide rail. The amount of material removed is such that the lift arm pivot must be secured to the lift arm by drilling, tapping and inserting a screw. Details of this modification are shown in Figure 4.
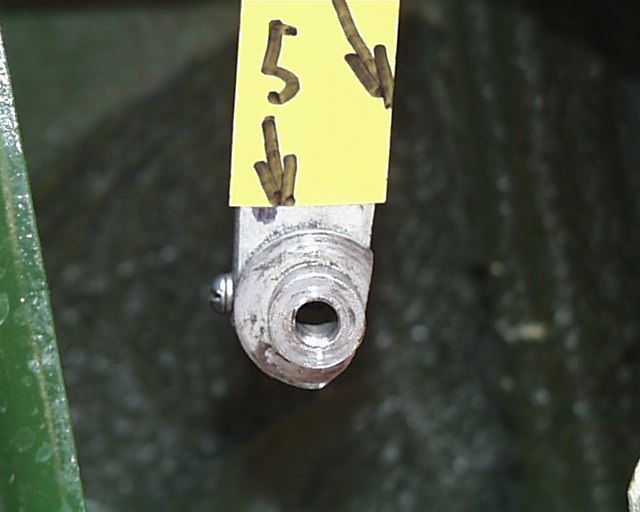
#4
Modification #6 grinds two slots in the window motor lift arm so the arm will clear the lift motor mounting bracket when the window is fully down. Details of this modification are shown in Figure 5.
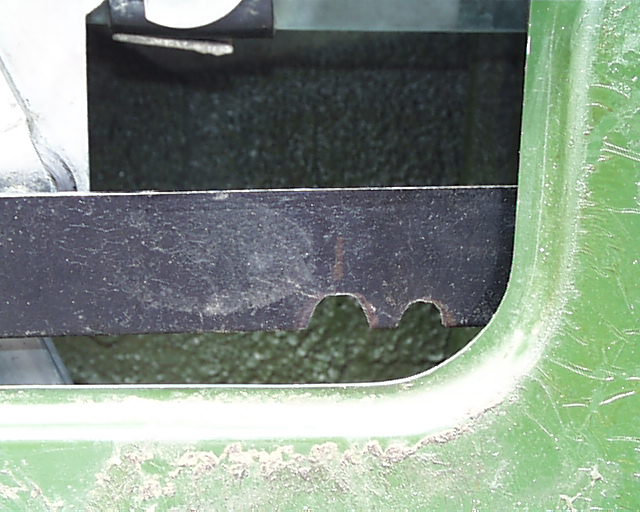
#5
When you have the window lift mechanism out of the door, remove the two position limit stops shown in Figure 6. Limit stops are not required.
#6
Modification #7 grinds the bottom edge of the window motor lift arm so the arm does not hit the door frame when the window is fully down. Details of this modification are shown in Figure 7.
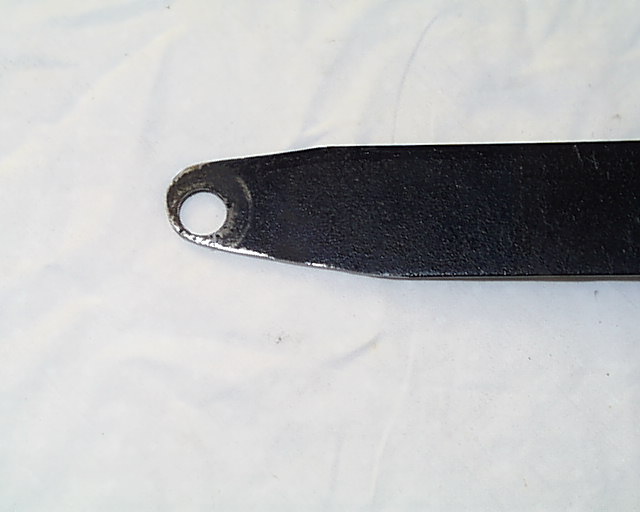
#7
Modification #8 grinds material from the left hand side (in this view) of the adjustable roller bracket so the bracket does not interfere with the motor lift arm when the window is fully down.
Modification #9 grinds material from the top front edge (in this view) of the adjustable roller bracket so the bracket does not interfere with the door frame when the window is fully closed.
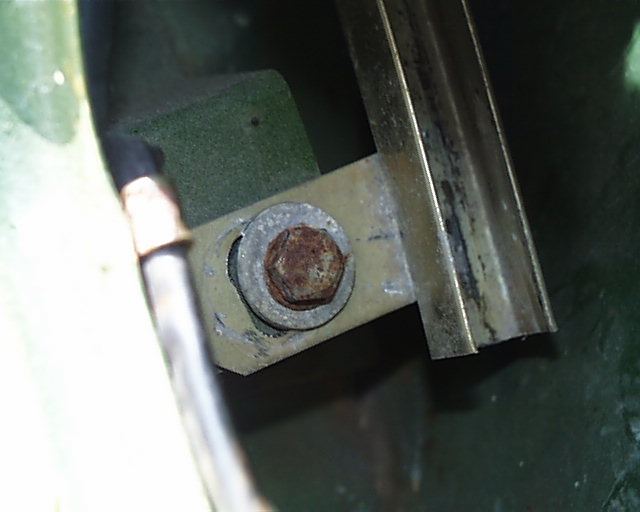
The position of the bottom of the window guide rail is set by a bolt thru the bottom of the door. To provide room between the window guide rail and the door skin when the window to fully down, the position of this bolt must be moved toward the centerline of the car. This is done by removing the existing bolt, elongated the existing hole, forming the bottom edge door recess for the new position of the bolt head, and grinding the bolt head to ½ normal thickness. This allows the bottom of the guide rail to be positioned inboard as required and prevents the bolt head from hitting the bottom of door jam when the door is closed. This modification is shown in Figure 8.

#8
The position of the aft window channel must be moved toward the centerline of the car so the window does not bind in the channel as it is lowered. To provide for this adjustment, remove the existing mounting bolt, elongate the hole in the channel mounting bracket so the channel can be repositioned inboard, and reinstall the bolt. This modification is shown in Figure 9.
#9
The various modifications may seem complex and extensive but they are basically a matter of repeated grinding, fitting, and testing. Not all the modifications may be required on your car. The amount of material which must be removed in the various modifications will likely vary on different cars. Basic hand tools are all that is needed although a bench grinder and a die grinder or simply a drill motor with several abrasive wheels will do the modifications in short order. I would schedule one day to do each door depending on the tools available.
A fully down window is shown Figure 10.
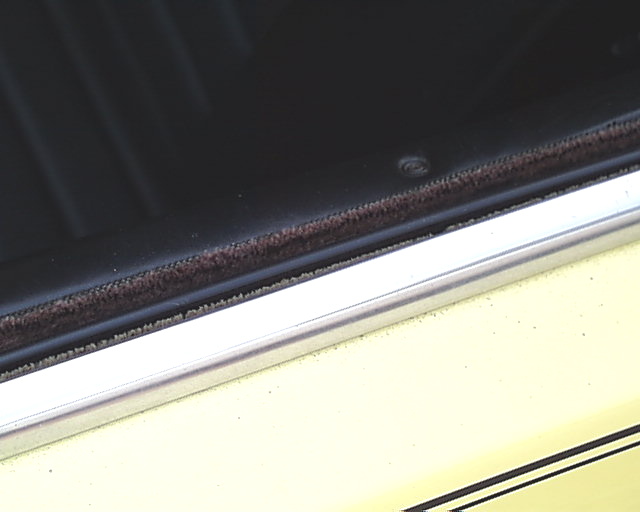
#10