The Pantera Place
"Your de Tomaso
Connection"
The Pantera Suspension and Brake System
The suspension of the Pantera consists of unequal length upper and lower A arms with coil-over shocks. The suspension is supported by a monocoque body design with a wheelhouse brace for the rear suspension. Hefty sway bars are part of the front and back suspension. Stopping power comes from four-wheel-power-assisted disk brakes with non-vented rotors. The steering is manual rack and pinion.
All of the Pantera design elements sound like the standard of today’s high performance cars, but in 1971 it was very advanced.
Front left and right upper and lower A arms
The front A arms have ball joints in the upper and lower A arm that are attached with bolts and nuts. The upper ball joint is adjustable in and out for the camber setting through slotted retaining holes in the A arms for the bolts.
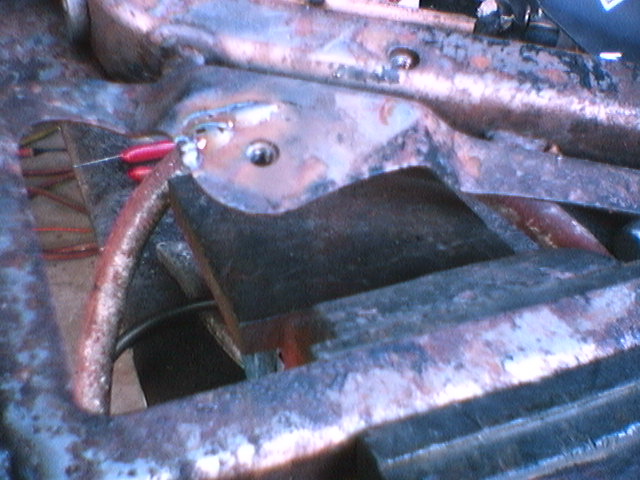
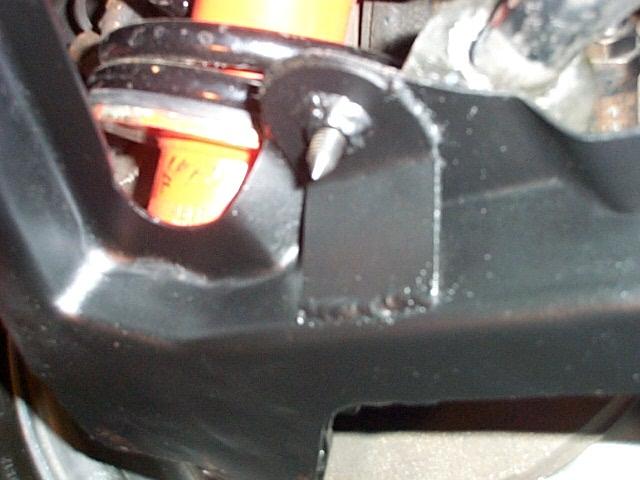
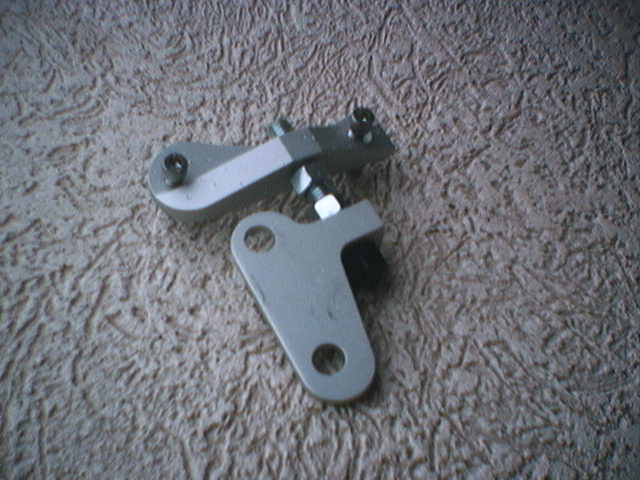
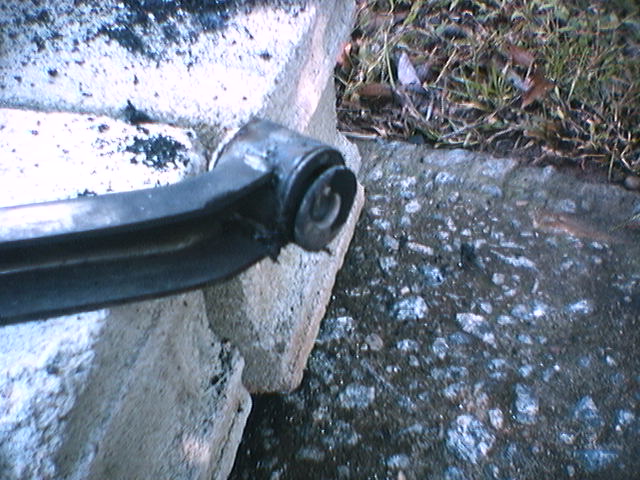
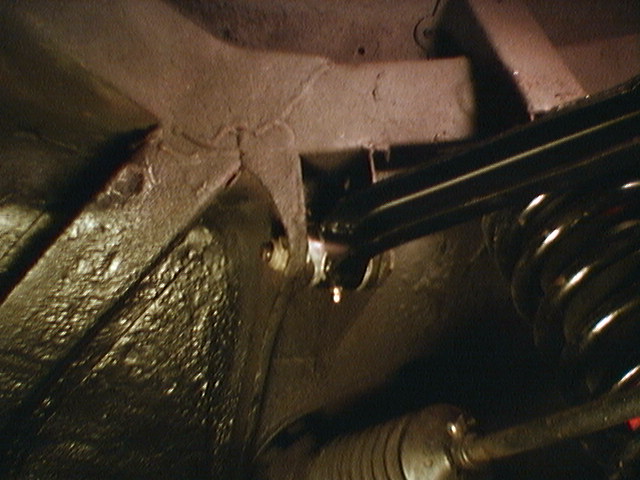
The image on the left shows how the early Pantera lower front A arm can crack where the sway bar bolts on to the inside edge of the A arm. This does not cause a structural problem with the A arm only a problem with the sway bar mounting to the A arm. The odd looking finish on the A arm is caused by the first cleaning phase where oven cleaner is used as the first clean-up step. The image on the right is a view of the sway bar mount brace added to my suspension. The view is from the bottom of the car looking up under the lower A arm and the bottom of the back sway bar nut and bolt. On later cars the factory added this small brace on the bottom of the sway bar mount that wraps around the mount nut and extends up to the side of the A arm forming a triangle. The brace has a hole that lets it slide over the sides of the nut and and fit flush on the bottom side of the A arm. The brace is welded at the nut area, the sides of the brace and on the other end to the edge of the A arm. For my car a pattern was made from a brace on a 74 Pantera.
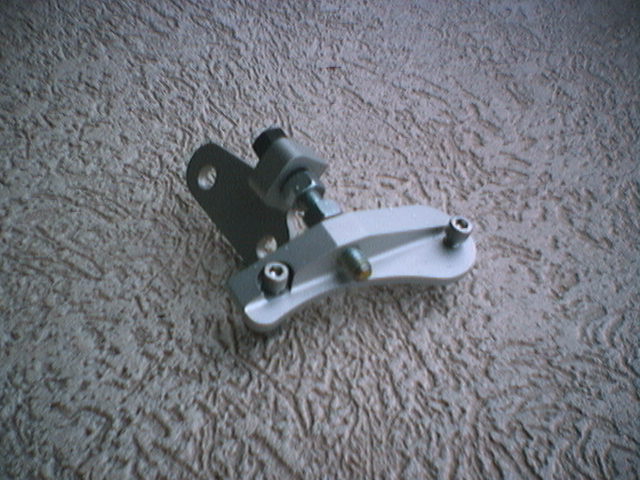
Front upper ball joint camber locks
To keep the upper ball joint from moving over time, adjustable camber locks are available from Pantera Performance that connect to the ball joint bolts and attach to the frame of the A arm.
Camber lock system designed by Jerry Pentaleri of Greenville, South Carolina. The drawing was scanned full size to present the fine detail and is not at the original scale. Dimensions are shown.
Front spindle lock nut adjustment screw designed by Jerry Pentaleri of Greenville South, Carolina. The drawing was scanned full size to present the fine detail and is not at the original scale. Dimensions are shown.
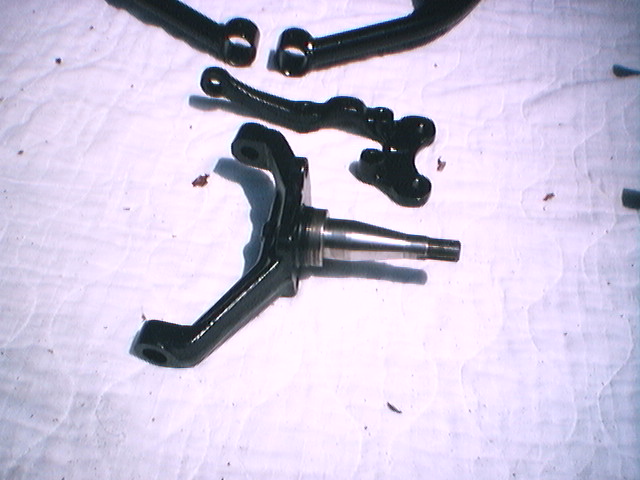
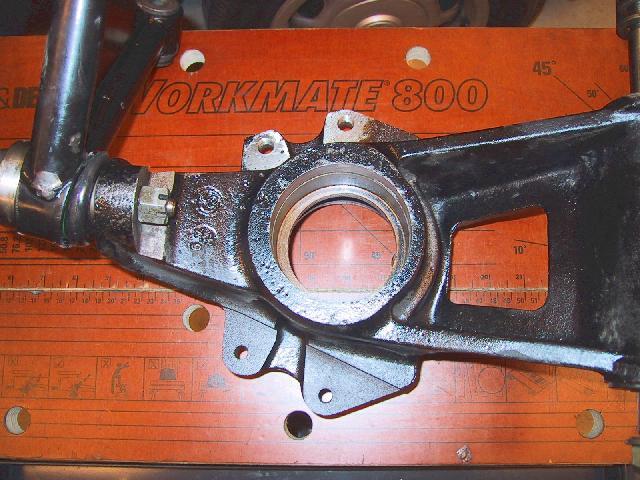
The front spindle
The front spindle has an upper and lower mounting hole for
the ball joints. The steering control arm bolts on with the caliper.
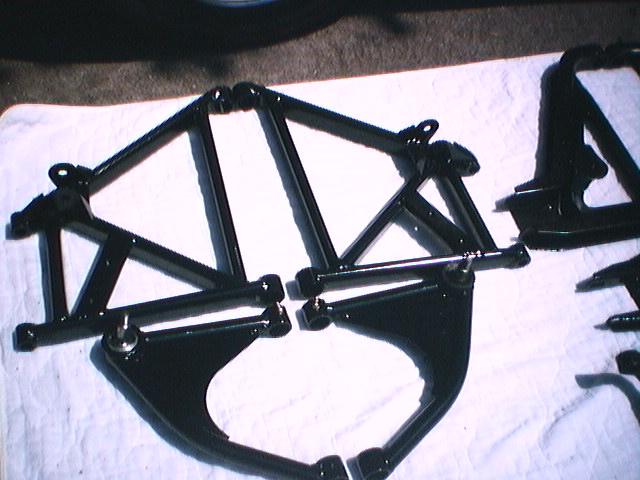
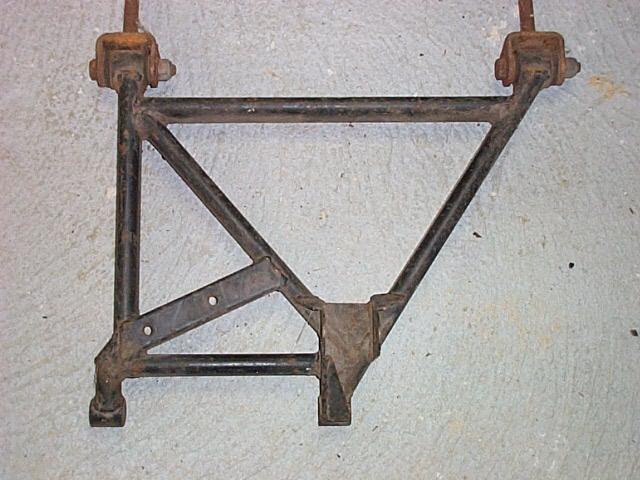
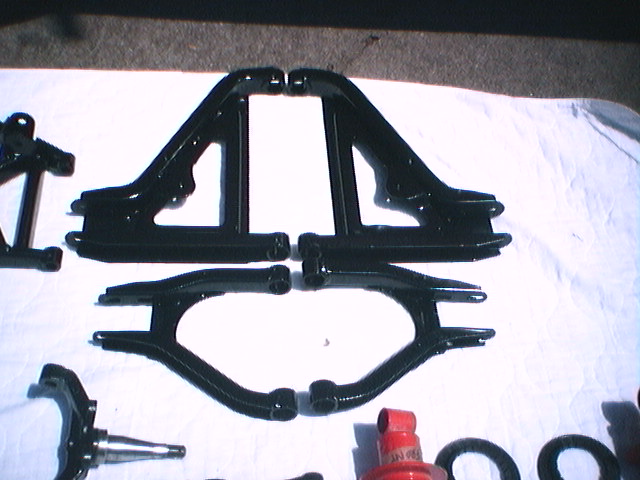
Image on the left is the back left and right upper and lower A arms.
Image on the right is the lower back A arm from a very early Pantera that has
a dog-leg in the back part of the arm. A spacer was used to position the
upright.
The upper A arm has a ball joint (the small A arm) that attaches to the top end of the upright. The upright is the part that is attached between the upper and lower A arm and holds the stub axle.
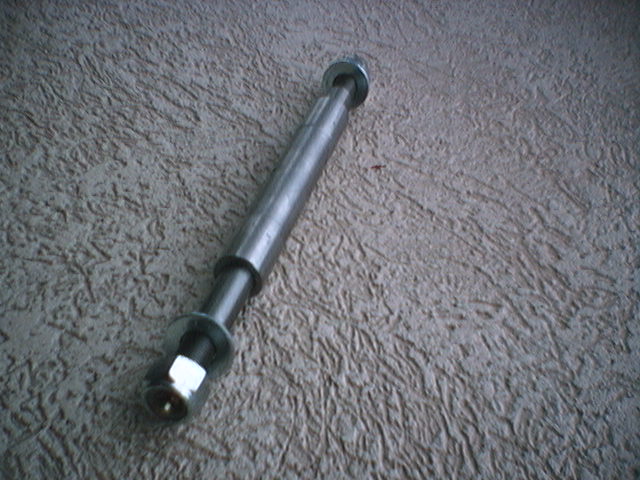
The lower A arm shaft
The lower A arm is attached to the lower part of the upright with the lower A arm shaft. Greaseable lower A arm shafts are available from Pantera Performance.
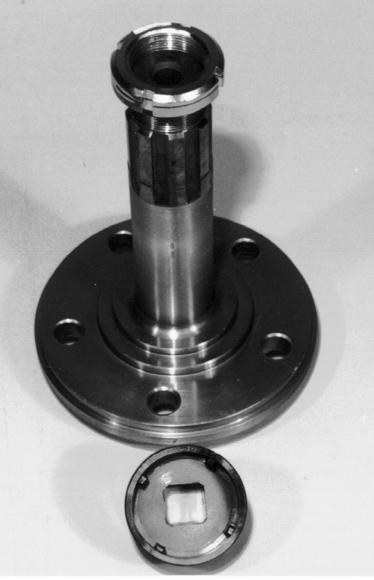
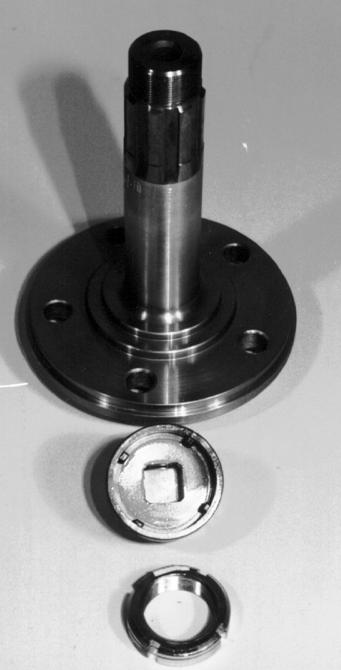
Mike Drew provided these images of a Pantera axle, axle nut and the socket tool at the bottom of the image. On the right a image of the axle with the nut removed. The axles and nuts come in both left and right thread. The nuts are a split design and are only safe to torque down ONCE. They are a throw-away item. Lots of people re-use them—probably not a good idea!
Thomas Tornblom sent in the following images of the back suspension parts to his 1984 GT5.
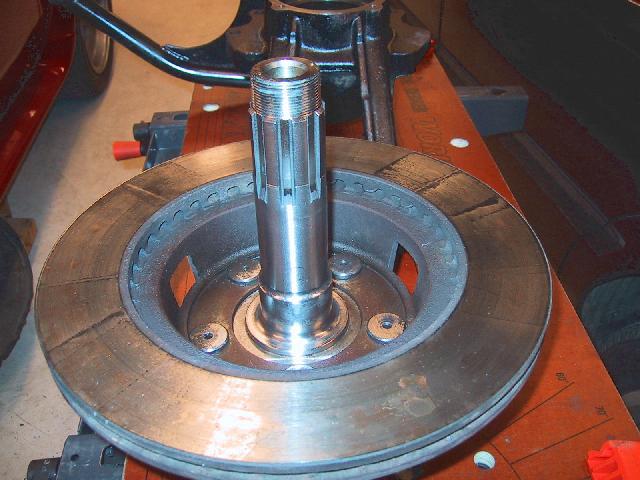
This shows the stepped axle together with the vented rear brake disc.
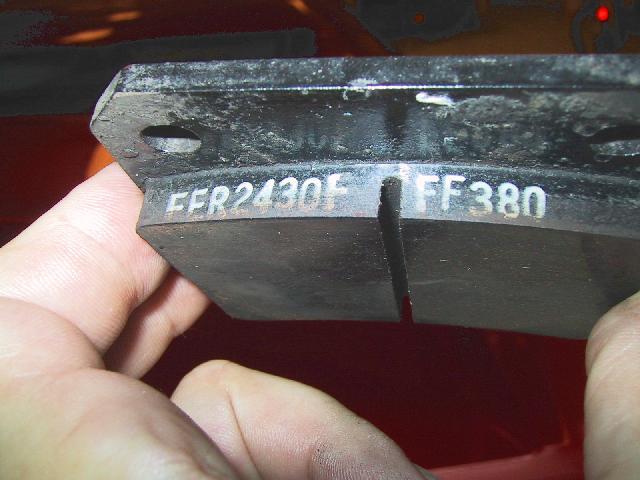
This image shows the markings on the rear brake-pad. Apparently the brand is "Ferodo"
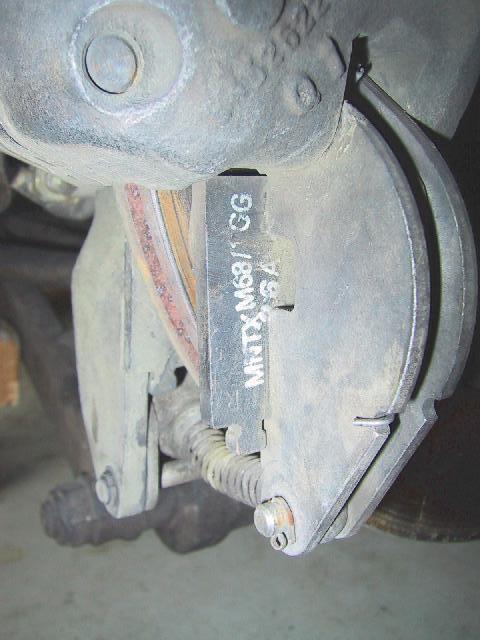
This image shows the markings on the separate handbrake pads. Rumor has it that the handbrake mechanism is adapted from a Rolls Royce.
This image shows the rear right upright seen from the inside. The inner bearing is a roller bearing with a loose inner ring and it will not take any axial load whatsoever. Therefore the outer part of the bearing must be held in place firmly against the flange seen in the center with a snapring, and the groove for that is also seen.
The inner bearing is an SKF "NU2208" and measures 40x80x23mm
The cavity between the outer and the inner bearing is filled with grease to lubricate the inner bearing.
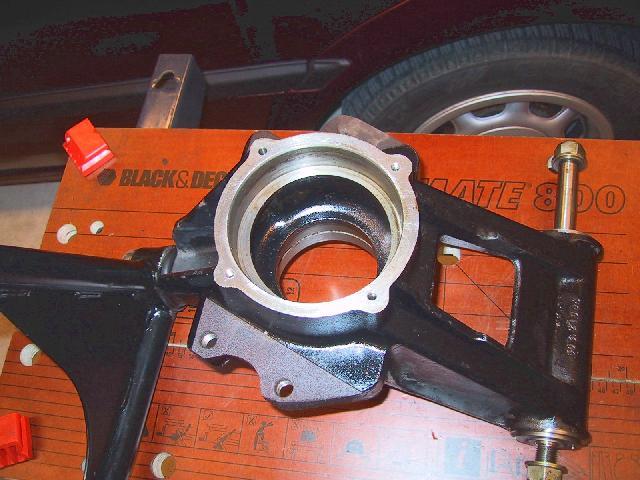
This image shows the outside of the upright and the outer bearing is held in place with a retainer similar to the early cars.
The outer bearing is a conventional sealed ball bearing, but it is larger than for early cars. The type is 6309-2RS1, and the dimensions are 45x100x25mm.
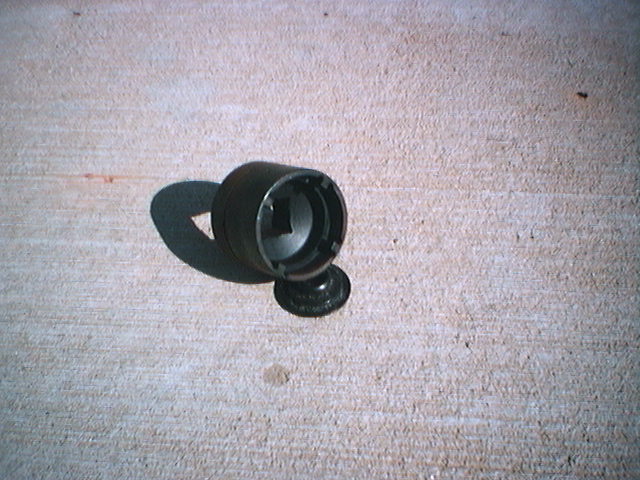
The socket tool used to remove the back stub axle nut
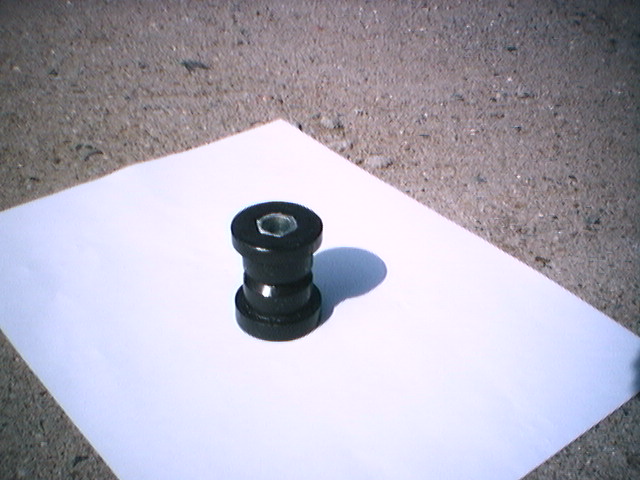
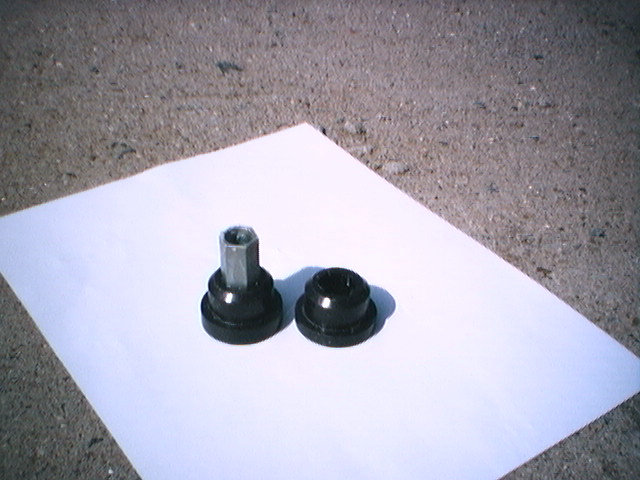
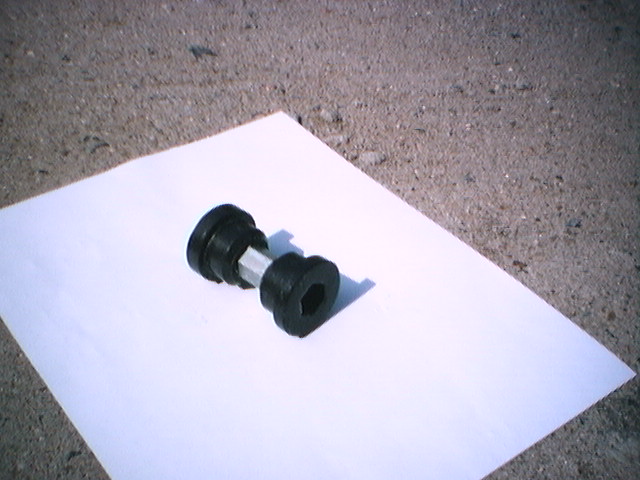
Graphite polyurethane A arm bushings
Graphite polyurethane A arm bushings are available to replace the stock rubber Pantera A arm bushings. The inter-sleeve is shaped to lock the bushing from moving in the body mount, so that the A arm moves around the outside of the bushing.
The stock rubber bushings have a metal inter and outer-sleeve and are very difficult to remove from the A arm. About the only way to get the old bushing out is to cut off one end of the inter-sleeve and pull the inter-sleeve out. Remove the rubber bushing. Then the outer-sleeve can be very, very carefully cut lengthwise with a hacksaw (DO NOT cut into the A arm material) to remove the sleeve. Graphite polyurethane A arm bushings do not use an outer-sleeve. Most people drill and tap the A arm bushing area for grease fittings.
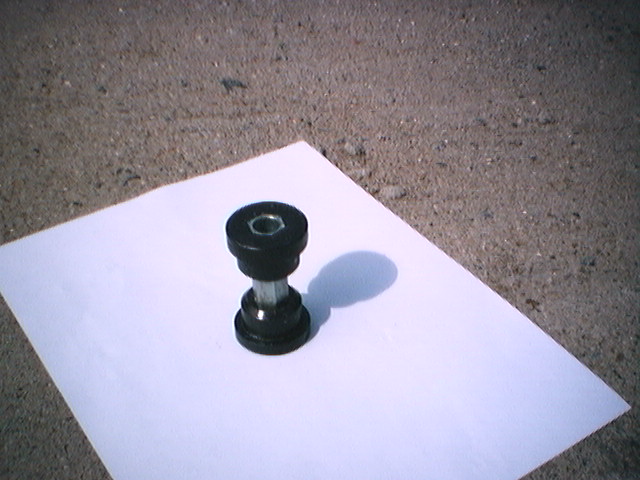
A stock A arm bushing that has had the rubber removed by burning. The inter-sleeve is ready to be cut off and removed.
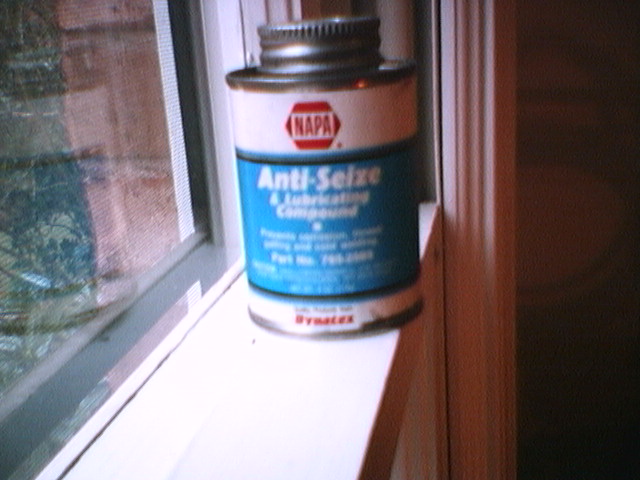

On the left is the NAPA auto parts anti-seize used to to assemble the bushings into the A arms. Center is a view of the upper left front A arm showing the bushing and grease fitting installed. As anti-seize was used grease will not be added for at least a year or more. On the right is the view of the lower left front A arm installed.
The thin side of the new bushing should be on the inside of the A arms and the thick side to the outside. Depending on the car you may find that the upper front A arm will not fit into the body mounts with the thick side of both the bushings to the outside. My car had this problem so I installed the bushing with thin side out on the back mount of the upper front A arm. The idea was to go for more caster rather than less! See Fred Terry's bushing remove tool.
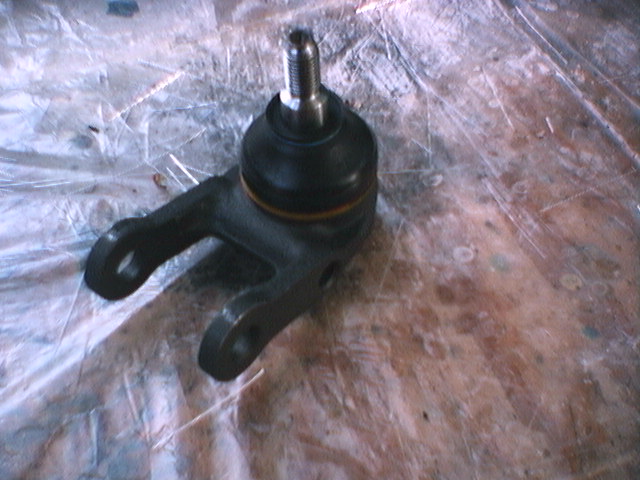
The pricey $270 ea. Pantera lower front ball joint
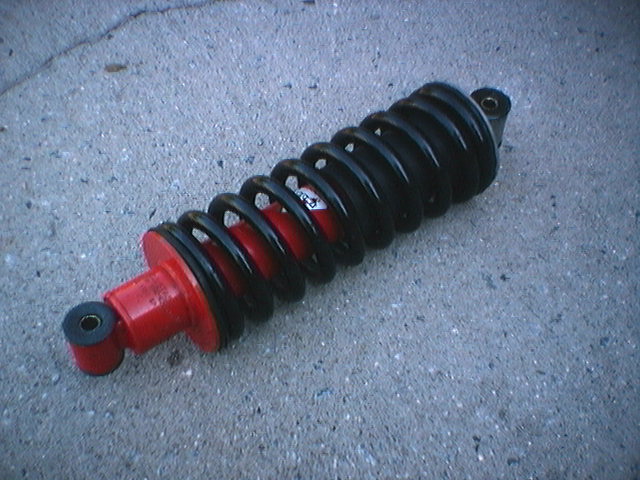
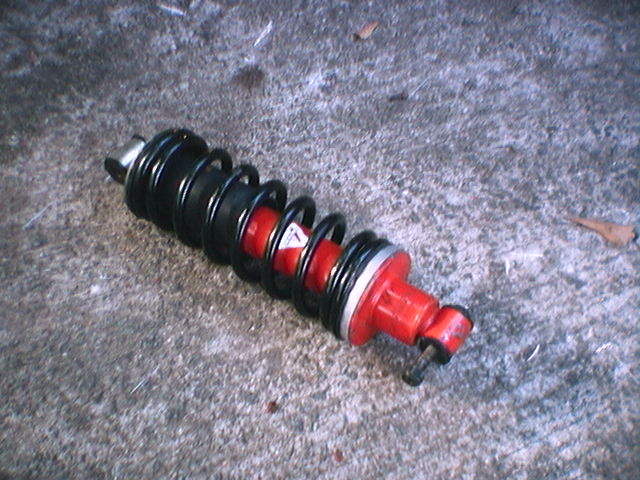
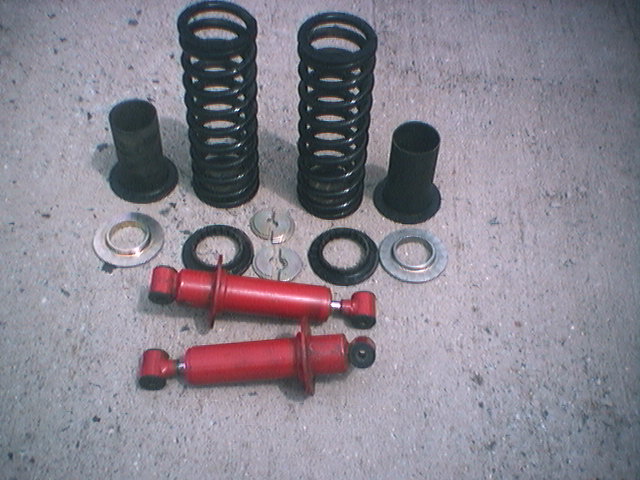
Back Koni shock and coil over on the left and the front Koni in the center. On the right a Koni back shock assembly disassembled. The split washers slip into the ring and the top of the shock strut to hold the assembly to together under spring compression. The front Koni shown has the stock spacer installed. The Koni shocks have a dampening adjustment that is adjusted by removing the shock from the spring assembly, taking the rubber bumper off the shock and then collapsing the shock so the valve adjustment in engaged. The shock shaft is then turned clockwise to make the ride firmer and counter clockwise for a softer ride.
![]()
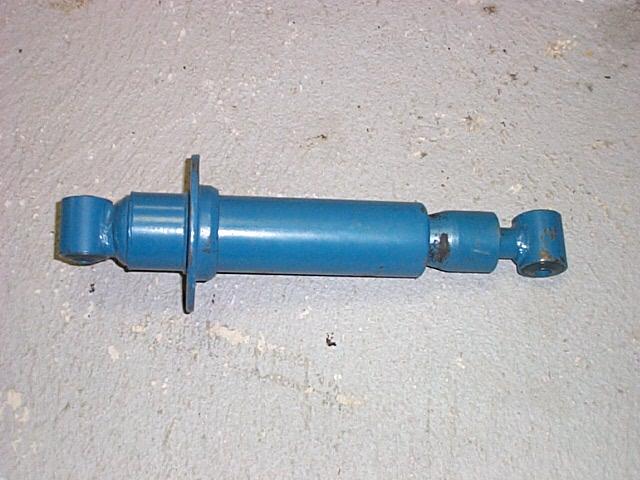
On the left is the stock Aristron shock used on the early cars. This shock has a dampening adjustment like the Koni shock. On the right is the Telecar shock used on the later cars. The Telecar is not adjustable.
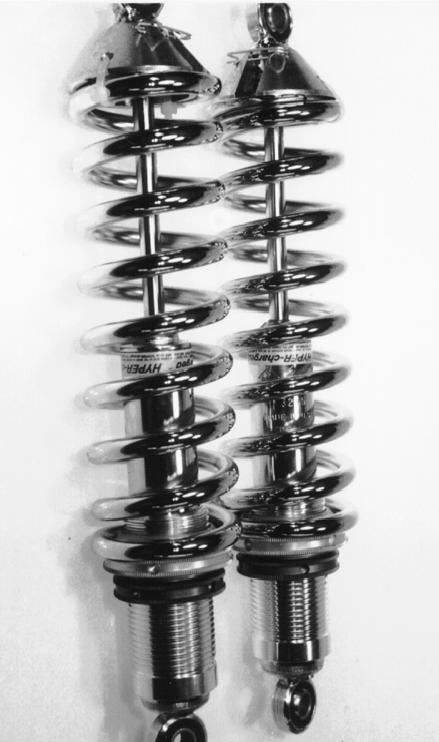
Mike Drew provided this image of the Carrera adjustable shocks from Wilkinson. The only adjustment available is ride-height. They don’t use rubber or poly bushings; they use heim-joints (rod ends). Mike was told that this can transmit more road noise and vibration to the car than a stock setup. If true he has never noticed it.
Mike Drew provided this image of machined aluminum sway bar mounts. These come from PPC in Colorado, and have the "de Tomaso" logo CNC machined into them. Cosmetic in most places, but the center stock mounts can break on the front bar, so these should be replaced if somebody drives the car hard.
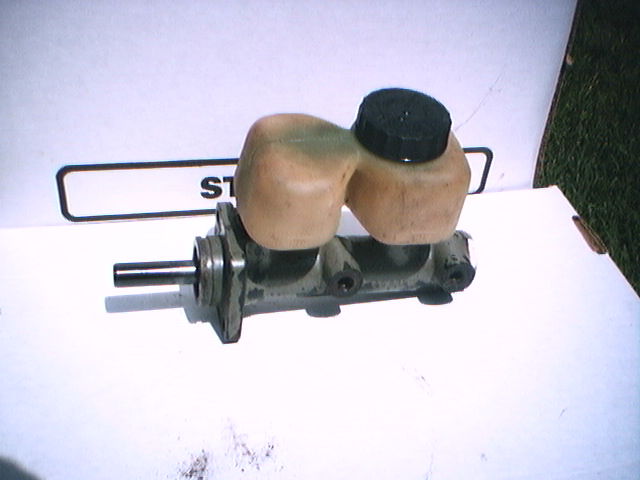
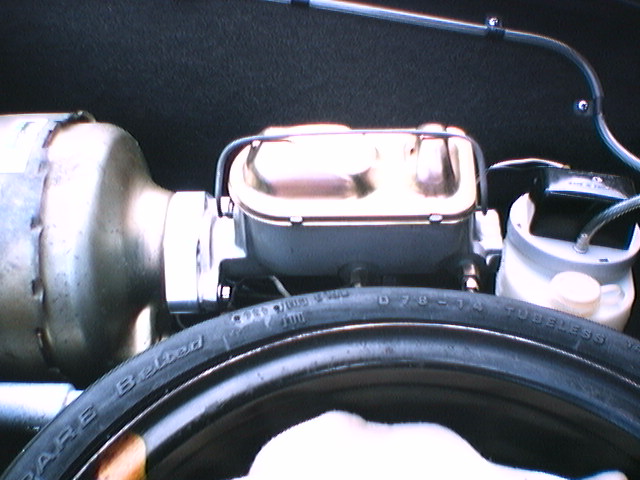
On the left, the stock Pantera brake master cylinder. On the right, the Pantera Performance Center upgraded master cylinder. Note the small PPC spacer between the brake booster and the master cylinder. The Pantera Performance Center brake master cylinder is a good and inexpensive way to upgrade the Pantera brake system.
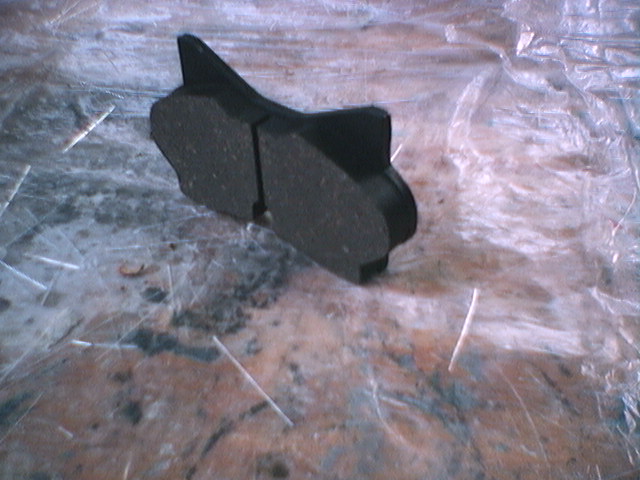
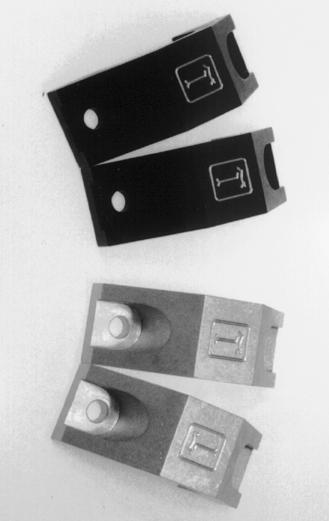
Stock Pantera front brake pad

Stock Pantera back brake pad
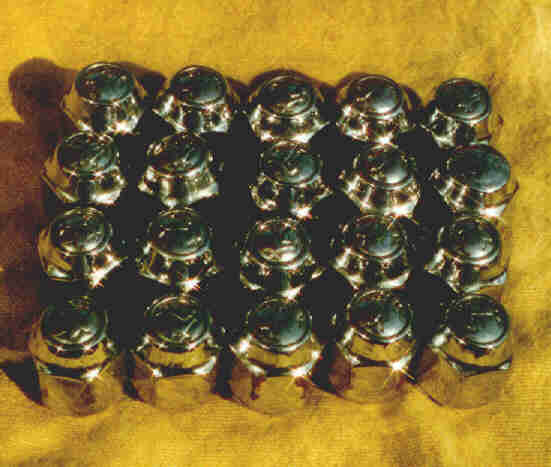
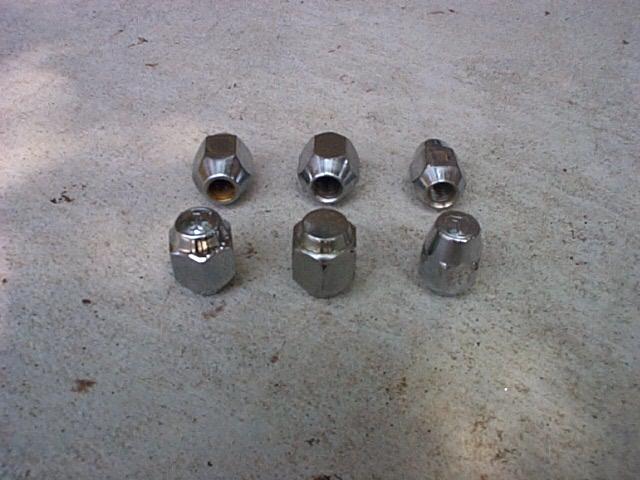
On the left, Mark Drastal sent in this image of his original de Tomaso lug nuts used on the early Pantera wheels. The lug nuts have the "Isis" logo. If you can find new and original lug nuts they may cost $35 each. On the right, the three different types of lug nuts that you might find on your Pantera. From the left to the right, the original lug nut with "isis" logo, later model lug nuts without logo and the reproduction nuts without the "isis" logo.